Join the DZone community and get the full member experience.
Join For Free
Welcome to the final step in creating your Collectibles portal! (for part 1, see here).
In this part, we'll focus on building the front end — the last piece of the puzzle. Here's what we'll achieve:
- Connect the Flow Wallet.
- Initialize your account and mint your NFT.
- Check the NFT ID in your Collection.
- View the NFT with the NFT ID you have in your Collection.
We will be using Next.js to build the front end.
Let's get started!
1. Installation
Setting Up
Open your project flow-collectible-portal directory. Then, run
npx create-next-app@latest frontend in the terminal and press enter .
This will provide you with several options. In this tutorial, we will not use Typescript, ESLint, or TailwindCSS, and we will use the src directory and the App router at the time of this article.
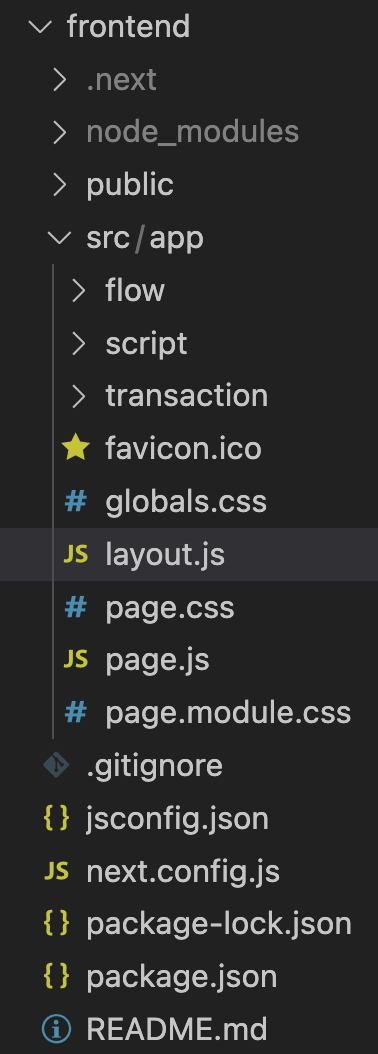
Now you have a fresh web app ready. This is how your frontend folder looks:
![]()
2. Configuration
To interact with the Flow blockchain, we will use the Flow Client Library (FCL) to manage wallet connections, run scripts, and send transactions in our application. It will allow us to write complete Cadence functions and run them as Javascript functions.
To get started, let's install FCL for our app by running the following command:
npm install @onflow/fcl --save
After installing FCL, we need to configure it. Here's what you need to do:
- Inside the
app folder create a new folder named flow and add a file named config.js.
- In this file, set up the configuration for the FCL, such as specifying the Access Node and wallet discovery endpoint. This helps you to choose between using a testnet or a local emulator.
- You will also want to specify the Collectibles contract address we deployed in Part 1.
Add the following code to the config.js file:
import { config } from "@onflow/fcl";

config({
 "app.detail.title": "Flow Name Service",
 "app.detail.icon": "https://placekitten.com/g/200/200",
 "accessNode.api": "https://rest-testnet.onflow.org",
 "discovery.wallet": "https://fcl-discovery.onflow.org/testnet/authn",
 "0xCollectibles": "ADD YOUR CONTRACT ACCOUNT ADDRESS",
 "0xNonFungibleToken": "0x631e88ae7f1d7c20",
});
Now, you're all set up to use the FCL in your app.
3. Authentication
To verify a user's identity in an app, you can use several functions:
- For logging in, call
fcl.logIn().
- For signing up, call
fcl.signUp().
- For logging out, call
fcl.unauthenticate().
Let’s learn how we can implement these fcl functions in your front end.
First, we will add the following code to our page.js file inside the app directory. This will import some dependencies, set up some initial useState for parts of our app, and build a basic UI.
To make sure it looks nice, delete the page.module.css file inside the app directory and instead make a file called page.css. Then, paste the contents of this file inside of it. Now, we can write out our initial page.
) : (
Connect Wallet to mint NFT!!
)}
);
}" data-lang="text/javascript">
"use client";
import React, { useState, useEffect, useRef } from "react";
import * as fcl from "@onflow/fcl";
import "./page.css";
import "./flow/config";

export default function Page() {
  const [currentUser, setCurrentUser] = useState({
    loggedIn: false,
    addr: undefined,
  });

  const urlInputRef = useRef();
  const nameInputRef = useRef();
  const idInputRef = useRef();
  const [isInitialized, setIsInitialized] = useState();
  const [collectiblesList, setCollectiblesList] = useState([]);
  const [loading, setLoading] = useState(false);
  const [ids, setIds] = useState([]);
  const [nft, setNFT] = useState({});

  useEffect(() => fcl.currentUser.subscribe(setCurrentUser), []);

  function handleInputChange(event) {
    const inputValue = event.target.value;

    if (/^\d+$/.test(inputValue)) {
      idInputRef.current = +inputValue;
    } else {
      console.error("Invalid input. Please enter a valid integer.");
    }
  }

  return (
    <div>
      <div className="navbar">
        <h1>Flow Collectibles Portal</h1>
        <span>Address: {currentUser?.addr ?? "NO Address"}</span>
        <button onClick={currentUser.addr ? fcl.unauthenticate : fcl.logIn}>
          {currentUser.addr ? "Log Out" : "Connect Wallet"}
        </button>
      </div>

      {currentUser.loggedIn ? (
        <div className="main">
          <div className="mutate">
            <h1>Mutate Flow Blockchain</h1>
            <form
              onSubmit={(event) => {
                event.preventDefault();
              }}
            >
              <input
                type="text"
                placeholder="enter name of the NFT"
                ref={nameInputRef}
              />
              <input type="text" placeholder="enter a url" ref={urlInputRef} />
              <button type="submit">Mint</button>
            </form>
            <mark>Your Collection will be initialized while minting NFT.</mark>
          </div>
          <div className="query">
            <h1>Query Flow Blockchain</h1>
            <mark>Click below button to check</mark>
            <button>Check Collection</button>
            <p>
              Is your collection initialized: {isInitialized ? "Yes" : "No"}
            </p>
            <button onClick={viewIds}>
              View NFT IDs you hold in your collection
            </button>
            <p>NFT Id: </p>
          </div>
          <div className="view">
            <h1>View Your NFT</h1>
            <input
              type="text"
              placeholder="enter your NFT ID"
              onChange={handleInputChange}
            />
            <button>View NFT</button>
            <div className="nft-card">
              <p>NFT id: </p>
              <p>NFT name: </p>
              <img src="" alt="" />
            </div>
          </div>
        </div>
      ) : (
        <div className="main-2">
          <h1>Connect Wallet to mint NFT!!</h1>
        </div>
      )}
    </div>
  );
}
After adding this code, run npm run dev to make sure everything loads correctly.
4. Querying the Flow Blockchain
Before getting a deep dive into how we can use fcl to query the Flow blockchain, add these Cadence script codes after the handleInput function in the page.js file.
const CHECK_COLLECTION = `
import NonFungibleToken from 0xNonFungibleToken
import Collectibles from 0xCollectibles

pub fun main(address: Address): Bool? {
    		return Collectibles.checkCollection(_addr: address)
}`

const GET_NFT_ID = `
import NonFungibleToken from 0xNonFungibleToken
import Collectibles from 0xCollectibles

pub fun main(user: Address): [UInt64] {
    	let collectionCap =
getAccount(user).capabilities.get
<&{Collectibles.CollectionPublic}>(/public/NFTCollection)
?? panic("This public capability does not exist.")
    	let collectionRef = collectionCap.borrow()!
    	return collectionRef.getIDs()
}
`

const GET_NFT = `
import NonFungibleToken from 0xNonFungibleToken
import Collectibles from 0xCollectibles

pub fun main(user: Address, id: UInt64): &NonFungibleToken.NFT? {
  		let collectionCap=
getAccount(user).capabilities.get<&{Collectibles.CollectionPublic}>(/public/NFTCollection) ?? panic("This public capability does not exist.")

  	let collectionRef = collectionCap.borrow()!
return collectionRef.borrowNFT(id: id)
}
With our Cadence scripts ready to go, we can now declare some JavaScript functions and pass in the Cadence constants into the `fcl` queries.
async function checkCollectionInit() {
    const isInit = await fcl.query({
        cadence: CHECK_COLLECTION,
        args: (arg,t) => [arg(currentUser?.addr, t.Address)],
    });
    console.log(isInit);
}

async function viewNFT() {
    console.log(idInputRef.current);
    const nfts = await fcl.query({
        	cadence: GET_NFT,
        	args: (arg,t) => [arg(currentUser?.addr,t.Address),
arg(idInputRef.current, t.UInt64)]
    });
    setNFT(nfts);
    console.log(nfts);
}

async function viewIds() {
    const ids = await fcl.query({
        cadence: GET_NFT_ID,
        args: (arg,t) => [arg(currentUser?.addr,t.Address)]
    });
    setIds(ids);
    console.log(ids);
}
Now, let’s take a look at all the functions we’ve written. There are two things to notice:
- The
fcl.query
- And the
args: (arg,t) => [arg(addr,t.Address)], line.
Since scripts are similar to view functions in Solidity and don't require any gas fees to run, we are essentially just querying the blockchain. So, we use fcl.query to run scripts on Flow.
In order to query something, we need to pass an argument. For that, we use arg, which is a function that takes a string value representing the argument and t, which is an object that contains all the different data types that Cadence has. So we can tell arg how to encode and decode the argument we are passing.
5. Mutating the Flow Blockchain
While our previous functions were just “read-only,” our next ones will have actions that can mutate the blockchain state and write to it, a.k.a. “mint an NFT.”
To do this, we’ll write another Cadence script as a constant.
const MINT_NFT = `
import NonFungibleToken from 0xNonFungibleToken
import Collectibles from 0xCollectibles

transaction(name:String, image:String){
    let receiverCollectionRef: &{NonFungibleToken.CollectionPublic}
    prepare(signer:AuthAccount){
        // initialise account
        if signer.borrow<&Collectibles.Collection>(from: Collectibles.CollectionStoragePath) == nil {
            let collection <- Collectibles.createEmptyCollection()
            signer.save(<-collection, to: Collectibles.CollectionStoragePath)
            let cap = signer.capabilities.storage.issue<&{Collectibles.CollectionPublic}>(Collectibles.CollectionStoragePath)
            signer.capabilities.publish( cap, at: Collectibles.CollectionPublicPath)
        }
        //takes the receiver collection refrence
        self.receiverCollectionRef = signer.borrow<&Collectibles.Collection>(from: Collectibles.CollectionStoragePath)
      ?? panic("could not borrow Collection reference")
    }
    execute{
        let nft <- Collectibles.mintNFT(name:name, image:image)
        self.receiverCollectionRef.deposit(token: <-nft)
    }
}
Now add the below function after the transaction code to the page.js file.
async function mint() {
	try{
	  const txnId = await fcl.mutate({
        	cadence: MINT_NFT,
        	args: (arg,t) => [arg(name,t.String), arg(image, t.String)],
	   	payer: fcl.authz,
	  	proposer: fcl.authz,
	  	authorizations: [fcl.authz],
	  	limit:999,});
	} catch(error){
	console.error('Minting failed:' error)
}
    console.log(txnId);
}
As for the function, the fcl.mutate syntax is the same as fcl.query. However, we do provide several extra parameters, such as the following:
payer: fcl.authz,
proposer: fcl.authz,
authorizations: [fcl.authz],
limit: 50,
- These are Flow-specific things that define which account will be paying for the transaction (payer), broadcasting the transaction (proposer), and the accounts from which we need authorizations. (In case an account has multiple keys attached, it can behave like a multi-sig wallet.)
fcl.authz refers to the currently connected account. limit is like gasLimit in the Ethereum world, which places an upper limit on the maximum amount of computation. If the computation crosses the limit, then the transaction will fail.
We’ll need to add one more function that will call and handle the mintNFT function we just made.
  const saveCollectible = async () => {
    if (urlInputRef.current.value.length > 0 && nameInputRef.current.value.length > 0) {
      try {
        setLoading(true);
        const transaction = await mintNFT(nameInputRef.current.value, urlInputRef.current.value);
        console.log('transactionID:', transaction);
        // Handle minting success (if needed)
      } catch (error) {
        console.error('Minting failed:', error);
        // Handle minting failure (if needed)
      } finally {
        setLoading(false);
      }
    } else {
      console.log('Empty input. Try again.');
    }
  };
6. Final Code
With our main functions in place, we can now plug them into our UI.
However, before we do that, we’ll add some useEffect calls to help load the initial state. You can add these right above the already existing useEffect call.
  useEffect(() => {
    checkCollectionInit();
    viewNFT();
  }, [currentUser]);

  useEffect(() => {
    if (currentUser.loggedIn) {
      setCollectiblesList(collectiblesList);
      console.log('Setting collectibles...');
    }
  }, [currentUser]);
Now, back in our return section with the UI, we can add our functions to the appropriate parts of the app.
  return (
    <div>
      <div className="navbar">
        <h1>Flow Collectibles Portal</h1>
        <span>Address: {currentUser?.addr ?? "NO Address"}</span>
        <button onClick={currentUser.addr ? fcl.unauthenticate : fcl.logIn}>
          {currentUser.addr ? "Log Out" : "Connect Wallet"}
        </button>
      </div>

      {currentUser.loggedIn ? (
        <div className="main">
          <div className="mutate">
            <h1>Mutate Flow Blockchain</h1>
            <form
              onSubmit={(event) => {
                event.preventDefault();
                saveCollectible();
              }}
            >
              <input
                type="text"
                placeholder="enter name of the NFT"
                ref={nameInputRef}
              />
              <input type="text" placeholder="enter a url" ref={urlInputRef} />
              <button type="submit">Mint</button>
            </form>
            <mark>Your Collection will be initialized while minting NFT.</mark>
          </div>
          <div className="query">
            <h1>Query Flow Blockchain</h1>
            <mark>Click below button to check</mark>
            <button onClick={checkCollectionInit}>Check Collection</button>
            <p>
              Is your collection initialized: {isInitialized ? "Yes" : "No"}
            </p>
            <button onClick={viewIds}>
              View NFT IDs you hold in your collection
            </button>
            <p>NFT Id: </p>
            {ids.map((id) => (
              <p key={id}>{id}</p>
            ))}
          </div>
          <div className="view">
            <h1>View Your NFT</h1>
            <input
              type="text"
              placeholder="enter your NFT ID"
              onChange={handleInputChange}
            />
            <button onClick={viewNFT}>View NFT</button>
            <div className="nft-card">
              <p>NFT id: {nft.id}</p>
              <p>NFT name: {nft.name}</p>
              <img src={nft.image} alt={nft.name} />
            </div>
          </div>
        </div>
      ) : (
        <div className="main-2">
          <h1>Connect Wallet to mint NFT!!</h1>
        </div>
      )}
    </div>
  );
Check the final code here.
Now that the app is complete, let’s walk through how to use it!
First, connect your wallet by clicking the “Connect Wallet” button in the top right.
![connect wallet]() Now, you can mint an NFT! Enter the name of your NFT and paste in a link to the image you want to use. After you click “mint,” it will prompt you to sign a transaction with your wallet.
Now, you can mint an NFT! Enter the name of your NFT and paste in a link to the image you want to use. After you click “mint,” it will prompt you to sign a transaction with your wallet.
![flow collectibles portal]()
It might take a little while for the transaction to complete. After it completes, you should be able to click the bottom button to view the IDs of your NFTs. If this is your first one, then the ID should be just “1”.
![view NFT]()
Now, you can copy the ID of your NFT, paste it into the View section, and click “View NFT.”
![your NFT]()
Conclusion
Well done! You've finished part 2 of the Collectibles portal project. In summary, we focused on building the front end of our Collectibles portal. We did this by:
- Creating an app with Next.js
- Connecting the Flow Wallet
- Creating our very own NFTs for minting
- Viewing your NFT
Have a really great day!
 Now, you can mint an NFT! Enter the name of your NFT and paste in a link to the image you want to use. After you click “mint,” it will prompt you to sign a transaction with your wallet.


Comments