In this tutorial, we'll demonstrate how to build a serverless Java application by creating the leaderboard app shown below:
Figure 1
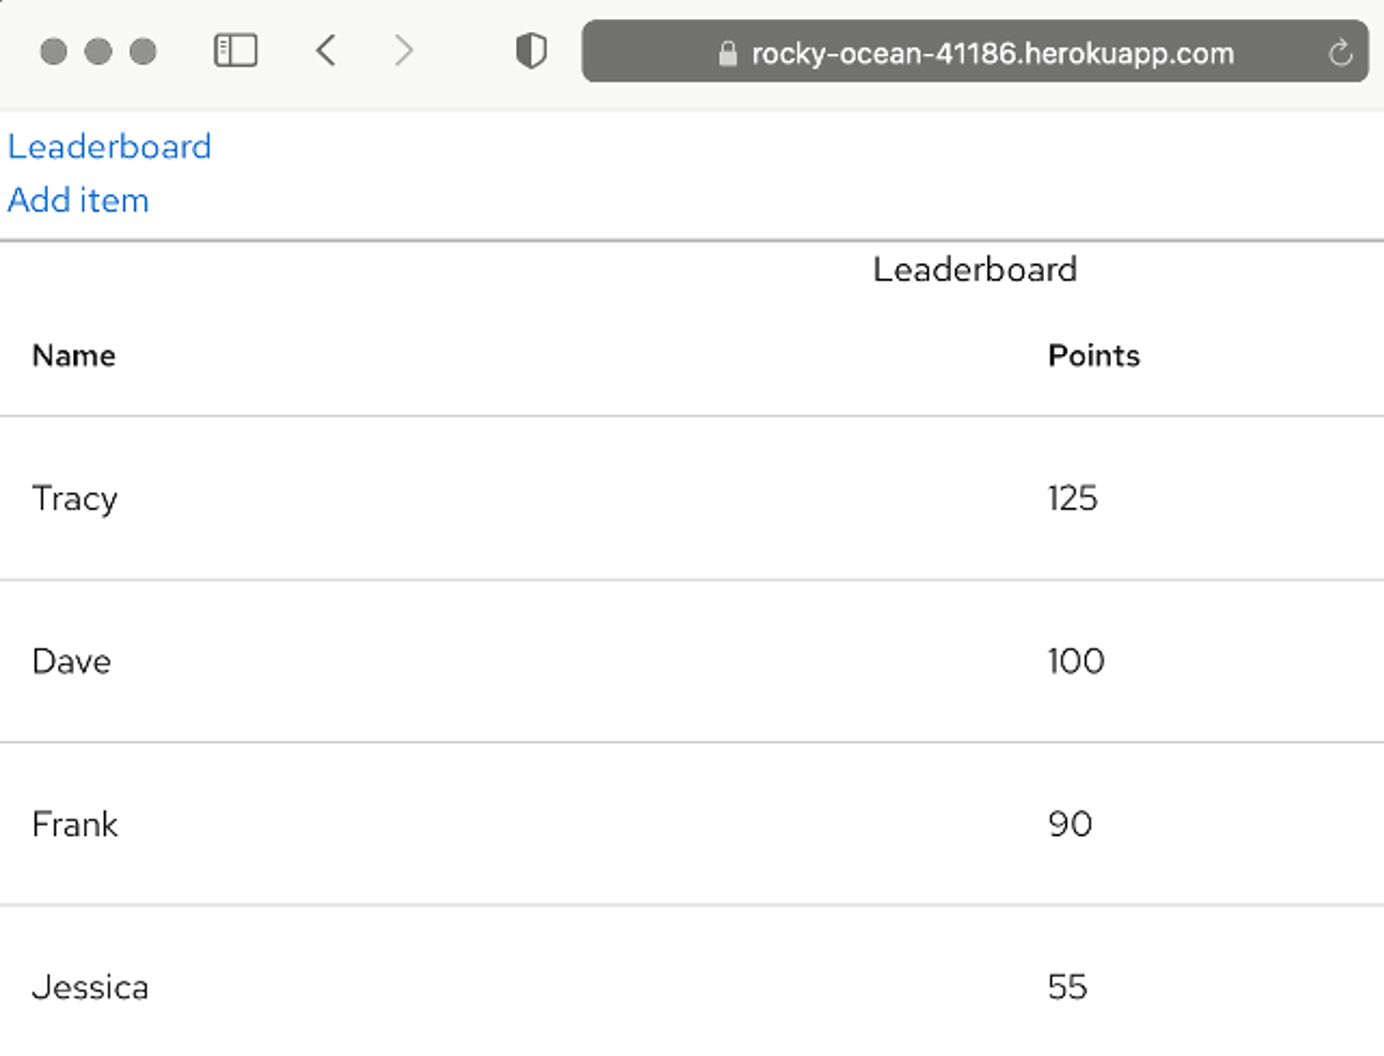
We'll first build the app's back end using Quarkus to enable CRUD operations on CockroachDB Serverless, which we will then use to store leaderboard items displayed on the front end. We'll build the front end using Node.js and React, enabling users to display and add new leaderboard items. Then, we will deploy the entire solution to Heroku to make it globally available.
You can follow along using the companion repository on GitHub. Examples were created in Visual Studio Code on macOS, but we've included instructions for other operating systems where necessary.
Note: We're assuming you have at least an intermediate level of Java programming skills and are familiar with Quarkus. If you're unfamiliar with JPA and MVC in Java, please check the following tutorial: "Learn JPA & Hibernate."
Here is a list of tools you will need:
Build Out the App's Back End
We'll start by creating the Quarkus back end. Let's go to the Quarkus project generator and set up our application's extensions, which we can think of as dependencies.
In the Group field, enter "org.db." In the Artifact field, enter "cockroach-serverless." In the Build Tool field, enter "Maven." Next, select the following four packages:
- RESTEasy Classic
- RESTEasy Classic JSON-B
- REST resources for Hibernate ORM with Panache [quarkus-hibernate-orm-rest-data-panache]
- JDBC Driver – PostgreSQL [quarkus-jdbc-postgresql]
Once the project is configured, select Generate your application. Quarkus then displays another window where you can download the source code:
Figure 2
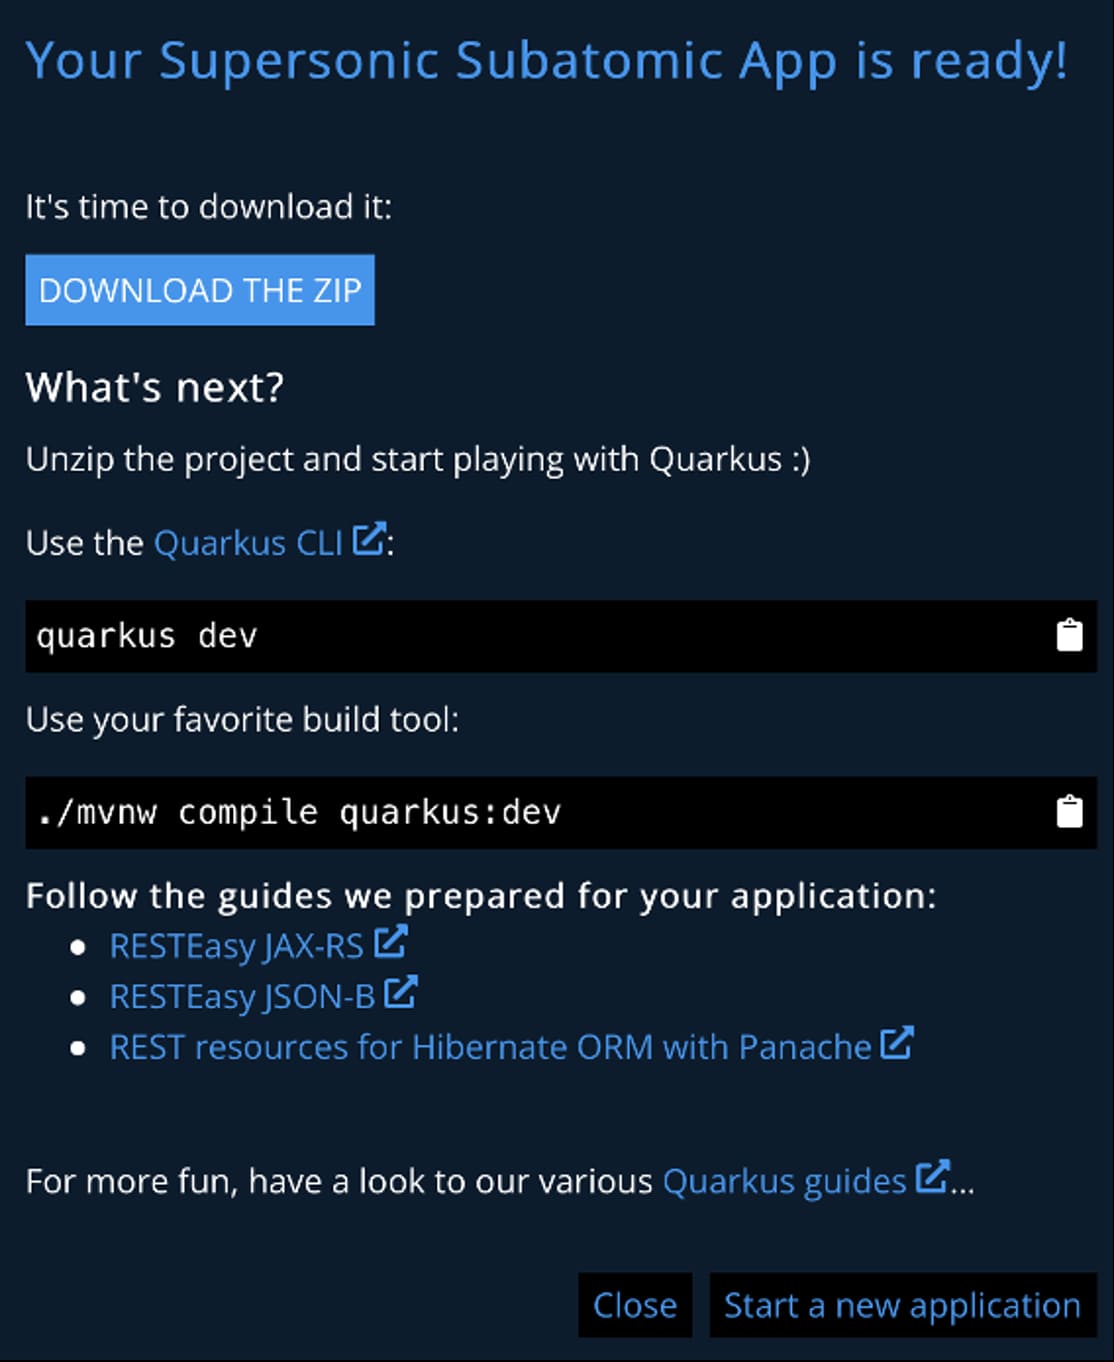
Download the zip file to receive the Java project with a static page, an index.html file (in src/main/resources), one REST API, a GreetingResource.java file (in src/main/java/org/db), some unit tests, and some Docker files.
The GreetingResource.java file implements a simple /hello endpoint with one GET method, which returns the static string, Hello RESTEasy:
@Path("/hello")
public class GreetingResource {

    @GET
     @Produces(MediaType.TEXT_PLAIN)
    public String hello() {
        return "Hello RESTEasy";
    }
}
To see this code at work, navigate to the unzipped file, /path/to/cockroach-serverless/, and enter the following command in your terminal:
Next, use your browser and navigate to localhost:8080. You will see index.html being rendered. You can ignore any test output generated in the log.
Figure 3
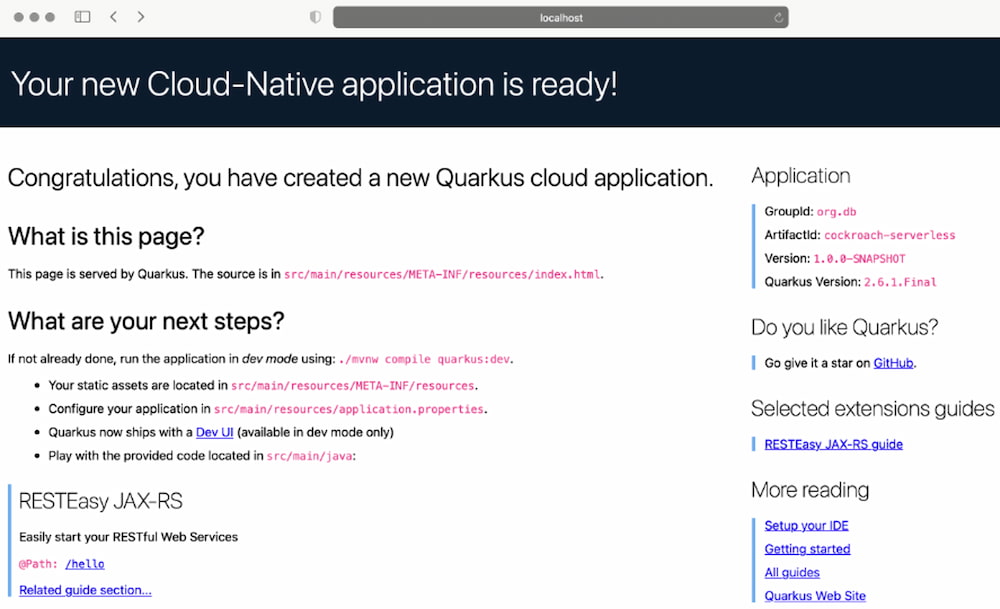
Append the request to the /hello endpoint to see the static string, Hello RESTEasy. Once this is done, we can add the class implementing the actual REST API for our leaderboard app.
Create a file called LeaderboardItem.java in src/main/java/org/db and add the following code:
package org.db;
import javax.enterprise.inject.Produces;
import javax.persistence.Column;
import javax.persistence.Entity;

import io.quarkus.hibernate.orm.panache.PanacheEntity;

@Entity
public class LeaderboardItem extends PanacheEntity {

    @Column
    public String name;

    @Column
    public double points;

}
This will represent the items on the leaderboard. The LeaderboardItem class has two fields: name and points. The class derives from PanacheEntity, so the getters and setters for name and points fields will be generated automatically. Additionally, PanacheEntity provides a default identifier, id, which helps to keep the definition of the LeaderboardItem class clean and simple.
Next, let's implement the actual REST resource for the leaderboard items. Add the LeaderboardResource.java class in the src/main/java/org/db directory:
package org.db;

import io.quarkus.hibernate.orm.rest.data.panache.PanacheEntityResource;

public interface LeaderboardResource extends PanacheEntityResource
     <LeaderboardItem, Long> {

}
PanacheEntityResource, used as a base class, is generic and implements our CRUD operations. It will work for instances of LeaderboardItem and identify particular database objects using the default identifier, Long (from the PanacheEntity class).
Also note that LeaderboardResource will automatically generate the REST API endpoint exposed at the /leaderboard path.
We are now ready to create the CockroachDB database and connect it to our back end.
Add the Serverless Database
If you do not have a free CockroachDB account, you'll need to create one. After signing up, you will be redirected to the dashboard.
Select Create Cluster, and in the display that pops up, choose Serverless. The Serverless option requires you to choose your cloud provider and its region: Set AWS as your provider and use the region closest to your physical location. Optionally, you can modify the cluster name, though we are using the default value, fluffy-possum.
Select Create your free cluster to begin the process of creating the cluster. In a few seconds, you will see a window containing your connection info:
Figure 4
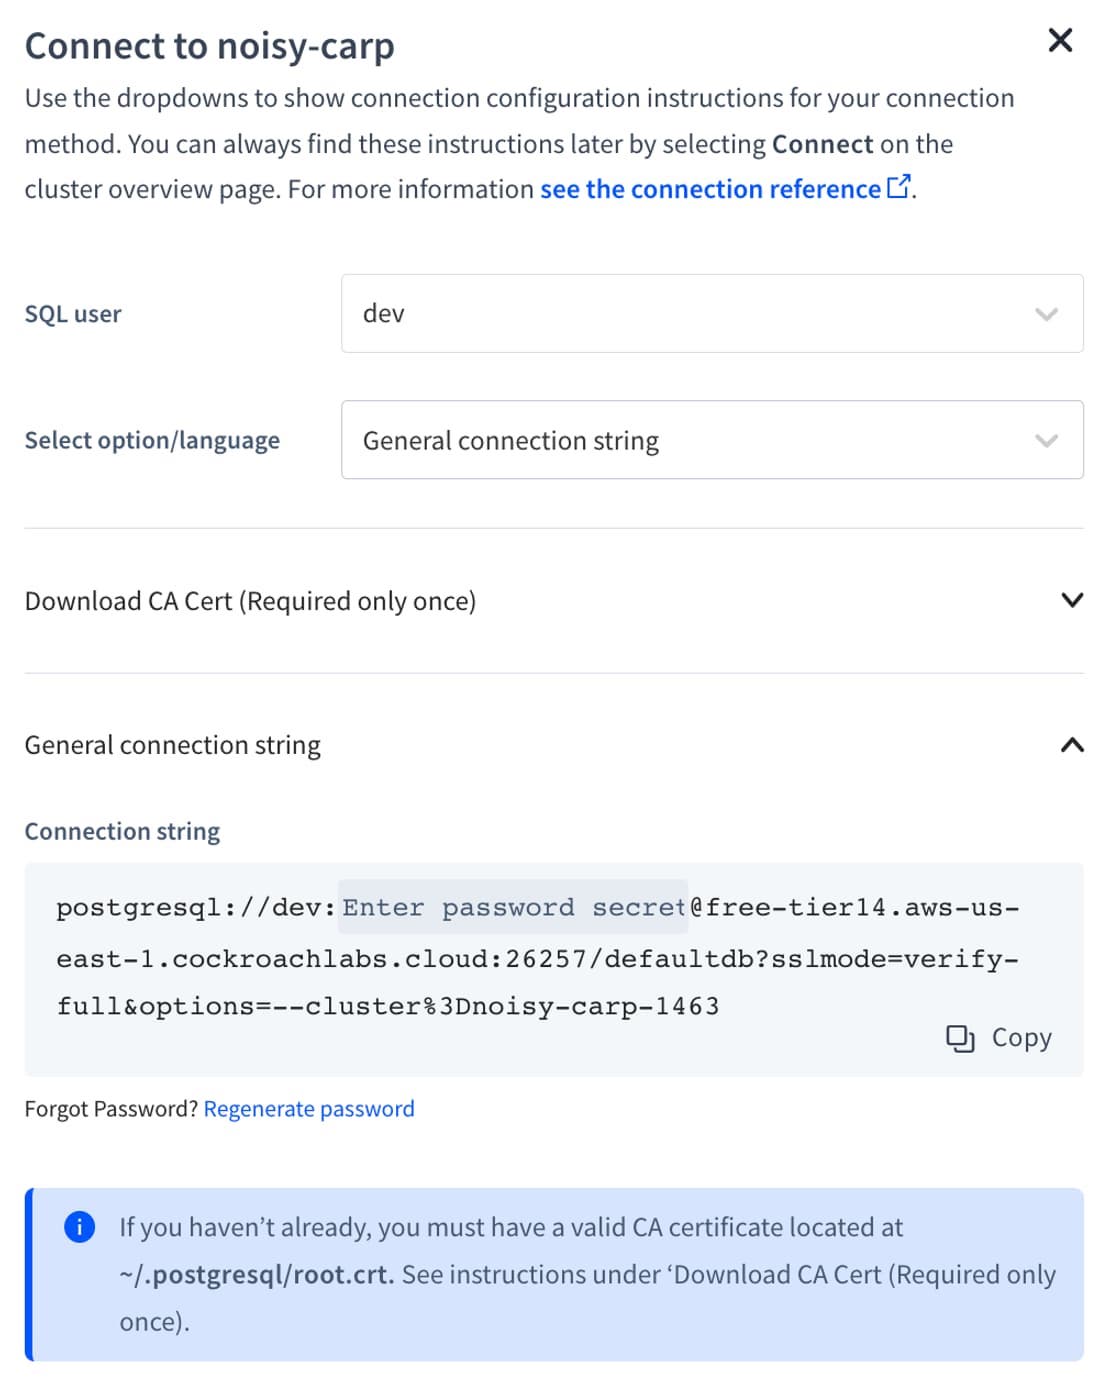
Be sure to note your database password at this point, as this is the only place where you can reveal it. Otherwise, you'll need to reset the password using the CockroachDB dashboard, found in: SQL Users > Action > Change Password.
While you have this window open, you will also want to grab a few more values that you'll soon need to configure the application.properties class.
Select the Parameters Only dropdown and note the values it presents (username, host, database, and port):
Figure 5
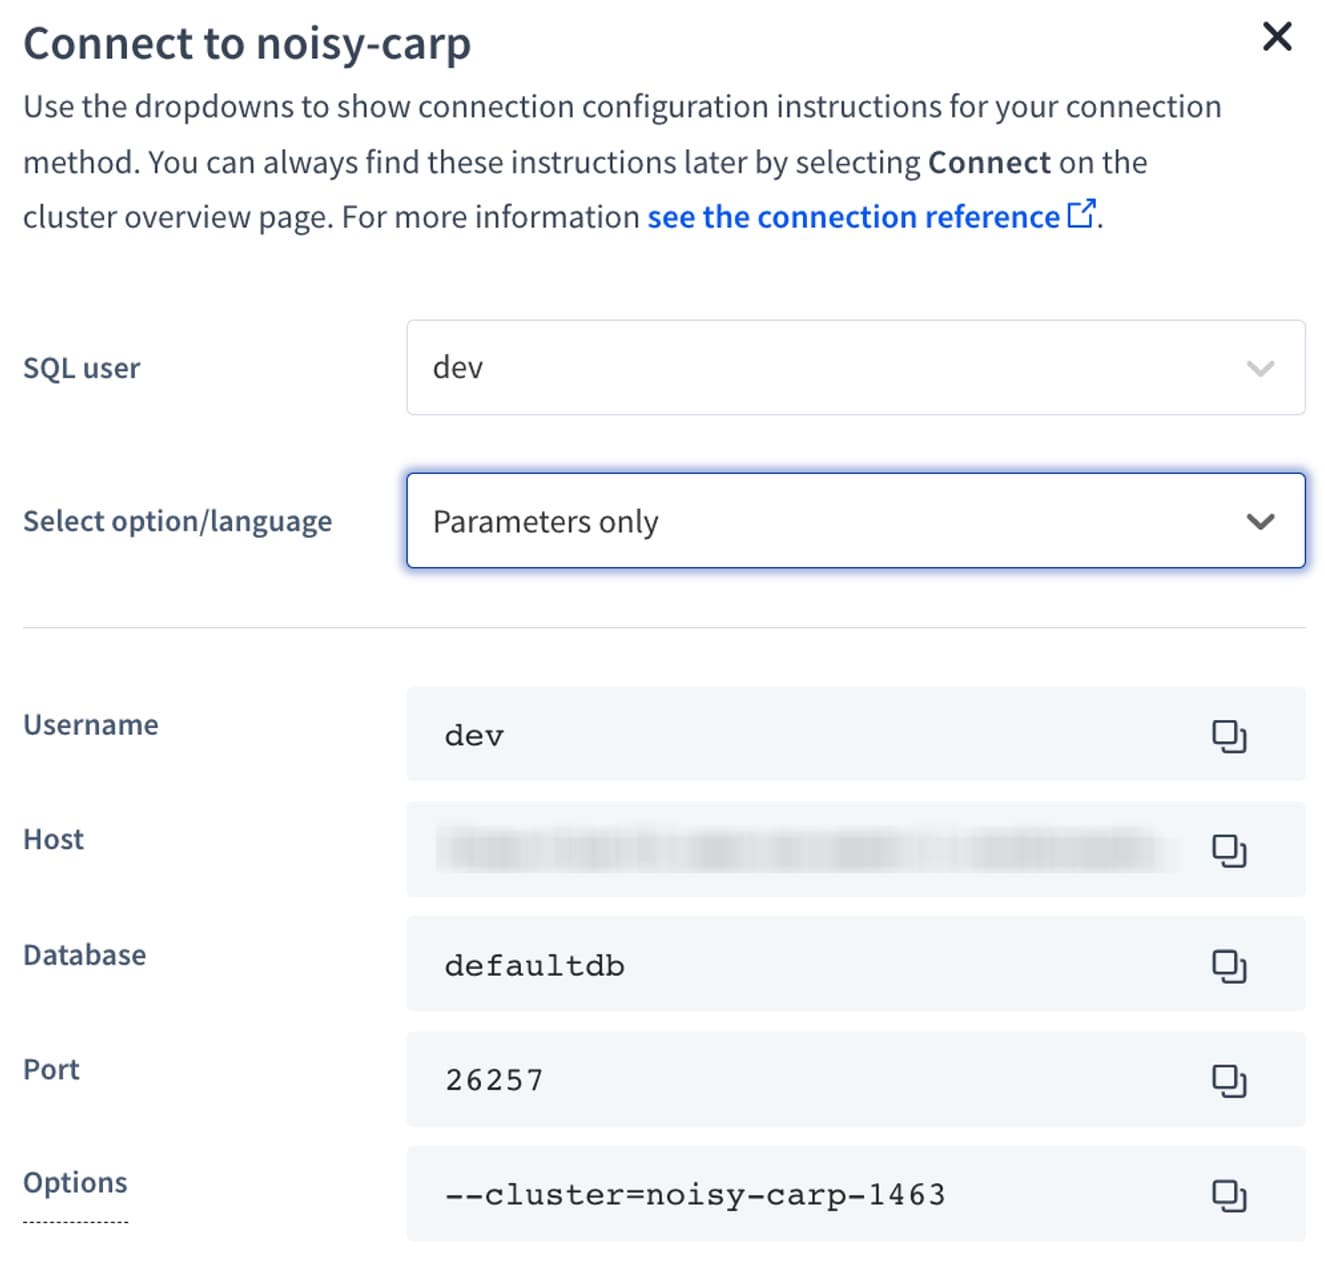
Next, open src/main/resources/application.properties and enter the following code. Replace the username, password, host, port, and database with the values taken from CockroachDB Serverless. Use the cluster name in the JDBC URL:
# configure your datasource
quarkus.datasource.db-kind = postgresql
quarkus.datasource.username = dev
quarkus.datasource.password = <your password>
quarkus.datasource.jdbc.url = jdbc:postgresql://<your host>:26257/<cluster-name>.<your database>

quarkus.hibernate-orm.database.generation = update
We are now ready to test the application. Go ahead and run the app again by entering the following command in your terminal:
Then, navigate to localhost:8080/leaderboard. The resource returns an empty collection. We can add one item using curl:
curl -i -X POST -H "Content-Type:application/json" -d "{ \"name\" : \"Dave\", \"points\" : \"100\"}" http://localhost:8080/leaderboard
The resource should respond with a 201 HTTP status code:
Figure 6
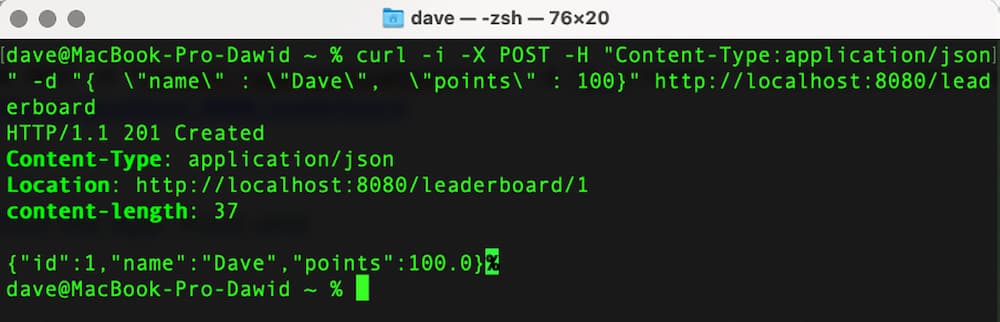
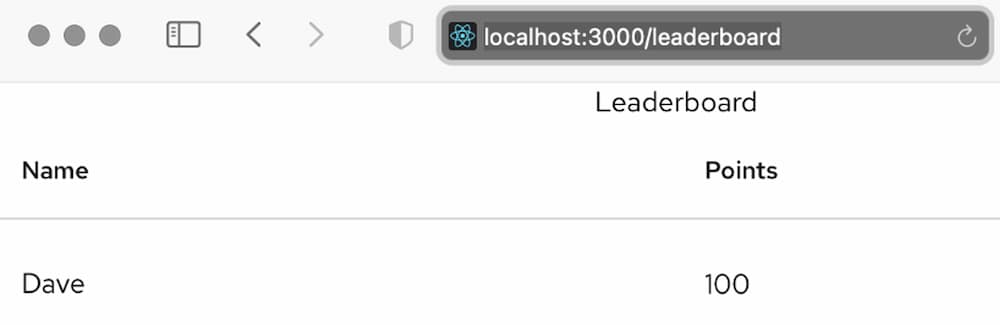
The item was successfully added to the database. We can check this by sending a GET request to http://localhost:8080/leaderboard, either using curl or a web browser:
Figure 7

Build Out the App's Front End
With the back end ready, let's add the front end. Because we will build using React, we'll need to make sure we also have Node.js. Install it now if necessary.
First, open your terminal and go to the project's directory. Create a new directory called webapp in /src/main. Then, create the React project by entering the following command:
npx create-react-app src/main/webapp/
Figure 8
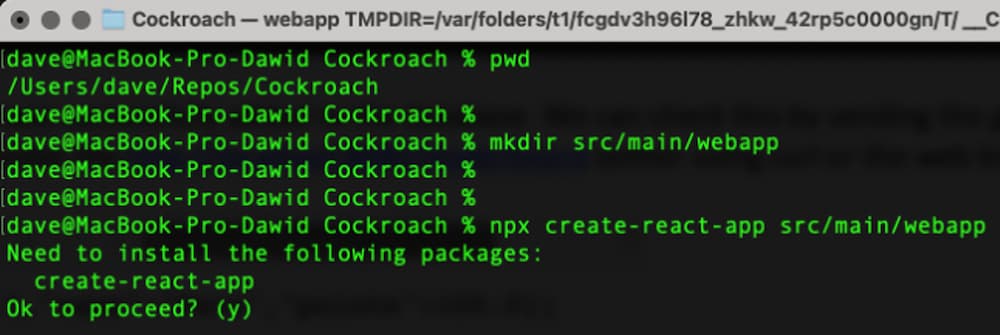
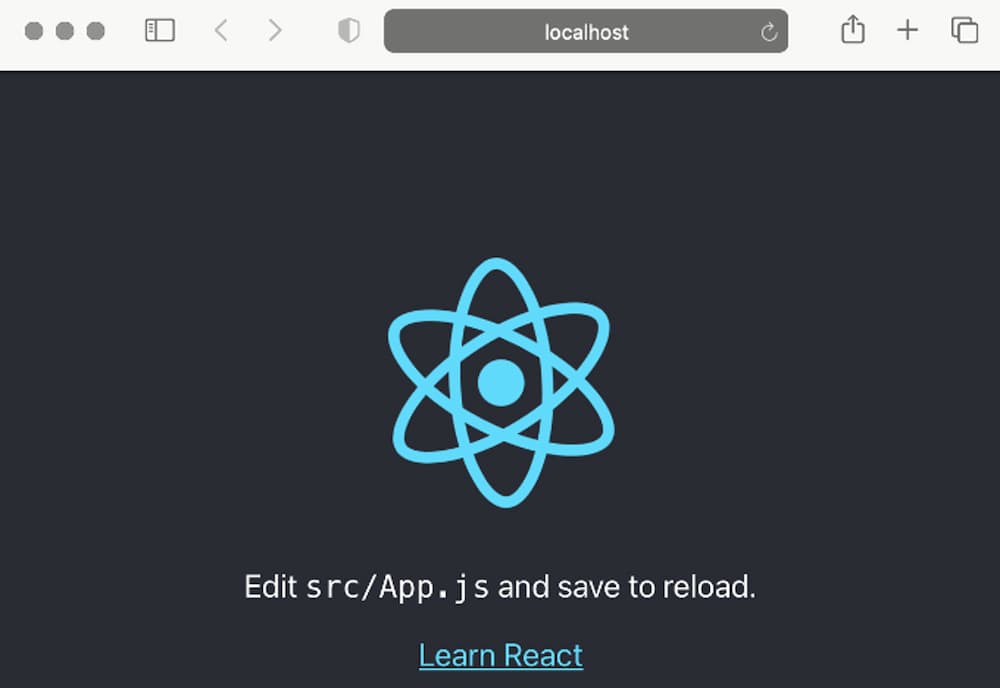
Enter y to proceed. The React web application will be bootstrapped in src/main/webapp. You can preview the app by changing your working directory to src/main/webapp and then entering the following command:
You will see the following welcome screen:
Figure 9
Let's now customize our web app and add the leaderboard. We will use the PatternFly package to create the table. Install the PatternFly npm package by invoking the following command from the src/main/webapp directory:
npm install @patternfly/patternfly –save
Then, import patternfly.css in index.js:
import React from 'react';
import ReactDOM from 'react-dom';
import './index.css';
import App from './App';
import reportWebVitals from './reportWebVitals';
import '@patternfly/patternfly/patternfly.css';
Next, create a subdirectory named components in the webapp/src directory. Then, in webapp/src/components, create a leaderboard.jsx file and add the following code:
import React from 'react'

const Leaderboard = ({ items }) => {
    return (
        <div>

             <center><h1>Leaderboard</h1></center>
            <table className="pf-c-table pf-m-grid-md">
                 <thead>
                     <tr role="row">
                         <th role="columnheader">Name</th>
                         <th role="columnheader">Points</th>
                     </tr>
                 </thead>
                 {items.map((item) => (
                     <tbody role="rowgroup">
                         <tr role="row">
                             <td role="cell">{item.name}</td>
                             <td role="cell">{item.points}</td>
                         </tr>
                     </tbody>
                ))}
             </table>
        </div>

    )
};

export default Leaderboard
This component, when given the list of leaderboard items, will render them as the two-column table we want to display:
Figure 10
To that end, the Leaderboard component iterates over the items collection and displays each item as a table row. Let's now use the Leaderboard component in App.js:
import React, {Component} from 'react';
import Leaderboard from './components/leaderboard';

class App extends Component {
  state = {
    items: []
  }
  componentDidMount() {
    fetch('http://localhost:8080/leaderboard')
    .then(res => res.json())
    .then((data) => {
        this.setState({ items: data.sort((a,b)=>{return a.points < b.points}) })
    })
     .catch(console.log)
  }

  render () {
    return (
      <Leaderboard items={this.state.items} />
    );
  }
}

export default App;
The App component will send a GET request to our Leaderboard resource, which we've implemented using the Quarkus REST API. The collection of items retrieved from the API is stored in state.items and then passed to the Leaderboard React component. Importantly, the items are also sorted in descending order by their points property.
To make this work, we need to configure cross-origin resource sharing (CORS). By default, the front end is exposed on the localhost at port 3000, while the REST API is exposed at port 8080. This could prevent fetching data from the API — the web browser could block a request due to misconfigured CORS.
To enable CORS, add the following line to application.properties in the Quarkus project:
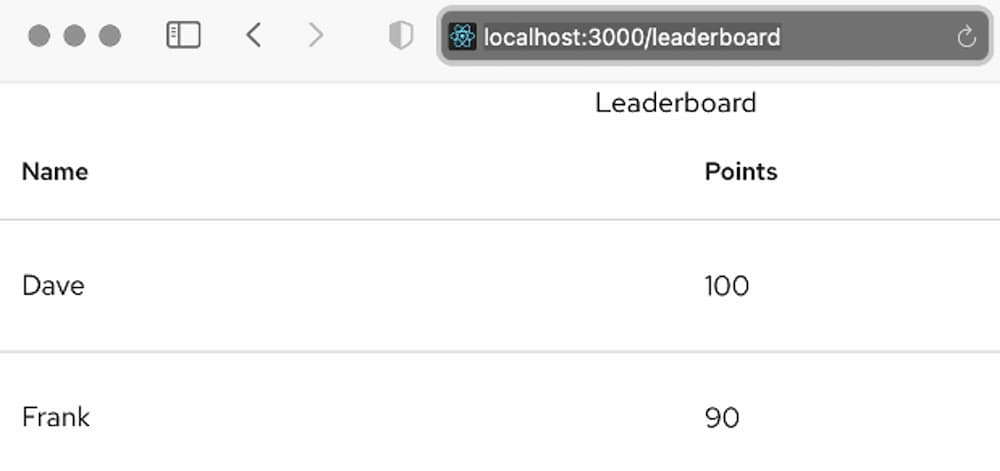
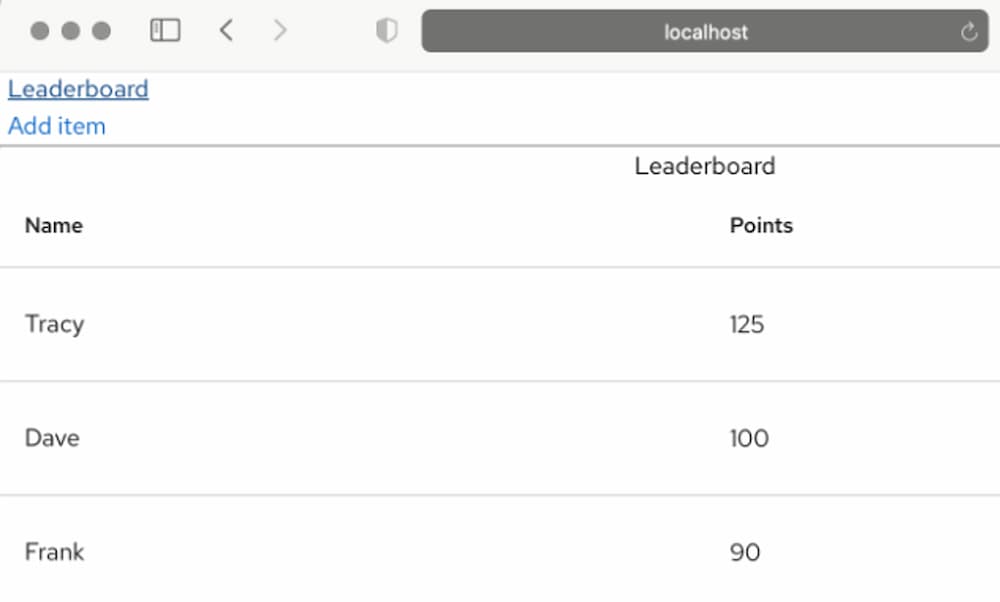
Now, run the REST API project again by running ./mvnw quarkus:dev and restart the web application by running npm start. Then, open localhost:3000/leaderboard. You should see something like this:
Figure 11
At this point, we can add items using curl or any other REST API client. Let's see how to do this.
Add Items
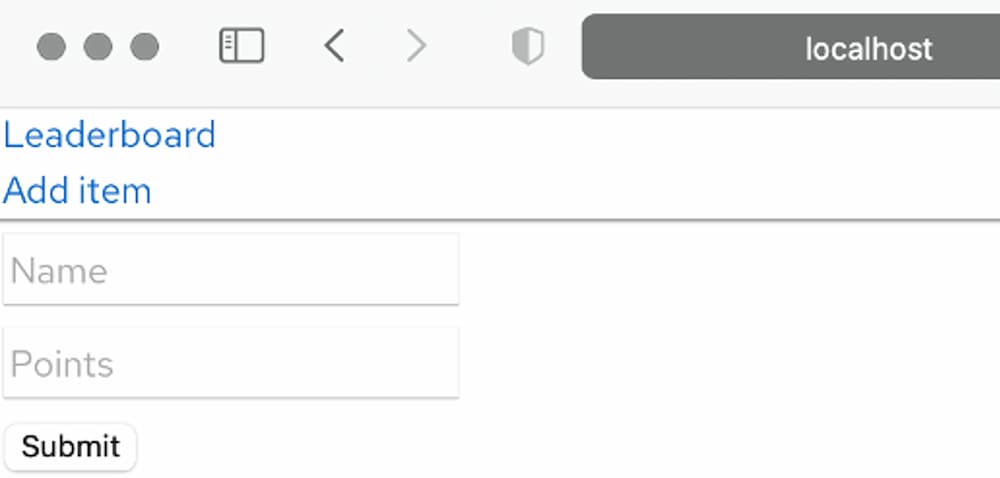
We'll now add a form that enables users to add new entries to the leaderboard through REST API. The application will also contain two links that enable the user to switch between the Leaderboard and Form screens:
Figure 12
We start by supplementing the React app with the react router. To do so, install the react-router-dom npm package:
npm install react-router-dom
Then, in the components directory, add an AddItem.css file:
Next, implement the AddItem.jsx component with the following code:
import React from 'react';
import './AddItem.css'

class AddItem extends React.Component {
    constructor(props) {
      super(props);
      this.state = { name: '', points: 0 };
    }

    handleChange = (event) => {
       this.setState({[event.target.name]: event.target.value});

       console.log(this.state);
    }

    handleSubmit = (event) => {
       console.log(JSON.stringify(this.state));
      fetch('http://localhost:8080/leaderboard', {
          method: 'POST',
          body: JSON.stringify(this.state),
          headers: {
            'Content-Type': 'application/json'
          },
         }).then(function(response) {
          return response.json();
        });

       event.preventDefault();
  }

    render() {
      return (
        <form onSubmit={this.handleSubmit}>
            <input type="text" value={this.state.value}
                        name="name" onChange={this.handleChange} placeholder="Name"/>
             <br/>
            <input type="text" value={this.state.value}
                        name="points" onChange={this.handleChange}placeholder="Points"/>
             <br/>
            <input type="submit" value="Submit" />
         </form>
      );
    }
  }

  export default AddItem
The AddItem component consists of a form with two text fields. The values of these text fields are used to update the state of the component. When the user selects the Submit button, a POST request is sent to our back end.
Finally, we modify App.js to include links to Leaderboard and AddItem components:
import React, {Component} from 'react';
import {BrowserRouter as Router, Routes, Route, Link} from 'react-router-dom'
import Leaderboard from './components/Leaderboard';
import AddItem from './components/AddItem';

class App extends Component {
  state = {
    items: []
  }

  componentDidMount() {
    fetch('http://localhost:8080/leaderboard')
    .then(res => res.json())
    .then((data) => {
      this.setState({ items: data.sort((a,b)=>{return a.points < b.points}) })
    })
     .catch(console.log)
  }

  render () {
    return (
       <Router>
        <div style={{padding: "5px"}}>
     <Link to="/">Leaderboard</Link><br/>
     <Link to="/addItem" >Add item</Link> <br/>
 </div>

        <hr/>

         <Routes>
          <Route exact path='/'
                 element={<Leaderboard items={this.state.items}/>} />
          <Route exact path='/addItem'
                  element={< AddItem />} />
         </Routes>
       </Router>
    );
  }
}

export default App;
Now, run the web app again. You can see the links at the top of the Leaderboard window.
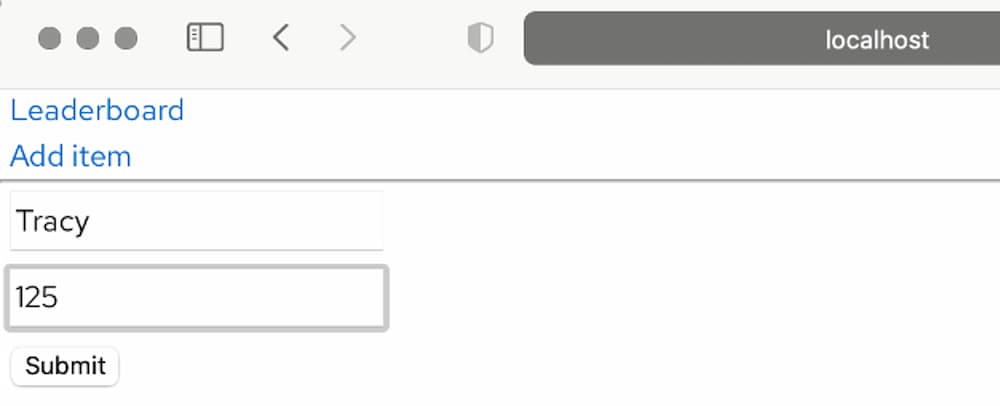
Select Add item, then fill in the form:
Figure 13
After submitting the form, select Leaderboard and refresh the page to see the new item:
Figure 14
You can also use the setInterval JavaScript function to automatically refresh the leaderboard at the predefined intervals.
Deploy to Heroku
In this section, we'll deploy our entire solution to Heroku, doing so in a cloud-native way by deploying the back end and front end independently. To complete all of the instructions, you will need Heroku and Git accounts, as well as the Heroku CLI installed on your development machine.
To install Heroku CLI on macOS, use brew:
brew install heroku/brew/heroku
On Ubuntu, use snap:
sudo snap install heroku --classic
On other Linux distributions, use a tarball.
On Windows, use one of the dedicated installers.
Back-End Deployment
First, let's deploy the back end through Heroku CLI and Git.
Start by logging into Heroku:
Then, update your application.properties file with the following configuration:
quarkus.http.port=${PORT:8080}
This updates the HTTP port on which our back end is listening for requests, so that it matches the port provided by Heroku.
Next, create a system.properties file:
echo "java.runtime.version=11" >> system.properties
We use this to set our JDK to version 11 to match the Quarkus configuration.
Next, create the Procfile, which Heroku uses to start our application:
echo "web: java \$JAVA_OPTS -jar target/quarkus-app/quarkus-run.jar" >> Procfile
Before we create our app, we need to collate everything through Git. Initialize a local Git repository and commit all these files:
git init
git add .
git commit -am "Initial version"
Now, create the application on Heroku:
Finally, deploy through Git:
The output of this command should look similar to this:
Figure 15
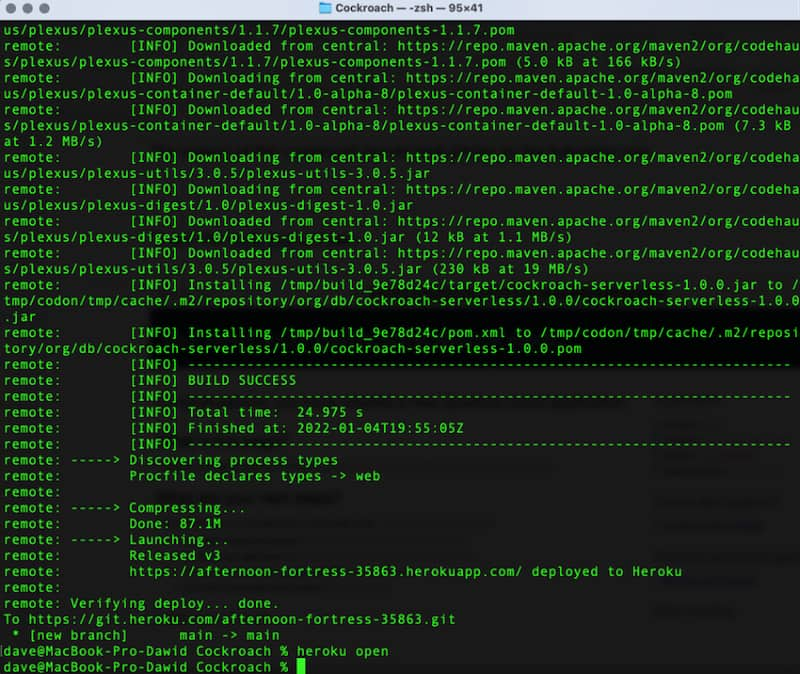
To see the app running, enter heroku open. This opens the default web browser and navigates to the Heroku app URL:
Figure 16
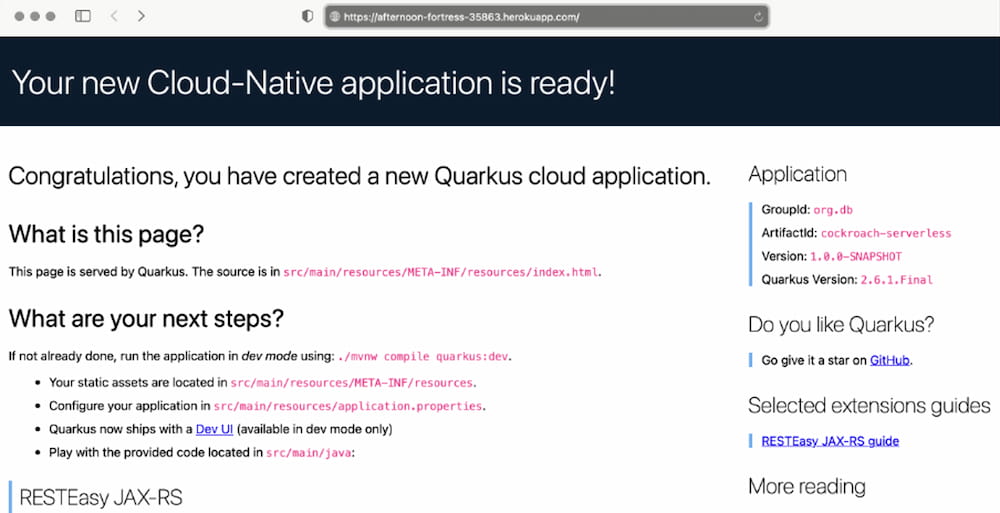
Append the /leaderboard path to the URL to see the back end communicate with CockroachDB and return the list of leaderboard items. Note that this list matches what we had before because the data is retrieved from the same database:
Figure 17

Front-End Deployment
After ensuring that the back end works, let's deploy the front end. We'll start by updating the code with the Heroku app's URL. In our case, that is https://afternoon-fortress-35863.herokuapp.com/leaderboard. Your URL will be similar.
Update this section of the App.js file — in src/main/webapp/src — with your URL:
componentDidMount() {
  fetch('https://afternoon-fortress-35863.herokuapp.com/leaderboard')
  .then(res => res.json())
  .then((data) => {
    this.setState({ items: data.sort((a,b)=>{return a.points < b.points}) })
  })
  .catch(console.log)
}
Then, update the URL in the AddItem.jsx file within src/main/webapp/src/components:
handleSubmit = (event) => {
   console.log(JSON.stringify(this.state));
  fetch('https://afternoon-fortress-35863.herokuapp.com/leaderboard', {
      method: 'POST',
      body: JSON.stringify(this.state),
      headers: {
        'Content-Type': 'application/json'
      },
     }).then(function(response) {
      return response.json();
    });

   event.preventDefault();
}
Before proceeding, let's ensure everything works locally. Change your working directory to src/main/webapp and then run using npm start. Then, go to localhost:3000. Note that it may take longer than before to retrieve leaderboard items. Now, we are ready to deploy the front end to Heroku.
Start by creating the Procfile:
echo "web: npm start" >> Procfile
Now, initialize another repository. Add and commit all the files, ensuring to do this from the src/main/webapp subdirectory:
git init
git add .
git commit -am "webapp"
Create the new Heroku app:
Finally, deploy the front end through Git:
All that remains to do now is to open your application:
You should see the solution up and running:
Figure 18
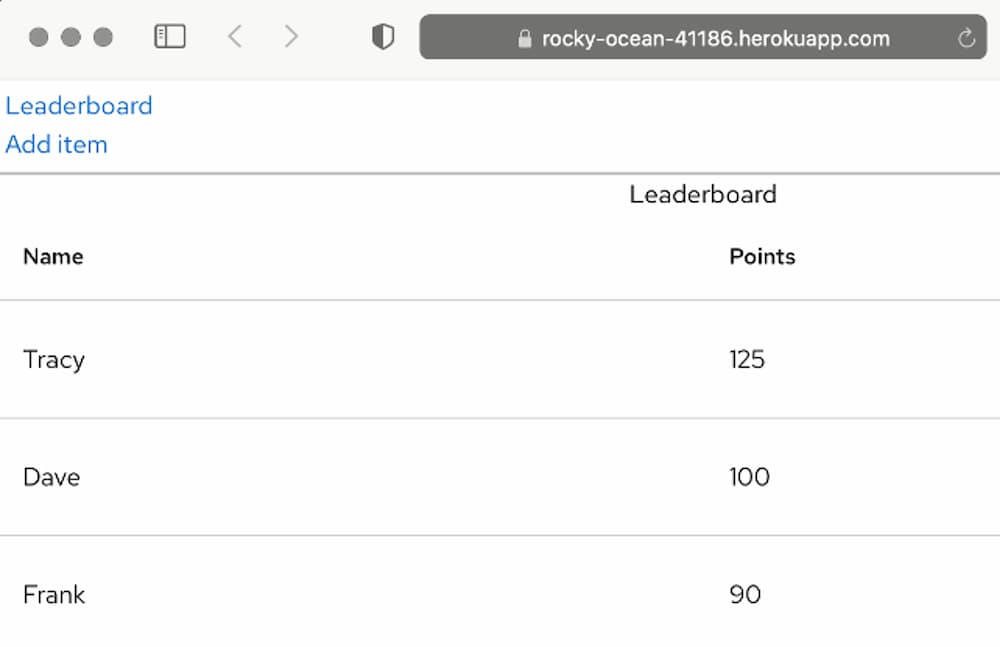
Try to add another item:
Figure 19
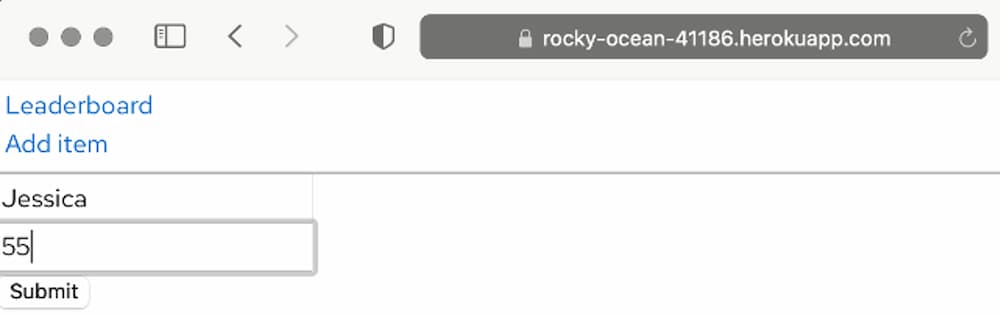
The item appears as an entry in the leaderboard:
Figure 20


{{ parent.title || parent.header.title}}
{{ parent.tldr }}
{{ parent.linkDescription }}
{{ parent.urlSource.name }}