How To Handle Pseudo-Elements in CSS With Selenium
Read on to know how to handle pseudo-elements in CSS with Selenium using Java and JavaScript, and execute the code on a cloud-based Selenium Grid.
Join the DZone community and get the full member experience.
Join For FreeWhile performing UI automation testing on a webpage, we all try to work with the web elements such as buttons, texts, etc. Interaction with the WebElements in the DOM is made possible with the help of Selenium locators. However, there are some aspects of a web page that even the locators can’t manage. Pseudo-elements in CSS fall in that category. Without the correct information, these pseudo-elements can be very hard to automate. In this article, we will see how to handle pseudo-elements in CSS with Selenium WebDriver.
Selenium is a powerful automation testing framework for checking complex web pages but pseudo-elements are tricky to automate. Selenium, when used in conjunction with the JavaScriptExecutor interface, helps to automate pseudo-elements. When testing your website, one must also ensure that the webpage functions as expected across various browser and OS combinations. Given that Selenium test automation is a cross-browser and cross-platform affair, you can perform automation tests at scale with the cloud-based Selenium Grid.
What Are Pseudo-Elements in CSS?
The combination of two words – pseudo and elements – can often lead to a misunderstanding, so let’s understand what exactly pseudo-elements are in CSS (Cascading Style Sheet).
While using CSS on any web element, we usually apply a style all over it. But what if we want to apply a class only to a specific part of it and not to a complete element? I know what you are thinking.
And the answer is YES. This is possible with the help of pseudo-elements. Pseudo-elements are CSS components used to style specified parts of a web element. These pseudo-elements can be used to apply CSS on a portion or a specific part of a web element, such as:
- Applying CSS on the first letter of an element
- Applying CSS on the first line of an element
- Inserting some text before the text of an element
- Inserting some text after the text of an element
The pseudo-elements are defined with the help of a double colon (::), as shown in the below syntax:
selector::pseudo-element {
  property: value;
}
Common Types of Pseudo-Elements in CSS
Before starting to work on the pseudo-elements in Selenium, let us first see some commonly used types of pseudo-elements in CSS.
The ::first-line Pseudo-Element
As the name suggests, the ::first-line pseudo-element in CSS is used to add special CSS styling only to the first line of the text and can be applied only to the block-level elements.
Syntax:
selector::first-line {
  property: value;
}
Pseudo-Element in CSS Example ::First-line Pseudo-element
Consider the below HTML code:
<!DOCTYPE html>
<html>

<head>
    <style>
        p::first-line {
            color: #00ff00;
            font-variant: small-caps;
        }
    </style>
</head>

<body>

    <p>The quick brown fox jumps over the lazy dog.
        <br>The quick brown fox jumps over the lazy dog.
        <br>The quick brown fox jumps over the lazy dog.
    </p>

</body>

</html>
If you try to run the above HTML file, the output will be:
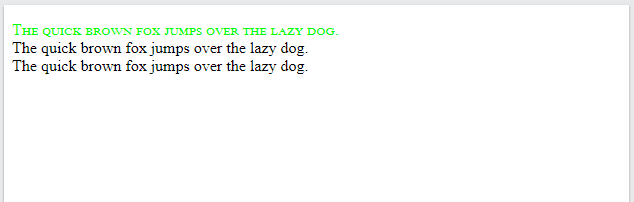
As you can see, the desired Green colour (#00ff00) is applied only on the first line of the <p></p> element, and that is possible only with the help of::first-line pseudo-element.
The ::First-letter Pseudo-Element
As the name suggests, the ::first-letter pseudo-element in CSS is used to add special CSS styling only to the first letter of the text and can be applied only to the block-level elements.
Syntax:
selector::first-letter {
  property: value;
}
Pseudo-element in CSS Example ::First-letter Pseudo-element
Consider the below HTML code:
<!DOCTYPE html>
<html>

<head>
    <style>
        p::first-letter {
            color: #00ff00;
            font-variant: small-caps;
        }
    </style>
</head>

<body>

    <p>The quick brown fox jumps over the lazy dog.
        <br>The quick brown fox jumps over the lazy dog.
        <br>The quick brown fox jumps over the lazy dog.
    </p>

</body>

</html>
If you try to run the above HTML file, the output will be:
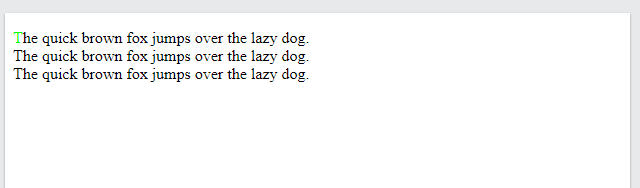
As you can see, the desired Green colour (#00ff00) is applied only on the first letter of the <p></p≶ element, and that is possible only with the help of ::first-letter pseudo-element.
The ::before Pseudo-Element
As the name suggests, the ::before pseudo-element in CSS is used to add unique CSS styling before the content of any element.
Syntax:
selector::before {
  property: value;
}
Pseudo-Element in CSS Example ::Before Pseudo-element
Consider the below HTML code:
<!DOCTYPE html>
<html>

<head>
    <style>
        p::before {
            content: "∴"
        }
    </style>
</head>

<body>

    <p>The quick brown fox jumps over the lazy dog.
        <br>The quick brown fox jumps over the lazy dog.
        <br>The quick brown fox jumps over the lazy dog.
    </p>

</body>

</html>
If you try to run the above HTML file, the output will be:
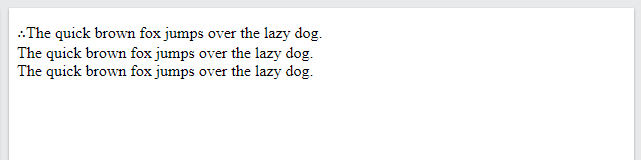
As you can see, the desired therefore symbol (∴) is applied before the <p></p> element, and that is possible only with the help of ::before pseudo-element.
The ::after Pseudo-Element
As the name suggests, the ::after pseudo-element in CSS is used to add unique CSS styling after the content of any element.
Syntax:
selector::after {
  property: value;
}
Pseudo-element in CSS Example ::After Pseudo-element
Consider the below HTML code:
<!DOCTYPE html>
<html>

<head>
    <style>
        p::after {
            content: "∴"
        }
    </style>
</head>

<body>

    <p>The quick brown fox jumps over the lazy dog.
        <br>The quick brown fox jumps over the lazy dog.
        <br>The quick brown fox jumps over the lazy dog.
    </p>

</body>

</html>
If you try to run the above HTML file, the output will be:
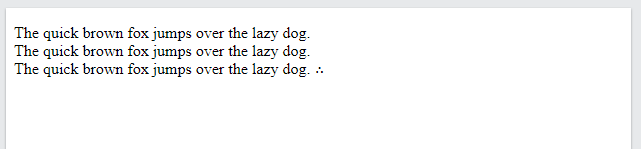
As you can see, the desired therefore symbol (∴) is applied after the <p></p> element, and that is possible only with the help of::after pseudo-element.
Similarly, there are many more pseudo-elements available in the CSS, such as:
The ::marker Pseudo-Element
The ::marker pseudo-element in CSS is used to add special CSS styling to the list markers, such as unordered list bullet points, ordered list numbers, etc.
Syntax:
selector::marker {
  property: value;
}
The ::selection Pseudo-Element
The ::selection pseudo-element in CSS is used to add special CSS styling to the user-selected portion or content.
Syntax:
selector::selection {
  property: value;
}
Backward Compatibility
Similar to pseudo-elements, there also exists a CSS pseudo-class. To define a pseudo-class, a single colon (:) is used.
Syntax:
selector:pseudo-class {
  property: value;
}
But, you might come across situations where a single colon is used for both – the pseudo-class and the pseudo-elements. This is because, before CSS3, both the pseudo-class and pseudo-elements had the same syntax. In CSS3, a double colon (::) was introduced for pseudo-elements instead of a single colon (:). So you might see the single-colon syntax used for both pseudo-classes and pseudo-elements in CSS2 and CSS1.
For backward compatibility, the single-colon syntax is acceptable for CSS2 and CSS1 pseudo-elements. Consider the below table for a complete backward compatibility chart of pseudo-elements in CSS:
Browser |
Lowest Version |
Support of |
Internet Explorer |
8.0 |
:pseudo-element |
9.0 |
:pseudo-element ::pseudo-element |
|
Firefox (Gecko) |
1.0 (1.0) |
:pseudo-element |
1.0 (1.5) |
:pseudo-element ::pseudo-element |
|
Opera |
4.0 |
:pseudo-element |
7.0 |
:pseudo-element ::pseudo-element |
|
Safari (WebKit) |
1.0 (85) |
:pseudo-element ::pseudo-element |
Why Can’t Normal Locators Be Used To Automate Pseudo-Elements in Selenium?
You must be wondering why we can’t use the normal Selenium locators to automate pseudo-elements in CSS. To understand that, let us first go ahead and try to automate them using the Selenium locators.
Let us consider the following webpage:
<!DOCTYPE html>
<html>

<head>
    <style>
        p::before {
            content: "∴"
        }
    </style>
</head>

<body>

    <p>The quick brown fox jumps over the lazy dog.
        <br>The quick brown fox jumps over the lazy dog.
        <br>The quick brown fox jumps over the lazy dog.
    </p>

</body>

</html>
In this, as you can see, we have used a ::before pseudo-element, which is adding the, therefore (∴) symbol before the text of the button (i.e., Submit).
Note: To help with the automation, I have uploaded this code in a sample GitHub repo.
So let us try to automate this element using the CSSSelector locator in JavaScript.
// Include the chrome driver
require("chromedriver");

// Include selenium webdriver
let webdriver = require("selenium-webdriver");
var By = require("selenium-webdriver").By;
let browser = new webdriver.Builder();
let driver = browser.forBrowser("chrome").build();

driver.get("https://monica-official.github.io/Pseudo-Elements/sample-pseudo-element.html");

var element = driver.findElement(By.css(".submitButton::before")).getText();

element.then(function(txt) {
    console.log(txt);
});

driver.quit();
Code Walkthrough:
In the above code, the steps done are as follows:
// Include selenium webdriver
let swd = require("selenium-webdriver");
var By = require("selenium-webdriver").By;
let browser = new swd.Builder();
let driver = browser.forBrowser("chrome").build();
First, the Selenium WebDriver is set up for the local Chrome browser.
driver.get("https://monica-official.github.io/Pseudo-Elements/sample-pseudo-element.html");Then the page where I have published the HTML code is opened in the local Chrome browser. You can use your local URL as well for this line.
var element = driver.findElement(By.css(".submitButton::before")).getText();Then the desired pseudo-element is called with the help of CSS Selector, and the result is stored in the variable element.
element.then(function(txt) {
    console.log(txt);
});
Upon executing the findElement() method in the last step, the desired pseudo-element is called, and the result is stored in the variable element. It is then validated with the help of the then() method and printed to the console in the following line.
driver.quit();
At last, the local browser is ended by destroying the Selenium WebDriver instance.
Expected Output:
Ideally, as per locators in Selenium, the above code should produce the value of the content property as output:
"∴ "
Actual Output:
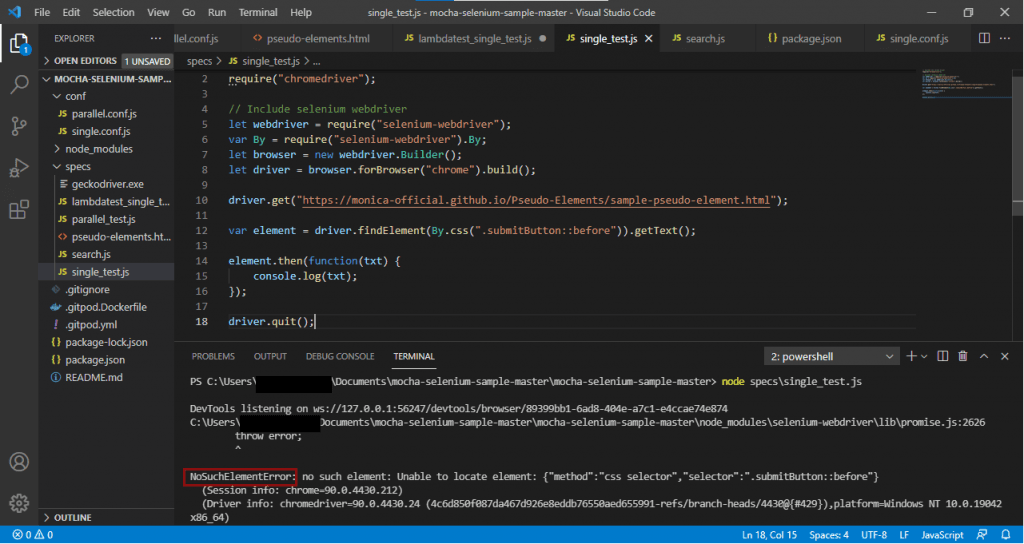
Upon executing the test, you get the output as NoSuchElementError.
Why NoSuchElementError?
Although the locator is correct, you cannot work with the pseudo-elements with normal Selenium locators. This is because the pseudo-elements in CSS on a webpage are treated as a JavaScript elements. It means that these pseudo-elements in CSS are executed in the front end at runtime when the page loads and not initially. This is why when the Selenium WebDriver wants to interact with these pseudo-elements, the code gives NoSuchElementError.
Let Us Try In Java
Consider the following Java code, which tries to use the CSS Selector Selenium locator and get the value of the pseudo-element.
import org.openqa.selenium.By;
import org.openqa.selenium.JavascriptExecutor;
import org.openqa.selenium.WebDriver;
import org.openqa.selenium.chrome.ChromeDriver;

public class PseudoElements {

    public static void main(String[] args) {

        // Instantiate a ChromeDriver class.
        WebDriver driver = new ChromeDriver();

        // Launch Website
        driver.navigate().to("https://monica-official.github.io/Pseudo-Elements/sample-pseudo-element.html");

        // Maximize the browser
        driver.manage().window().maximize();

        // Scroll down the webpage by 5000 pixels
        //      JavascriptExecutor js = (JavascriptExecutor) driver;
        //      js.executeScript("scrollBy(0, 5000)");

        String text = driver.findElement(By.cssSelector(".submitButton::before")).getText();
        System.out.print(text);

        driver.quit();

    }

}
Upon execution, the Java code also gives the NoSuchElementException.

How To Work With Pseudo-Elements In Selenium?
Since the Selenium locators fail with pseudo-elements, the question arises is there any way to work with the pseudo-elements in Selenium?
Yes. The pseudo-elements can be automated in Selenium with the help of JavaScriptExecutor. By definition, JavaScriptExecutor is an Interface that helps to execute JavaScript through Selenium Webdriver. Since pseudo-elements in CSS are treated as JavaScript, hence we can use the JavaScriptExecutors to interact with them.
For example, to get the value of the content property in the above code, the JavaScriptExecutor code will be:
script = "return window.getComputedStyle(document.querySelector('.submitButton'),'::before').getPropertyValue('content')";

var element = driver.executeScript(script);
Let us see via a complete code.
How To Work With Pseudo-Elements In Selenium JavaScript?
In case you are new to JavaScript with Selenium, do check out our detailed tutorial on Automating Testing with Selenium using JavaScript. Consider the following test written in JavaScript to run on local Google Chrome.
// Include the chrome driver
require("chromedriver");

// Include selenium webdriver
let webdriver = require("selenium-webdriver");
var By = require("selenium-webdriver").By;
let browser = new webdriver.Builder();
let driver = browser.forBrowser("chrome").build();

driver.get("https://monica-official.github.io/Pseudo-Elements/sample-pseudo-element.html");

script = "return window.getComputedStyle(document.querySelector('.submitButton'),'::before').getPropertyValue('content')";

var element = driver.executeScript(script);

element.then(function(txt) {
    console.log(txt);
});

driver.quit();
Code Walkthrough:
In the above code, the steps done are as follows:
// Include selenium webdriver
let swd = require("selenium-webdriver");
var By = require("selenium-webdriver").By;
let browser = new swd.Builder();
let driver = browser.forBrowser("chrome").build();
First, the Selenium WebDriver is set up for the local Chrome browser.
driver.get("https://monica-official.github.io/Pseudo-Elements/sample-pseudo-element.html");Then the page where I have published the HTML code is opened in the local Chrome browser. You can use your local URL as well for this line.
script = "return window.getComputedStyle(document.querySelector('.submitButton'),'::before').getPropertyValue('content')";

var element = driver.executeScript(script);
The script to get the property value (content) of the class submitButton is written. It is then executed with the help of the driver.executeScript() method.
element.then(function(txt) {
    console.log(txt);
});
Upon executing the script in the last step, the desired pseudo-element is called, and the result is stored in the variable element. It is then validated with the help of the then() method and printed to the console in the following line.
driver.quit();
At last, the local browser is ended by destroying the Selenium WebDriver instance.
Output:
Upon execution of the above test, the output will be:
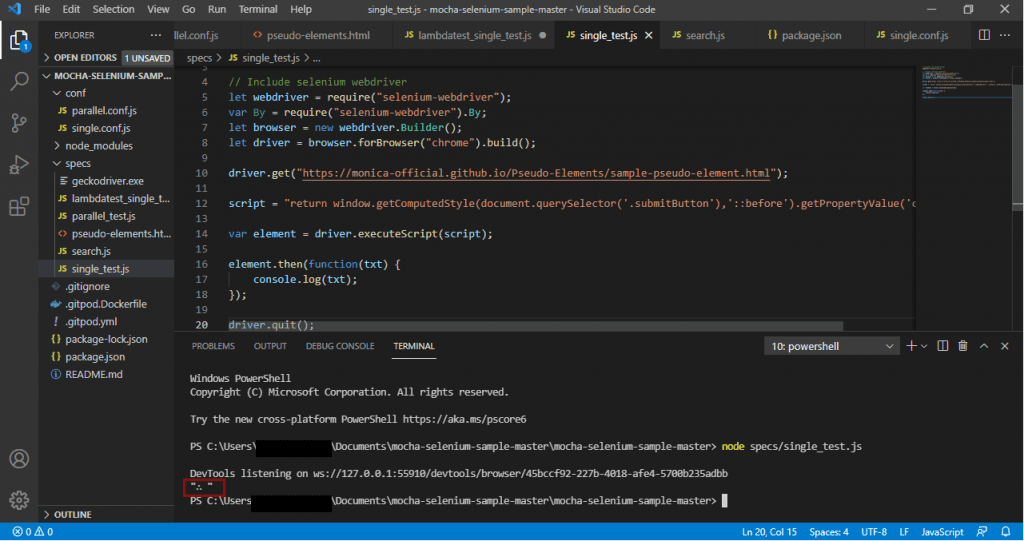
As you can see, we have now received the ideal output:
"∴ "
How to Work With Pseudo-Elements in Selenium Java?
The JavaScriptExecutor can be used to work with pseudo-elements in Selenium Java. Consider the following test written in Java to run on local Google Chrome.
import org.openqa.selenium.By;
import org.openqa.selenium.JavascriptExecutor;
import org.openqa.selenium.WebDriver;
import org.openqa.selenium.chrome.ChromeDriver;

public class PseudoElements {

    public static void main(String[] args) {

        // Instantiate a ChromeDriver class.
        WebDriver driver = new ChromeDriver();

        // Launch Website
        driver.navigate().to("https://monica-official.github.io/Pseudo-Elements/sample-pseudo-element.html");

        // Maximize the browser
        driver.manage().window().maximize();

        JavascriptExecutor js = (JavascriptExecutor) driver;
        String text = js.executeScript("return window.getComputedStyle(document.querySelector('.submitButton'),'::before').getPropertyValue('content')")
                .toString();

        System.out.print(text);

        driver.quit();

    }

}
Code Walkthrough:
In the above code, the steps done are as follows:
// Instantiate a ChromeDriver class.
WebDriver driver = new ChromeDriver();
First, the Selenium WebDriver is set up for the local Chrome browser.
driver.navigate().to("https://monica-official.github.io/Pseudo-Elements/sample-pseudo-element.html");Then the page where I have published the HTML code is opened in the local Chrome browser. You can use your local URL as well for this line.
// Maximize the browser
driver.manage().window().maximize();
The browser is then maximized using the maximize() method.
JavascriptExecutor js = (JavascriptExecutor) driver;

String text = js.executeScript("return window.getComputedStyle(document.querySelector('.submitButton'),'::before').getPropertyValue('content')")
                .toString();
The script to get the property value (content) of the class submitButton is written. It is then executed with the help of the JavascriptExecutor.executeScript() method, and the value is retrieved as a String in the variable text.
System.out.print(text);
Upon executing the script in the last step, the desired pseudo-element is called, and the result is stored in the variable text. It is then printed to the console.
driver.quit();
At last, the local browser is ended by destroying the Selenium WebDriver instance.
Output:
Upon execution of the above test, the output will be:
Starting ChromeDriver 90.0.4430.24 (4c6d850f087da467d926e8eddb76550aed655991-refs/branch-heads/4430@{#429}) on port 22874
Only local connections are allowed.
Please see https://chromedriver.chromium.org/security-considerations for suggestions on keeping ChromeDriver safe.
ChromeDriver was started successfully.
May 24, 2021 3:15:07 AM org.openqa.selenium.remote.ProtocolHandshake createSession
INFO: Detected dialect: W3C
"∴ "
As you can see, we have now received the ideal output."∴ "
Running Tests on Cloud-Based Selenium Grid
The solution to the problems or limitations of the local Selenium setup is the cloud-based Selenium Grid. One such cloud-based Selenium Grid provider is LambdaTest. LambdaTest allows you to run your tests on its online cloud-based Selenium Grid on 3000+ browsers, browser versions, and operating systems with the help of Remote WebDriver.
To run Selenium test automation on LambdaTest Selenium Grid, you need:
- A LambdaTest username and access key.
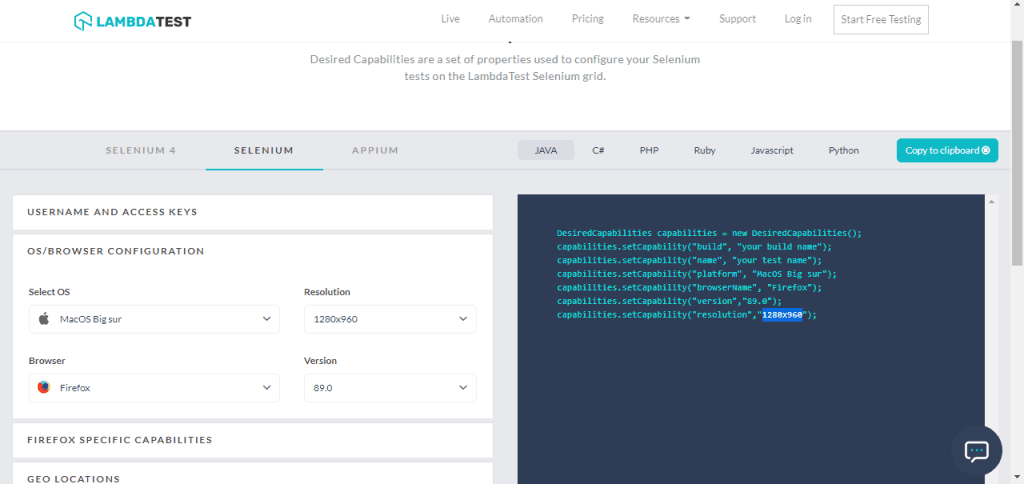
- Selenium Desired Capabilities to run your tests on the desired combination of browsers, browser versions, and operating systems. These Selenium Desired Capabilities are language-specific and can be easily written with the help of the LambdaTest Desired Capabilities Generator.
For example, let’s say the browser we want to test on is Firefox, version 89, and the operating system macOS Big Sur. Also, let’s try it at a resolution of 1280×960.
- Browser: Firefox
- Browser Version: 89
- Operating System: macOS Big Sur
- Resolution: 1280×968
So we can select the same capabilities from the capabilities generator.
Let’s try to convert our local Selenium test automation setup code to execute on the LambdaTest platform.
Executing Java Code on LambdaTest
As the prerequisites, we first need to get the username, access key, and the desired capabilities.
- To set the username and access key, replace yours from your Profile section in the below code snippet for the Grid URL. Grid URL is your specific Remote WebDriver route on which the tests will be executed.
String gridURL = "http://" + username + ":" + accesskey + "@hub.lambdatest.com/wd/hub"; - Next, get the above-mentioned desired capabilities for Java from the Capabilities Generator:
DesiredCapabilities capabilities = new DesiredCapabilities();
capabilities.setCapability("build", "your build name");
capabilities.setCapability("name", "your test name");
capabilities.setCapability("platform", "MacOS Big sur");
capabilities.setCapability("browserName", "Firefox");
capabilities.setCapability("version","89.0");
capabilities.setCapability("resolution","1280x960");- We need to create the Remote WebDriver instance and initialize it with the above capabilities and Grid URL.
DesiredCapabilities capabilities = new DesiredCapabilities();
capabilities.setCapability("build", "Cap Gen Demo");
capabilities.setCapability("name", "Win10 Firefox85 1280x800");
capabilities.setCapability("platform", "MacOS Big sur");
capabilities.setCapability("browserName", "Firefox");
capabilities.setCapability("version","89.0");
capabilities.setCapability("resolution","1280x960");

String gridURL = "http://" + username + ":" + accesskey + "@hub.lambdatest.com/wd/hub";

try {
    driver = new RemoteWebDriver(new URL(gridURL), capabilities);
} catch (Exception e) {
    System.out.println("driver error");
    System.out.println(e.getMessage());
}
That’s it. Now we can use this Remote WebDriver instance to write and execute our test to show working on pseudo-elements in Selenium. Below’s the complete Java code:
import org.testng.annotations.Test;
import java.net.URL;

import org.openqa.selenium.JavascriptExecutor;
import org.openqa.selenium.WebDriver;
import org.openqa.selenium.remote.DesiredCapabilities;
import org.openqa.selenium.remote.RemoteWebDriver;
import org.testng.annotations.AfterTest;
import org.testng.annotations.BeforeTest;

public class PseudoElementsOnLambdaTest {

    public static WebDriver driver;
    public static String status = "failed";

    @BeforeTest(alwaysRun = true)
    public void setUp() throws Exception {

        DesiredCapabilities capabilities = new DesiredCapabilities();
        capabilities.setCapability("build", "Cap Gen Demo");
        capabilities.setCapability("name", "Win10 Firefox85 1280x800");
        capabilities.setCapability("platform", "MacOS Big sur");
        capabilities.setCapability("browserName", "Firefox");
        capabilities.setCapability("version", "89.0");
        capabilities.setCapability("resolution", "1280x960");

        String gridURL = "http://" + username + ":" + accesskey + "@hub.lambdatest.com/wd/hub";

        try {
            driver = new RemoteWebDriver(new URL(gridURL), capabilities);
        } catch (Exception e) {
            System.out.println("driver error");
            System.out.println(e.getMessage());
        }
    }

    @Test
    public static void test() throws InterruptedException {

        // Launch Website
        driver.get("https://monica-official.github.io/Pseudo-Elements/sample-pseudo-element.html");

        // Maximize the browser
        driver.manage().window().maximize();

        // Scroll down the webpage by 5000 pixels
        JavascriptExecutor js = (JavascriptExecutor) driver;
        String text = js.executeScript(
                "return window.getComputedStyle(document.querySelector('.submitButton'),'::before').getPropertyValue('content')")
                .toString();

        System.out.print(text);

        status = "passed";
        Thread.sleep(150);

    }

    @AfterTest
    public static void afterTest() {
        ((JavascriptExecutor) driver).executeScript("lambda-status=" + status + "");
        driver.quit();
    }

}
Upon Selenium test automation execution, you can see the test getting run on the desired environment configuration on the LambdaTest platform.
Executing JavaScript Code on LambdaTest
Similarly, let’s try to execute our JavaScript code on the LambdaTest platform. For a quick overview of automation testing with Selenium and JavaScript, do check out the below video from the LambdaTest YouTube channel.
As the prerequisites, we first need to get the username, access key, and the desired capabilities.
- To set the username and access key, replace yours from your Profile section in the below code snippet for the Grid URL. Grid URL is your specific Remote WebDriver route on which the tests will be executed.
String gridURL = "http://" + username + ":" + accesskey + "@hub.lambdatest.com/wd/hub"; - Next, get the above-mentioned desired capabilities for Java from the Capabilities Generator:
var capabilities = {
		"build" : "your build name",
		"name" : "your test name",
		"platform" : "MacOS Big sur",
		"browserName" : "Firefox",
		"version" : "89.0",
		"resolution" : "1280x960"
}- We need to create the Remote WebDriver instance and initialize it with the above capabilities and Grid URL.
LT_USERNAME = "username";
LT_ACCESS_KEY = "access key";

caps = {
  'build': 'Mocha-Selenium-Sample', //Build name
  'name': 'Your Test Name', // Test name
  'platform':'MacOS Big sur', // OS name
  'browserName': 'Firefox', // Browser name
  'version': '89.0', // Browser version
  "resolution" : "1280x960",
  'visual': false,  // To take step by step screenshot
  'network':false,  // To capture network Logs
  'console':false, // To capture console logs.
  'tunnel': false // If you want to run the localhost, then change it to true
  };

var buildDriver = function () {
    return new webdriver.Builder()
        .usingServer(
            "http://" +
            LT_USERNAME +
            ":" +
            LT_ACCESS_KEY +
            "@hub.lambdatest.com/wd/hub"
        )
        .withCapabilities(caps)
        .build();
};
That’s it. Now we can use this Remote WebDriver instance to write and execute our test to show working on pseudo-elements in Selenium. Below is the complete JavaScript code:
LT_USERNAME = "username";
LT_ACCESS_KEY = "access key";

exports.capabilities = {
  'build': 'Pseudo ELements', //Build name
  'name': 'Your Test Name', // Test name
  'platform':'MacOS Big sur', // OS name
  'browserName': 'Firefox', // Browser name
  'version': '89.0', // Browser version
  "resolution" : "1280x960",
  'visual': false,  // To take step by step screenshot
  'network':false,  // To capture network Logs
  'console':false, // To capture console logs.
  'tunnel': false // If you want to run the localhost, then change it to true
};var assert = require("assert"),
webdriver = require("selenium-webdriver"),
conf_file = process.argv[3] || "conf/single.conf.js";
var caps = require("../" + conf_file).capabilities;
var buildDriver = function (caps) {
return new webdriver.Builder()
.usingServer(
"http://" +
LT_USERNAME +
":" +
LT_ACCESS_KEY +
"@hub.lambdatest.com/wd/hub"
)
.withCapabilities(caps)
.build();
};
describe("Pseudo-Elements " + caps.browserName, function () {
var driver;
this.timeout(0);
beforeEach(function (done) {
caps.name = this.currentTest.title;
driver = buildDriver(caps);
done();
});
it("Pseudo ELements JavaScript", function (done) {
driver.get("https://monica-official.github.io/Pseudo-Elements/sample-pseudo-element.html").then(function () {
script = "return window.getComputedStyle(document.querySelector('.submitButton'),'::before').getPropertyValue('content')";
var element = driver.executeScript(script);
element.then(function (txt) {
console.log(txt);
});
});
});
afterEach(function (done) {
if (this.currentTest.isPassed) {
driver.executeScript("lambda-status=passed");
} else {
driver.executeScript("lambda-status=failed");
}
driver.quit().then(function () {
done();
});
});
});Upon execution, you can see the test getting run on the desired environment configuration on the LambdaTest platform.
Conclusion
The UI of a webpage is often very complex, and to test the complete UI, Selenium automation is one of the most effective ways. You might even come across complex pseudo-elements in CSS, but the method to work with these pseudo-elements in Selenium will remain the same. You can use the JavaScript Executor to automate the pseudo-elements in any language.
Along with testing the UI, one must also ensure the cross-browser compatibility of the webpage. Since the local Selenium test automation setup can’t be used to ensure that, the cloud-based Selenium Grid like LambdaTest is efficient.
We hope you learned how to work with pseudo-elements in Selenium.
Thank you.
Published at DZone with permission of Harshit Paul, DZone MVB. See the original article here.
Opinions expressed by DZone contributors are their own.
Comments