Introduction to Grafana, Prometheus, and Zabbix
This article discusses three observability tools, demonstrates their integration, how to collect the metrics, and how to show them in the dashboard.
Join the DZone community and get the full member experience.
Join For FreeWhat Is Grafana?
Grafana is an open-source tool to visualize the metrics and logs from different data sources. It can query those metrics, send alerts, and can be actively used for monitoring and observability, making it a popular tool for gaining insights. The metrics can be stored in various DBs, and Grafana supports most of them, like Prometheus, Zabbix, Graphite, MySQL, PostgreSQL, Elasticsearch, etc. If the data sources are not available then customized plugins can be developed to integrate these data sources. Grafana is used widely these days to monitor and visualize the metrics for 100s or 1000s of servers, Kubernetes Platforms, Virtual Machines, Big Data Platforms, etc. The key feature of Grafana is its ability to share these metrics in visual forms by creating dashboards so that the teams can collaborate for data analysis and provide support in real-time.
Various platforms that are supported by Grafana today:
- Relational Databases
- Cloud Services like Google Cloud Monitoring, Amazon Cloud Watch, Azure Cloud
- Time Series Databases like InfluxDB for memory and CPU Usage graphs
- Other Data Sources like Elasticsearch and Graphite
What Is Prometheus?
It’s an open-source data source that is used for infrastructure monitoring and observability. It stores the time-series data, which is collected from various sources like applications developed in various programming languages, virtual machines, databases, servers, Kubernetes clusters, etc. To query these metrics, it uses a query language called PromQL that can be used to explore these metrics for various times and intervals and ensure insights into the health of the systems mentioned above. To create dashboards, send alerts, and ensure observability, tools like Grafana are used.
What Is Zabbix?
Zabbix is used for comprehensive monitoring which ensures the reliability and efficiency of the IT infrastructure like network, servers, and applications. It has three components: Zabbix Server, Zabbix Agent, and Frontend.
- Zabbix Server is used for gathering the data.
- The Zabbix agent collects and sends the data to the Zabbix Server.
- Frontend is a Web Interface for configuration.
Comparison Between Zabbix and Prometheus
Features/Aspects |
Prometheus |
Zabbix |
Primary Use Case |
Collection of metrics of the servers and services. |
Comprehensive monitoring of network, servers, and applications. |
Data Collection |
Collection of metrics in numbers and can be viewed via HTTP Endpoints. |
Agents (Zabbix Agent) for collecting performance data, SNMP, IPMI, and JMX support. Supports agentless monitoring for certain scenarios. |
Logging |
Cannot collect or analyze logs. |
Centralized logging analysis is not possible with Zabbix. You can monitor log files, but no analysis possibilities are available. |
Data Visualization |
Data visualization is possible through numbers and graphs. |
Graphical representation of monitored data through charts, graphs, maps, and dashboards. |
Application Metrics |
Application metrics can be collected if Prometheus is integrated with the web application. |
No Application-related metrics/dashboards/Alerts are available at this moment. |
Service Metrics |
Prometheus can collect metrics from web applications. |
Zabbix can monitor services like haproxy, databases MySQL, PostgreSQL, HTTP services, etc., and require configurations/integrations. |
Custom Metrics |
Custom metrics can be collected through the exporters. |
The Anomaly Detection feature is available from version 6.0. |
Alerting System |
Alerting is not possible via Prometheus. |
Robust alerting system with customizable triggers, actions, escalations, and notification channels. Alerts can trigger E-mail Notifications, Slack, Pagerduty, Jira, etc. |
Service Availability |
Not possible. |
Zabbix has a built-in feature to generate Service Availability Reports. Planned and unplanned outage windows require manual input to the script, which generates a service availability report. |
Retention Policy |
Prometheus can retain the metrics for 1 day to multiple days. |
Zabbix persists all the data in its own database. |
Security Features |
Prometheus and most exporters support TLS. Including authentication of clients via TLS client certificates. Details on configuring Prometheus are here. The Go projects share the same TLS library based on the Go crypto/tls library. |
Robust user roles and permissions, granular control over user access, and secure communication between components. |
Kubernetes Compatibility |
Prometheus can be fully integrated with Kubernetes clusters. It takes full advantage of exporters to collect the metrics and show them on the UI. |
Compatibility Zabbix is compatible with K8s and can be used to monitor various aspects of the K8s environment. No Logging using K8s Log Forwarder Application logs cannot be forwarded to the Zabbix server. Container Monitoring with Zabbix The Zabbix Server can be configured to collect data from Zabbix Agents deployed on K8s nodes and applications. Scalability Zabbix also scales horizontally, making it suitable for large K8s deployments with a growing number of nodes and applications. |
Adding a Data Source in Grafana
A data source is the location from where the metrics are being sourced. These metrics are integrated into Grafana for visualization and other purposes.
Prerequisites
You need to have an ‘administrator’ role in Grafana to make these changes.
You need to have connection details of the data source, like database name, login details, URL and port number of the database, and other relevant information.
The below steps can be used to add a custom source:
- First, navigate to the sidebar and open the context menu. Then click on Configurations and then Data Sources.
- To create a data source, add it first. Click on the Connections from the menu and create a data source.
- Now, select the type of data source where the metrics are being sourced from. If it’s a custom data source, then click on custom data source.
- Provide the connection details that are required and were collected in pre-requisites.
- Save and Test the connectivity and ensure there are no errors. Once the data source is saved, you can explore the metrics and also create the dashboards.
Demo on How To Integrate Grafana and Prometheus to Monitor the Metrics of a Server
Assumptions
- Operating System: Centos 7 Linux Virtual Machine
- Internet is available to access the packages
- Root Access to the VM
- Single Machine setup: Grafana, Prometheus, and Node Exporter are installed on a single VM
- Node Exporter
Install Grafana
Disable Selinux and Firewall
systemctl stop firewalld
systemctl disable firewalld
Add yum.repo for Grafana
 [grafana]
 name=grafana
 baseurl=https://packages.grafana.com/oss/rpm
 repo_gpgcheck=1
 enabled=1
 gpgcheck=1
 gpgkey=https://packages.grafana.com/gpg.key
 sslverify=1
sslcacert=/etc/pki/tls/certs/ca-bundle.crt[root@vm-grafana ~]# yum install grafana
[root@vm-grafana ~]# vim /etc/sysconfig/grafana-serverEdit the Grafana configuration file to add the port and IP where Grafana is installed.
[root@vm-grafana ~]# vim /etc/grafana/grafana.ini

Uncomment
# The http port  to use
http_port = 3000
# The public facing domain name used to access grafana from a browser
domain = 127.0.0.1
Restart Grafana Server Service and Check Logs
Log file location.
[root@vm-grafana ~]# tail -f /var/log/grafana/grafana.log
[root@vm-grafana ~]# systemctl restart grafana-server
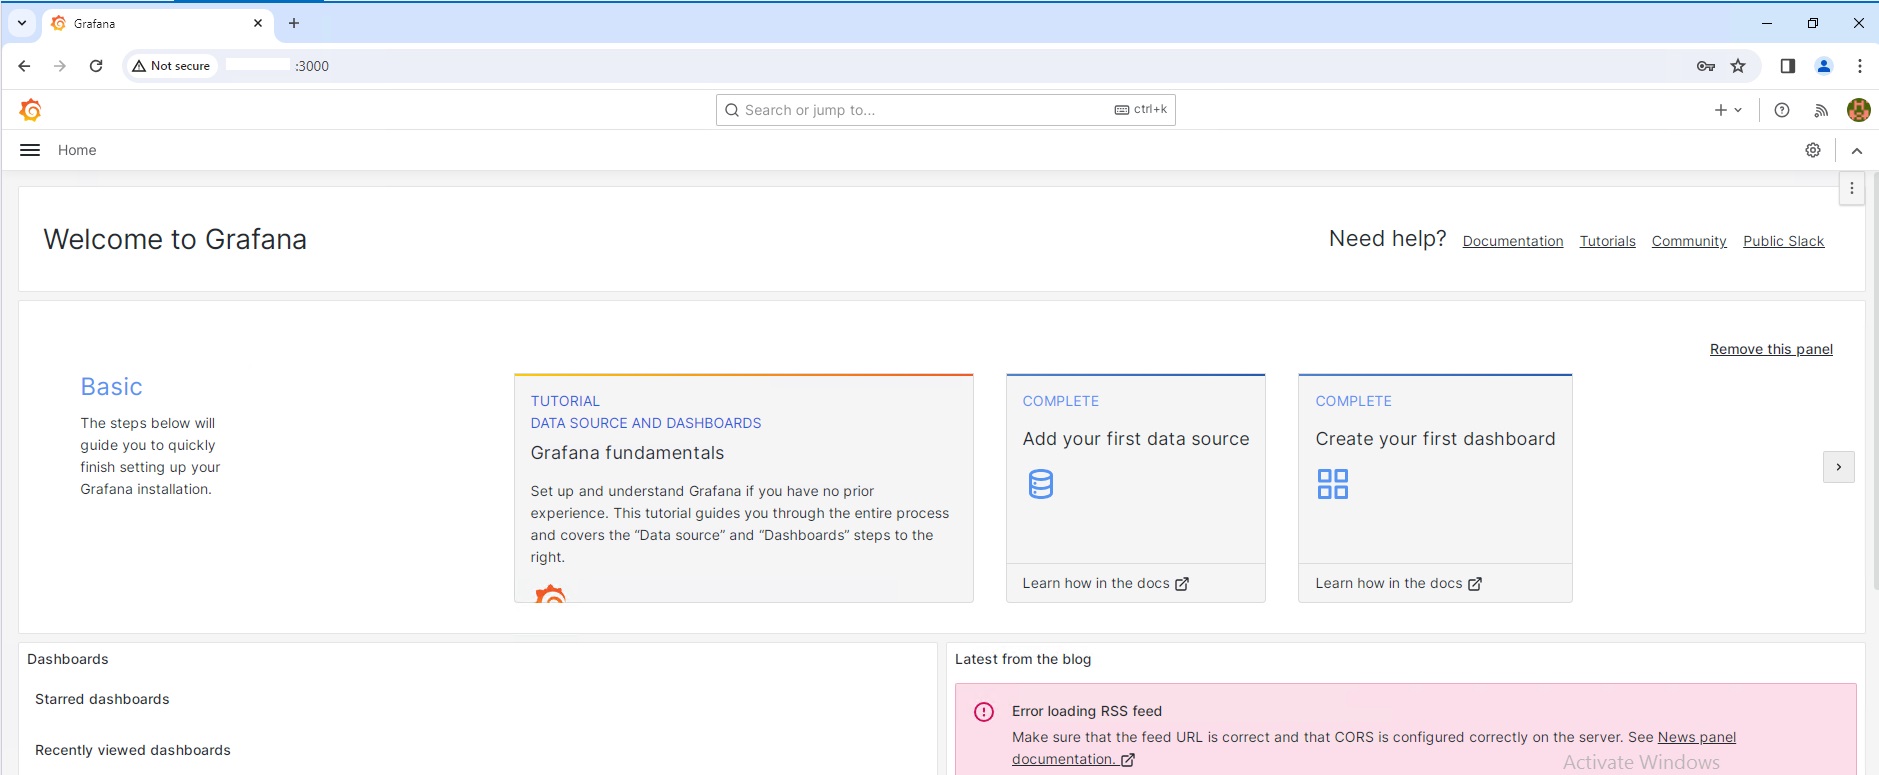
[root@vm-grafana ~]# systemctl status grafana-serverConnect to the Web UI
Grafana will connect to Port 3000.
Install Prometheus and Node-Exporter
Download Package for Prometheus
yum install wget
wget https://github.com/prometheus/prometheus/releases/download/v2.49.1/prometheus-2.49.1.linux-amd64.tar.gz
Saving to: ‘prometheus-2.49.1.linux-amd64.tar.gz’

Installation

useradd --no-create-home --shell /bin/false prometheus
mkdir /etc/Prometheus
mkdir /var/lib/Prometheus
chown prometheus:prometheus /etc/prometheus
chown prometheus:prometheus /var/lib/prometheus
Extract the package.
[root@vm-grafana ~]# tar zxvf prometheus-2.49.1.linux-amd64.tar.gz
mv prometheus-2.49.1.linux-amd64 prometheuspackage
cp prometheuspackage/prometheus /usr/local/bin/
cp prometheuspackage/promtool /usr/local/bin/
chown prometheus:prometheus /usr/local/bin/prometheus
chown prometheus:prometheus /usr/local/bin/promtool
cp -r prometheuspackage/consoles /etc/prometheus
cp -r prometheuspackage/console_libraries /etc/Prometheus
chown -R prometheus:prometheus /etc/prometheus/consoles
chown -R prometheus:prometheus /etc/prometheus/console_libraries
chown prometheus:prometheus /etc/prometheus/prometheus.yml
Edit configuration file.
global:
  scrape_interval: 10s
scrape_configs:
  - job_name: 'prometheus_master'
	scrape_interval: 5s
	static_configs:
  	- targets: ['localhost:9090']
Create a Linux Service file for Prometheus.
vim /etc/systemd/system/prometheus.service

[Unit]
Description=Prometheus
Wants=network-online.target
After=network-online.target

[Service]
User=prometheus
Group=prometheus
Type=simple
ExecStart=/usr/local/bin/prometheus \
--config.file /etc/prometheus/prometheus.yml \
--storage.tsdb.path /var/lib/prometheus/ \
--web.console.templates=/etc/prometheus/consoles \
--web.console.libraries=/etc/prometheus/console_libraries

[Install]
WantedBy=multi-user.target
Start the service.
systemctl daemon-reload
systemctl start prometheus
systemctl status prometheus
Access Prometheus Web UI.

Monitor Linux Server Using Prometheus and Integration With node_exporter
Download the Setup
wget https://github.com/prometheus/node_exporter/releases/download/v1.7.0/node_exporter-1.7.0.linux-amd64.tar.gz
[root@vm-grafana ~]# tar zxvf node_exporter-1.7.0.linux-amd64.tar.gz
[root@vm-grafana ~]# ls -ld node_exporter-1.7.0.linux-amd64
drwxr-xr-x. 2 prometheus prometheus 56 Nov 13 00:03 node_exporter-1.7.0.linux-amd64
Setup Instructions
useradd -rs /bin/false nodeusr
mv node_exporter-1.7.0.linux-amd64/node_exporter /usr/local/bin/
Create a Service File for the Node Exporter
vim /etc/systemd/system/node_exporter.service

[Unit]
Description=Node Exporter
After=network.target
[Service]
User=nodeusr
Group=nodeusr
Type=simple
ExecStart=/usr/local/bin/node_exporter
[Install]
WantedBy=multi-user.target
Reload the System Daemon and Start Node Exporter Service
systemctl daemon-reload
systemctl restart node_exporter
systemctl enable node_exporter
View the metrics browsing node exporter URL.

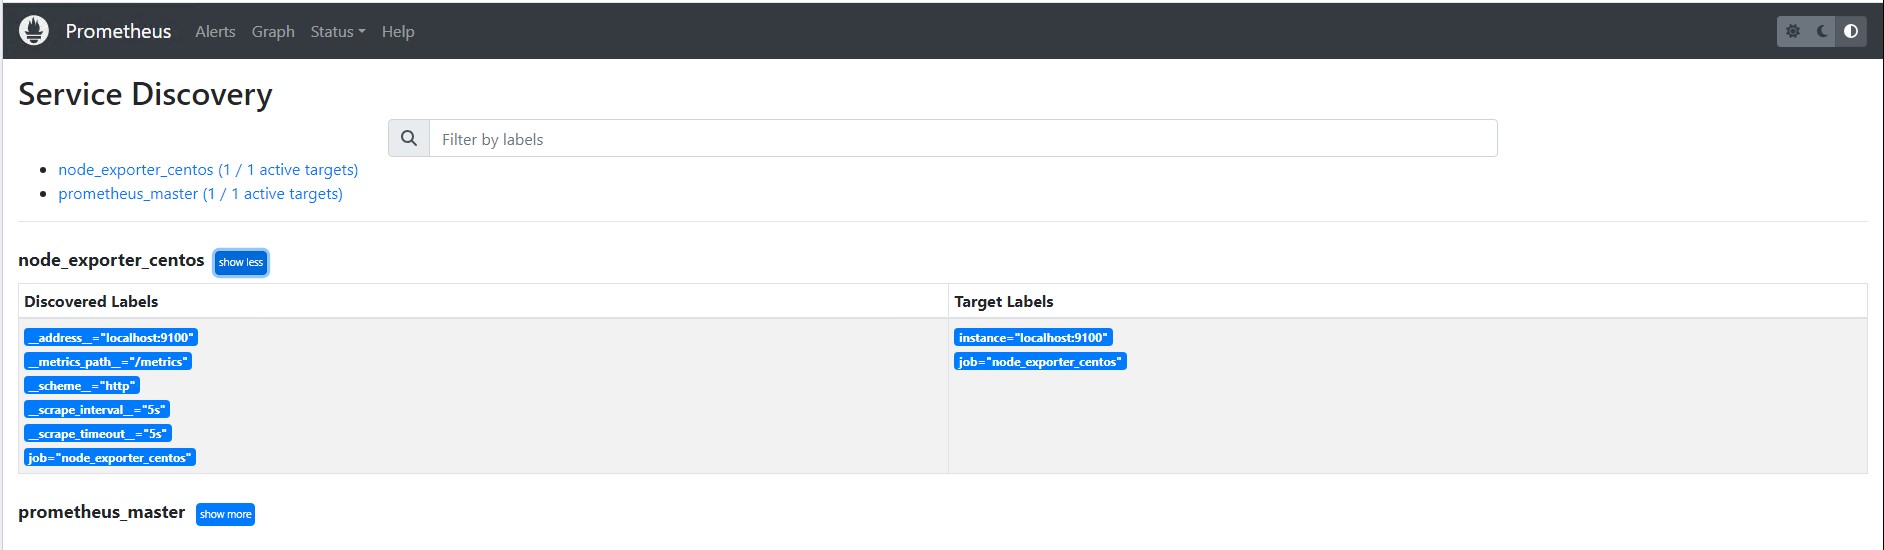
Integrate node_exporter With Prometheus
Login to the Prometheus server and modify the prometheus.yml configuration file. Add the following configurations under the scrape config.
vim /etc/prometheus/prometheus.yml
 - job_name: 'node_exporter_centos'
	scrape_interval: 5s
	static_configs:
  	- targets: ['TARGET_SERVER_IP:9100']
Restart Prometheus service.
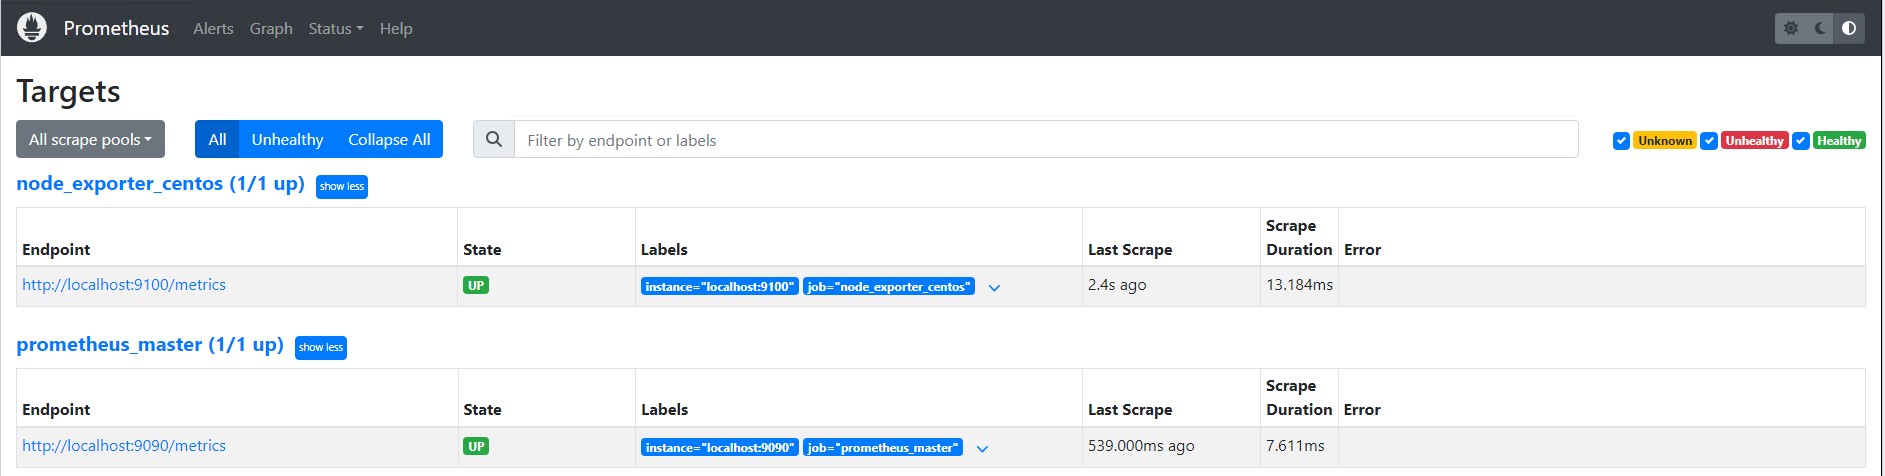
systemctl restart prometheusLogin to Prometheus Server Web Interface, and Check Targets
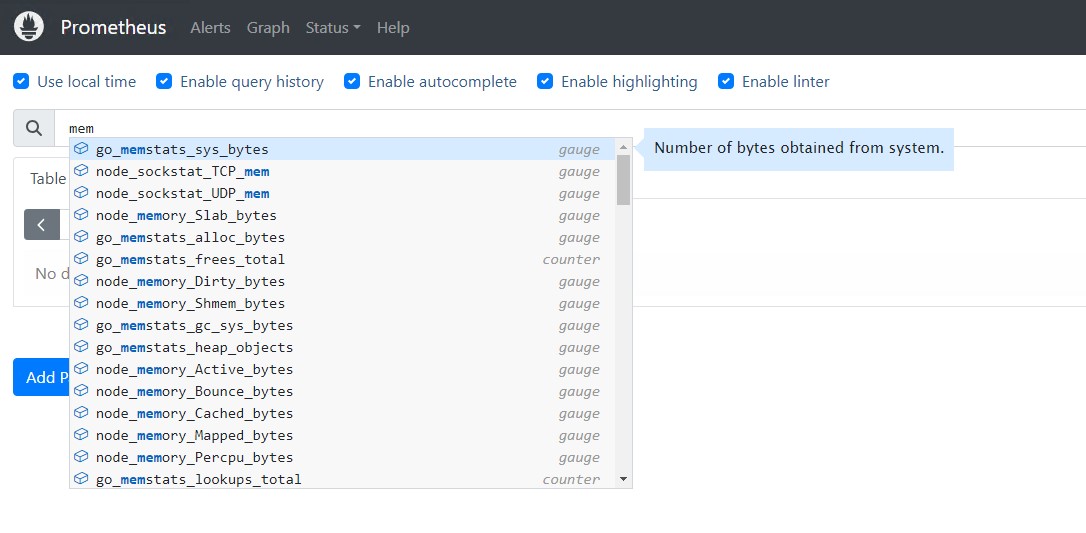
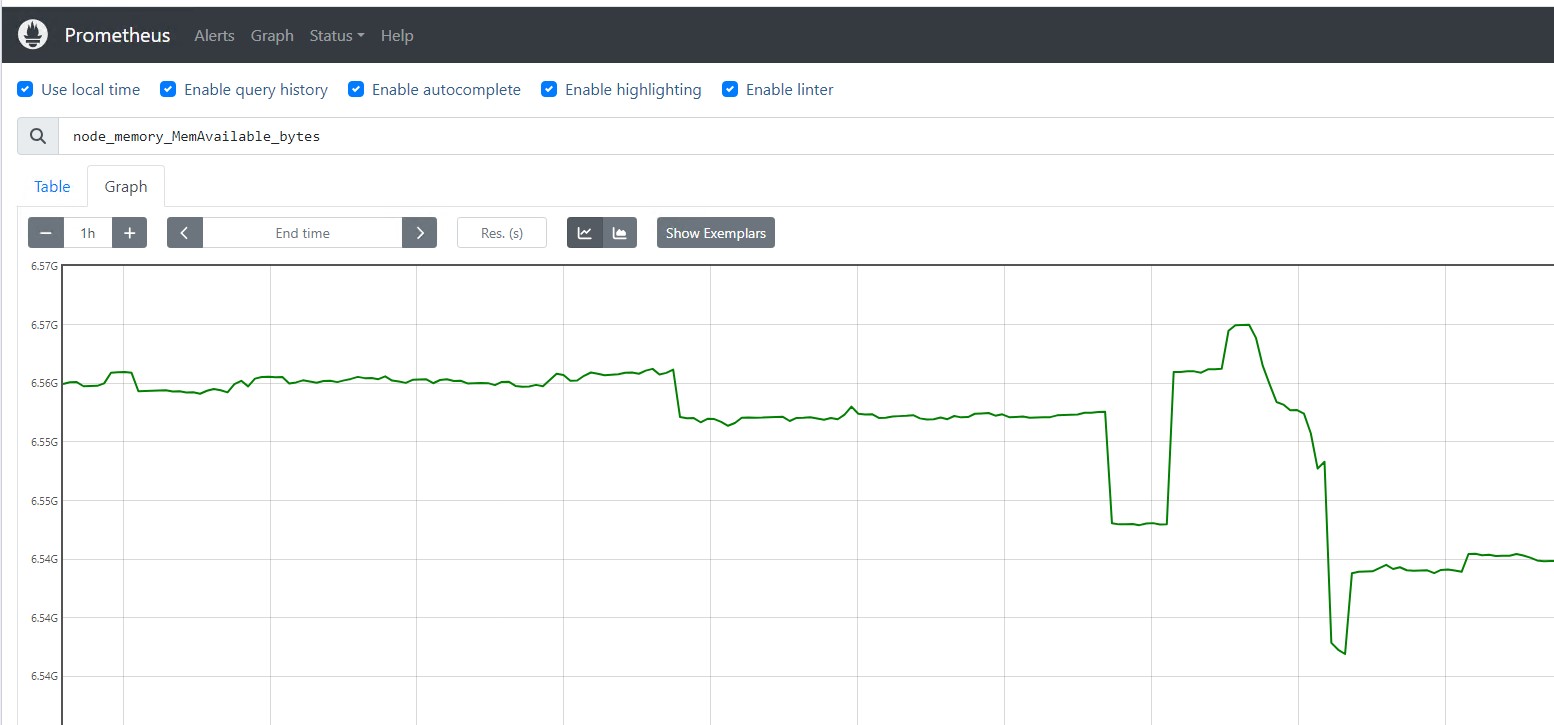
Follow this link.
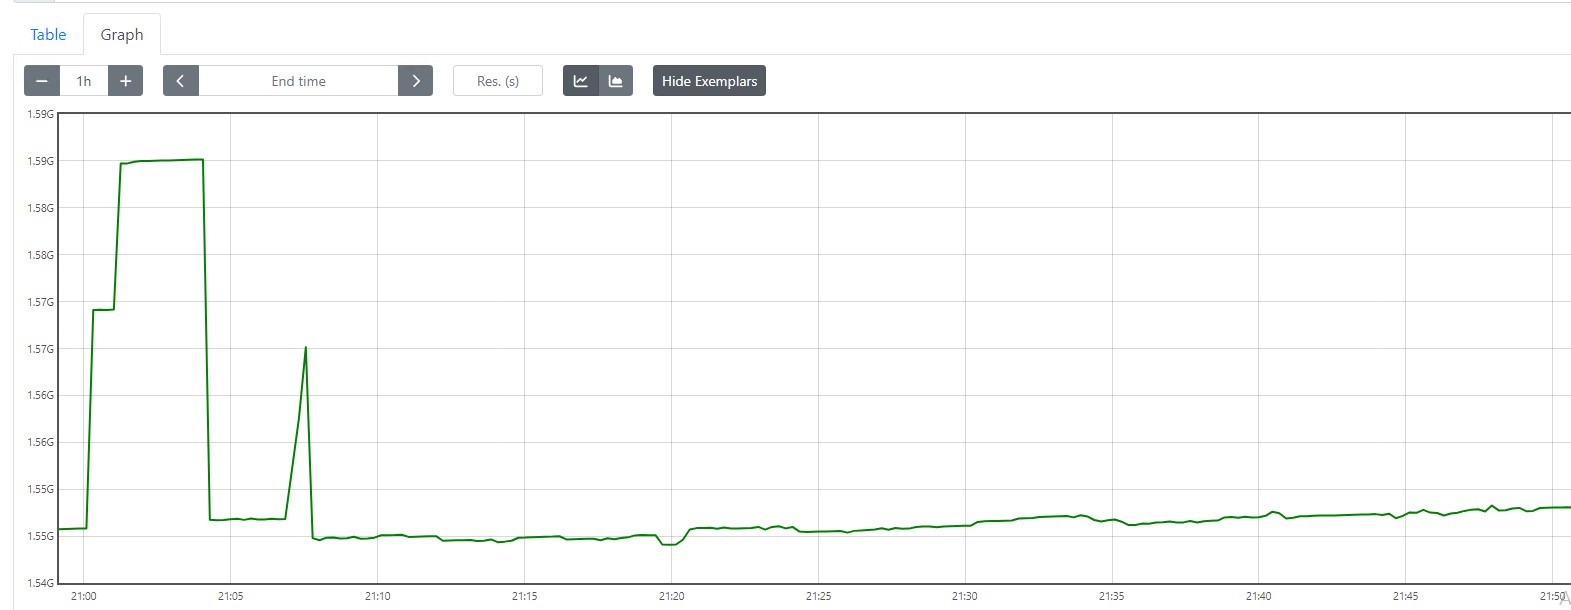
You can click the graph and query any server metrics and click execute to show output. It will show the console output.
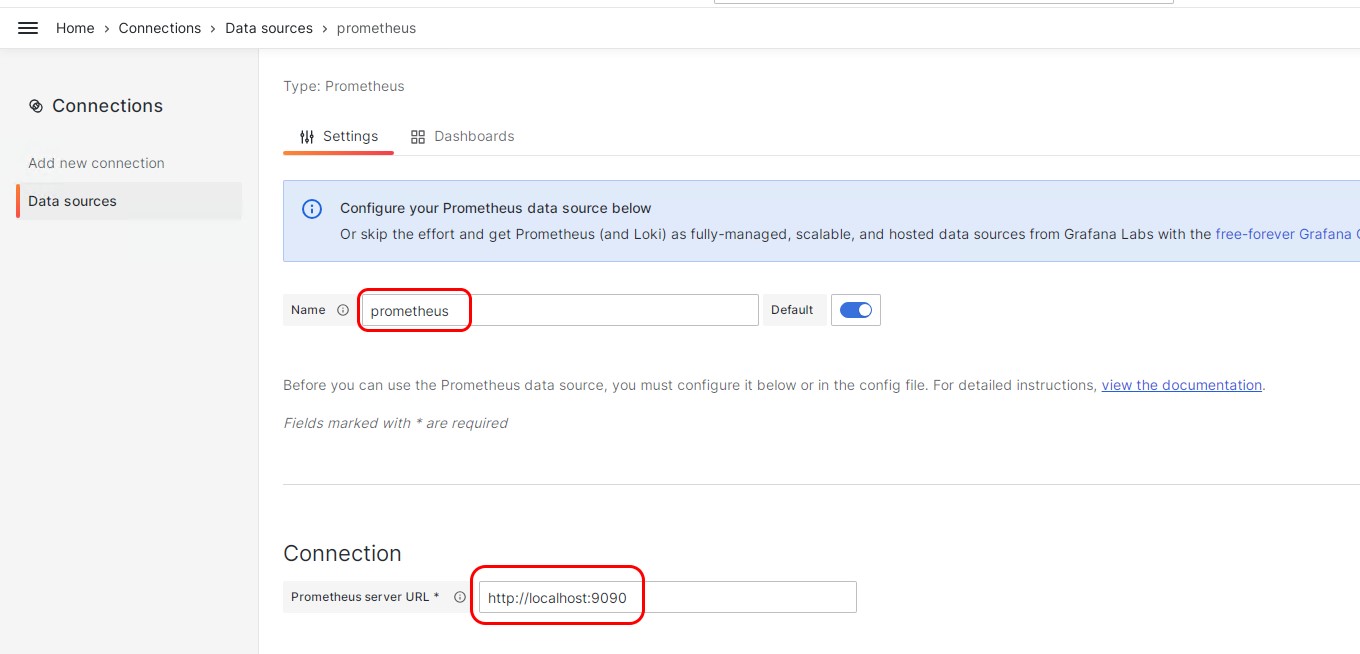
Add Prometheus as DataSource in Grafana
Click on Add a new data source and add Prometheus as the data source by entering the Prometheus URL.
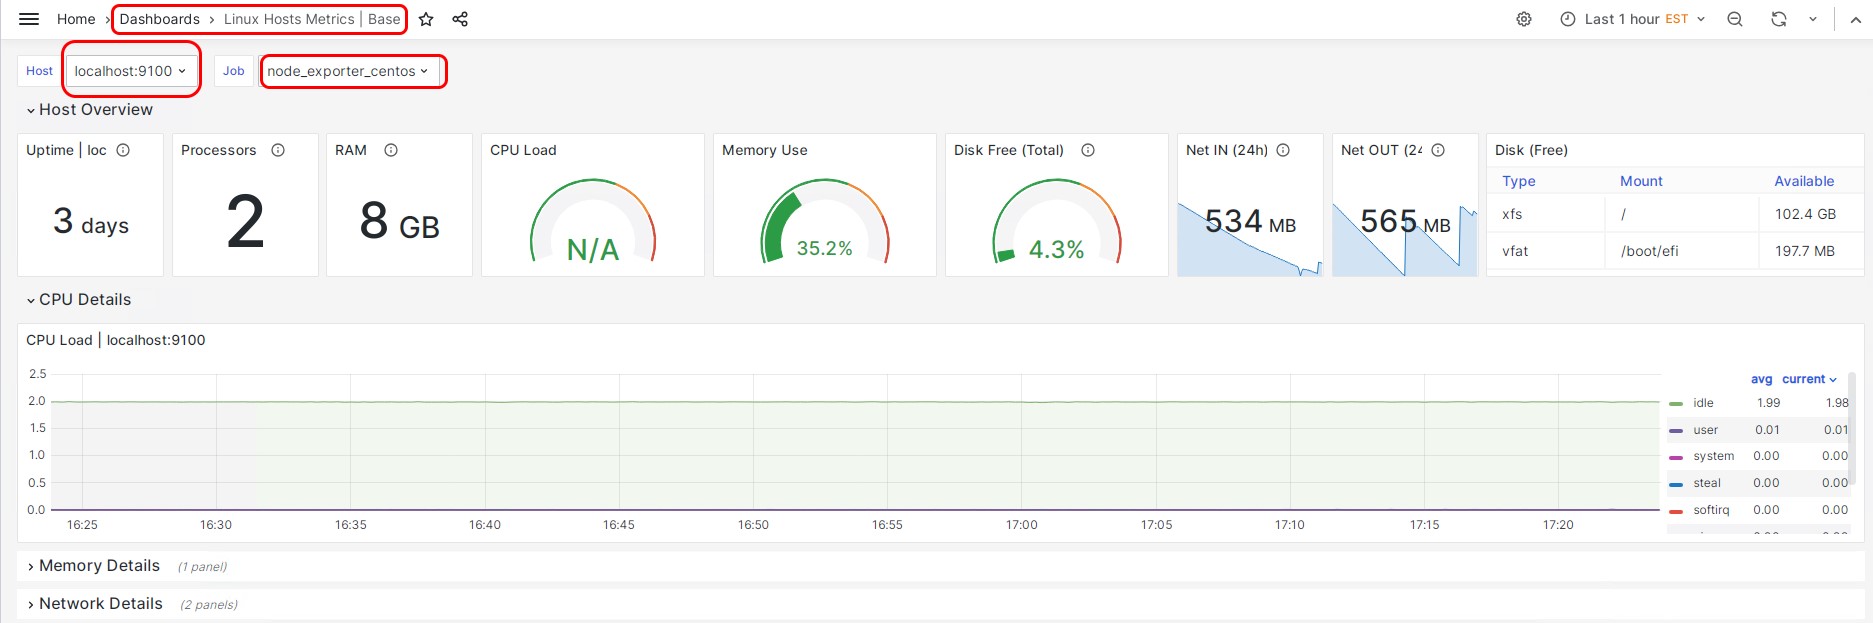
Import a pre-built dashboard from Grafana using this link and ID.
Dashboard ID: 10180
Click on Dashboard and go to the imported dashboard. You should now be able to see all the metrics of the server.
Next Steps
Users can explore more on setting up alerts, adding Role Based Access Control, importing metrics from a remote server, and Grafana Administration as the next steps.
Opinions expressed by DZone contributors are their own.
Comments