Jenkins: Publish Maven Artifacts to Nexus OSS Using Pipelines or Maven Jobs
Take a look at how you can further improve your Continuous Integration and Delivery pipelines by making it simple to reproduce builds in different platforms.
Join the DZone community and get the full member experience.
Join For FreeJenkins, in conjunction with Nexus OSS, forms a powerful combination for managing the deployment of Maven artifacts. Crucial in the Software Development Life Cycle (SDLC), this process typically falls within the build and release phases of the SDLC, where automating artifact deployment ensures consistency, reliability, and efficiency. For developers and DevOps engineers, understanding how to seamlessly integrate Jenkins pipelines or Maven jobs with Nexus OSS for artifact publication is essential for streamlining software delivery.
In this article, we will cover the usage of Jenkins along with Nexus OSS and go through how we can publish Maven artifacts using Jenkins. Leveraging these tools effectively is the key to accelerating your development cycles and ensuring robust artifact management. Moreover, by mastering this integration, you'll gain the ability to automate artifact deployment with confidence, ultimately enhancing productivity and the quality of your software.
So let's get our hands dirty.
Assumptions
- Jenkins is running in: http://localhost:8080/
- Nexus OSS 3 is running in: http://172.17.0.3:8081/
You can get more details about the Docker images I used in this article from these resources:
- Jenkins Continuous Integration and Delivery server
- Sonatype Nexus Repository Docker: sonatype/nexus3
I am using my own fork of the Cargo EE Java project as source code to build the artifact. The main difference is I'm not using it as SNAPSHOT.
Step 1: Install "Nexus Artifact Uploader" and "Pipeline Utility Steps" Plugins
The Nexus plugin IDs we are going to install are nexus-artifact-uploader and pipeline-utility-steps.
For this, go to http://localhost:8080/pluginManager/available, search for "nexus-artifact-uploader," and install the plugin.

- nexus-artifact-uploader (plugins.jenkins.io)
For steps to get help to easily read a pom.xml file, let's do the same for the Jenkins plugin id: pipeline-utility-steps. You can find more details about this plugin which contains a lot of very useful steps in the documentation about Pipeline Utility Steps. This plugin is a must if you are working with pipelines since contains a lot of useful steps.
Step 2: Create a Hosted Repository in Nexus
If you already have your repository configured in Nexus then you can skip this step; otherwise, you can create a Maven 2-hosted repository in Nexus OSS where we will upload our artifacts.
In the image below, we are creating a hosted repository named "repository-example," which we'll use in this article.
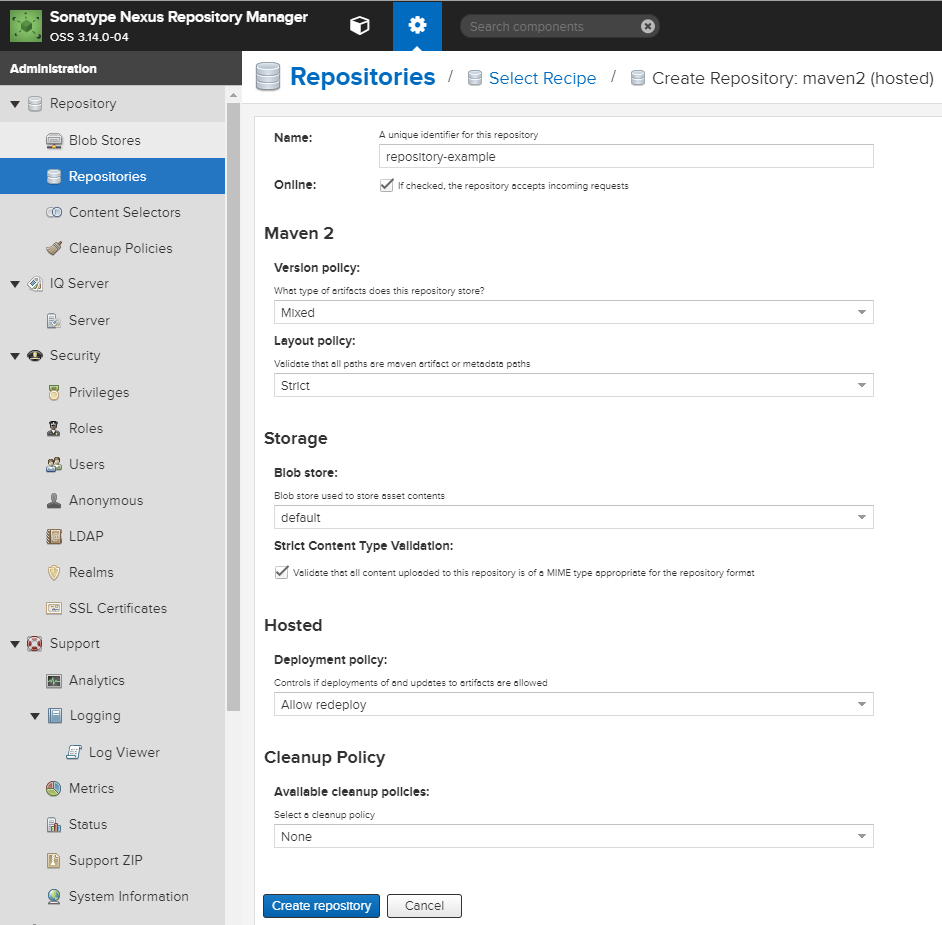
As for this example, we have chosen these configurations:
- Deployment policy: allow redeploy
- If you want to deploy as many times as you want the same version
- Storage: default
- Note: you can get deep on this and go for AWS S3 storage, which is a very nice feature enabled in the free version for Nexus.
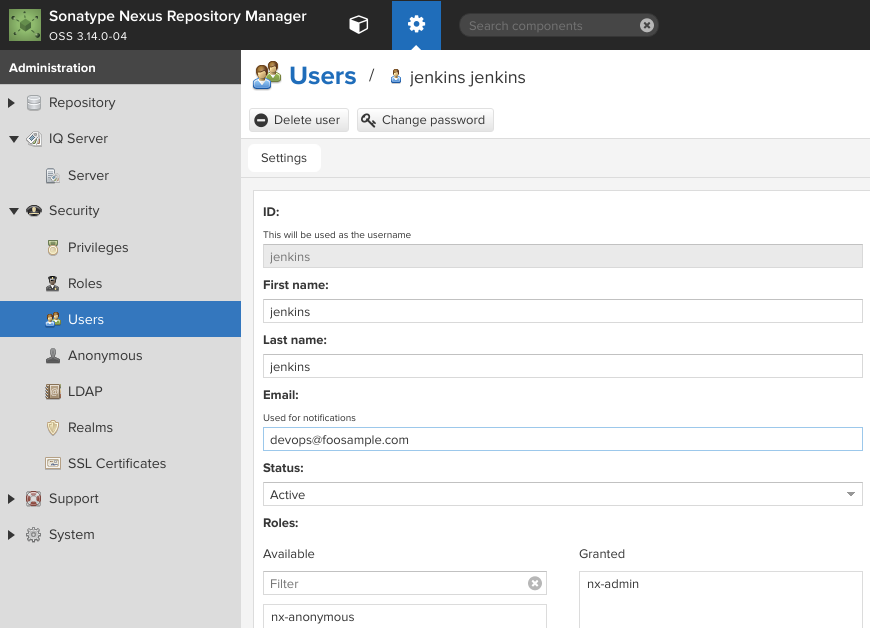
Step 3: Create a Valid User in Nexus OSS
If you already have a login, you can skip this step. An example of how a user could look might be found in the below image. For simplicity's sake, this has admin rights, so you can choose and configure a user according to your needs.
Step 4: Create Valid Jenkins Credentials To Authenticate To Nexus OSS
In this step, we should add a Jenkins credential of the kind "Username with password" with a valid login to our Nexus instance, and let's give it an ID of "nexus-credentials."
Go to: http://localhost:8080/credentials/.
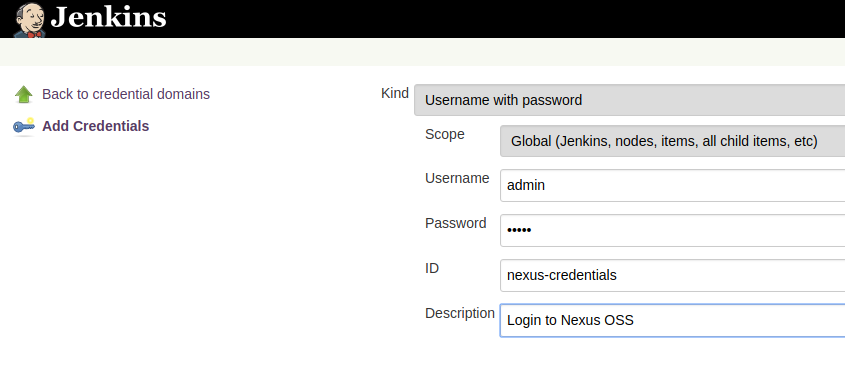
Note: I am using the default scope and domains in an as-is Jenkins installation.
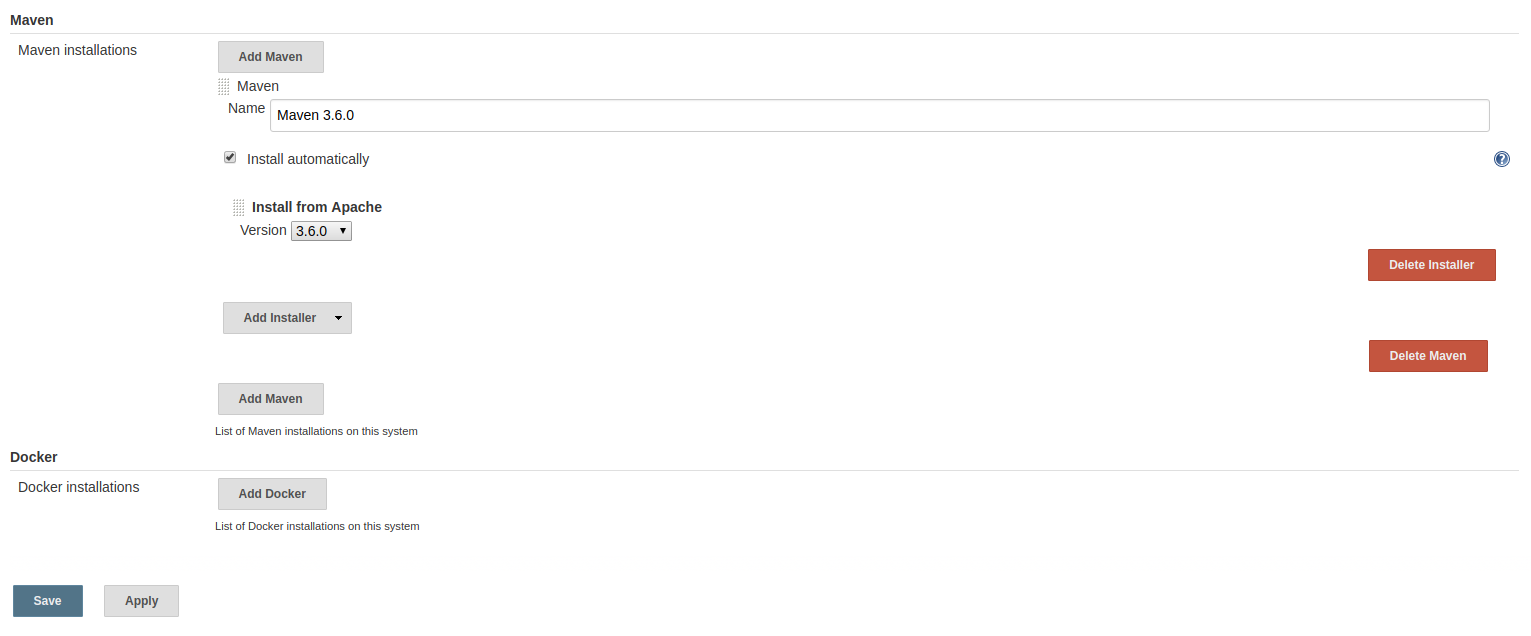
Step 5: Set Up Maven as A Managed Tool
If you already have Maven in your classpath whenever your build will run (slave or master) then you should be fine and skip this; otherwise, it's always good to have it as a managed tool since Jenkins has built-in support for Maven.
Go to http://localhost:8080/configureTools/ and set a Maven configuration. For this example, I chose Maven 3.6.0, so I'll name this as "Maven 3.6.0".
Publishing Artifacts Using Jenkins Pipelines
Below is a script I am using to publish an artifact in Nexus OSS.
pipeline {

    agent {
        label "master"
    }

    tools {
        // Note: this should match with the tool name configured in your jenkins instance (JENKINS_URL/configureTools/)
        maven "Maven 3.6.0"
    }

    environment {
        // This can be nexus3 or nexus2
        NEXUS_VERSION = "nexus3"
        // This can be http or https
        NEXUS_PROTOCOL = "http"
        // Where your Nexus is running
        NEXUS_URL = "172.17.0.3:8081"
        // Repository where we will upload the artifact
        NEXUS_REPOSITORY = "repository-example"
        // Jenkins credential id to authenticate to Nexus OSS
        NEXUS_CREDENTIAL_ID = "nexus-credentials"
    }

    stages {
        stage("clone code") {
            steps {
                script {
                    // Let's clone the source
                    git 'https://github.com/danielalejandrohc/cargotracker.git';
                }
            }
        }

        stage("mvn build") {
            steps {
                script {
                    // If you are using Windows then you should use "bat" step
                    // Since unit testing is out of the scope we skip them
                    sh "mvn package -DskipTests=true"
                }
            }
        }

        stage("publish to nexus") {
            steps {
                script {
                    // Read POM xml file using 'readMavenPom' step , this step 'readMavenPom' is included in: https://plugins.jenkins.io/pipeline-utility-steps
                    pom = readMavenPom file: "pom.xml";
                    // Find built artifact under target folder
                    filesByGlob = findFiles(glob: "target/*.${pom.packaging}");
                    // Print some info from the artifact found
                    echo "${filesByGlob[0].name} ${filesByGlob[0].path} ${filesByGlob[0].directory} ${filesByGlob[0].length} ${filesByGlob[0].lastModified}"
                    // Extract the path from the File found
                    artifactPath = filesByGlob[0].path;
                    // Assign to a boolean response verifying If the artifact name exists
                    artifactExists = fileExists artifactPath;

                    if(artifactExists) {
                        echo "*** File: ${artifactPath}, group: ${pom.groupId}, packaging: ${pom.packaging}, version ${pom.version}";

                        nexusArtifactUploader(
                            nexusVersion: NEXUS_VERSION,
                            protocol: NEXUS_PROTOCOL,
                            nexusUrl: NEXUS_URL,
                            groupId: pom.groupId,
                            version: pom.version,
                            repository: NEXUS_REPOSITORY,
                            credentialsId: NEXUS_CREDENTIAL_ID,
                            artifacts: [
                                // Artifact generated such as .jar, .ear and .war files.
                                [artifactId: pom.artifactId,
                                classifier: '',
                                file: artifactPath,
                                type: pom.packaging],

                                // Lets upload the pom.xml file for additional information for Transitive dependencies
                                [artifactId: pom.artifactId,
                                classifier: '',
                                file: "pom.xml",
                                type: "pom"]
                            ]
                        );

                    } else {
                        error "*** File: ${artifactPath}, could not be found";
                    }
                }
            }
        }

    }
}
Let's go through some very important details.
The current plugin used in this article allows the use of the configuration of Nexus with versions of Nexus 3 and Nexus 2 along with HTTPS and HTTP protocols.
The magic here is nexusArtifactUploader, so let's decompose some of the parameters:
nexusVersion: It can be nexus3 or nexus2.protocol: It can be https or http.nexusUrl: For this example, it is the address where you have located your Nexus OSS instance without including the protocol "http" or "https." For this example, we use 172.17.0.3:8081, which is the IP address of my Docker container.repository: The name of the repository, in this case, is the one I created in Step 3.credentialsId: This is the ID of the credential stored in Jenkins. Try to specify a mnemonic ID in Jenkins. Otherwise, this will be auto-generated in Jenkins, assigning it a random hash value.artifacts: This is very important. A lot of examples I reviewed only upload the binary artifact, but it's so critical to upload our pom.xml file as type "pom." This is important to allow transitive dependencies in case our artifacts contain more information. Just as another project referencing it might need some "extra" information to figure out how or what dependencies to include, a lot of your builds might be just fine even without uploading this. It could compile or package them fine but you might face hard to trackRuntimeExceptionsdue to a lack of dependencies. You could face issues with this kind of message in your Maven log builds:
[WARNING] The POM for groupId:artifactId:version is missing, no dependency information
available- In order to avoid the messages above, we always should upload our pom.xml to Nexus, so that the parameter accepts an array of artifacts.
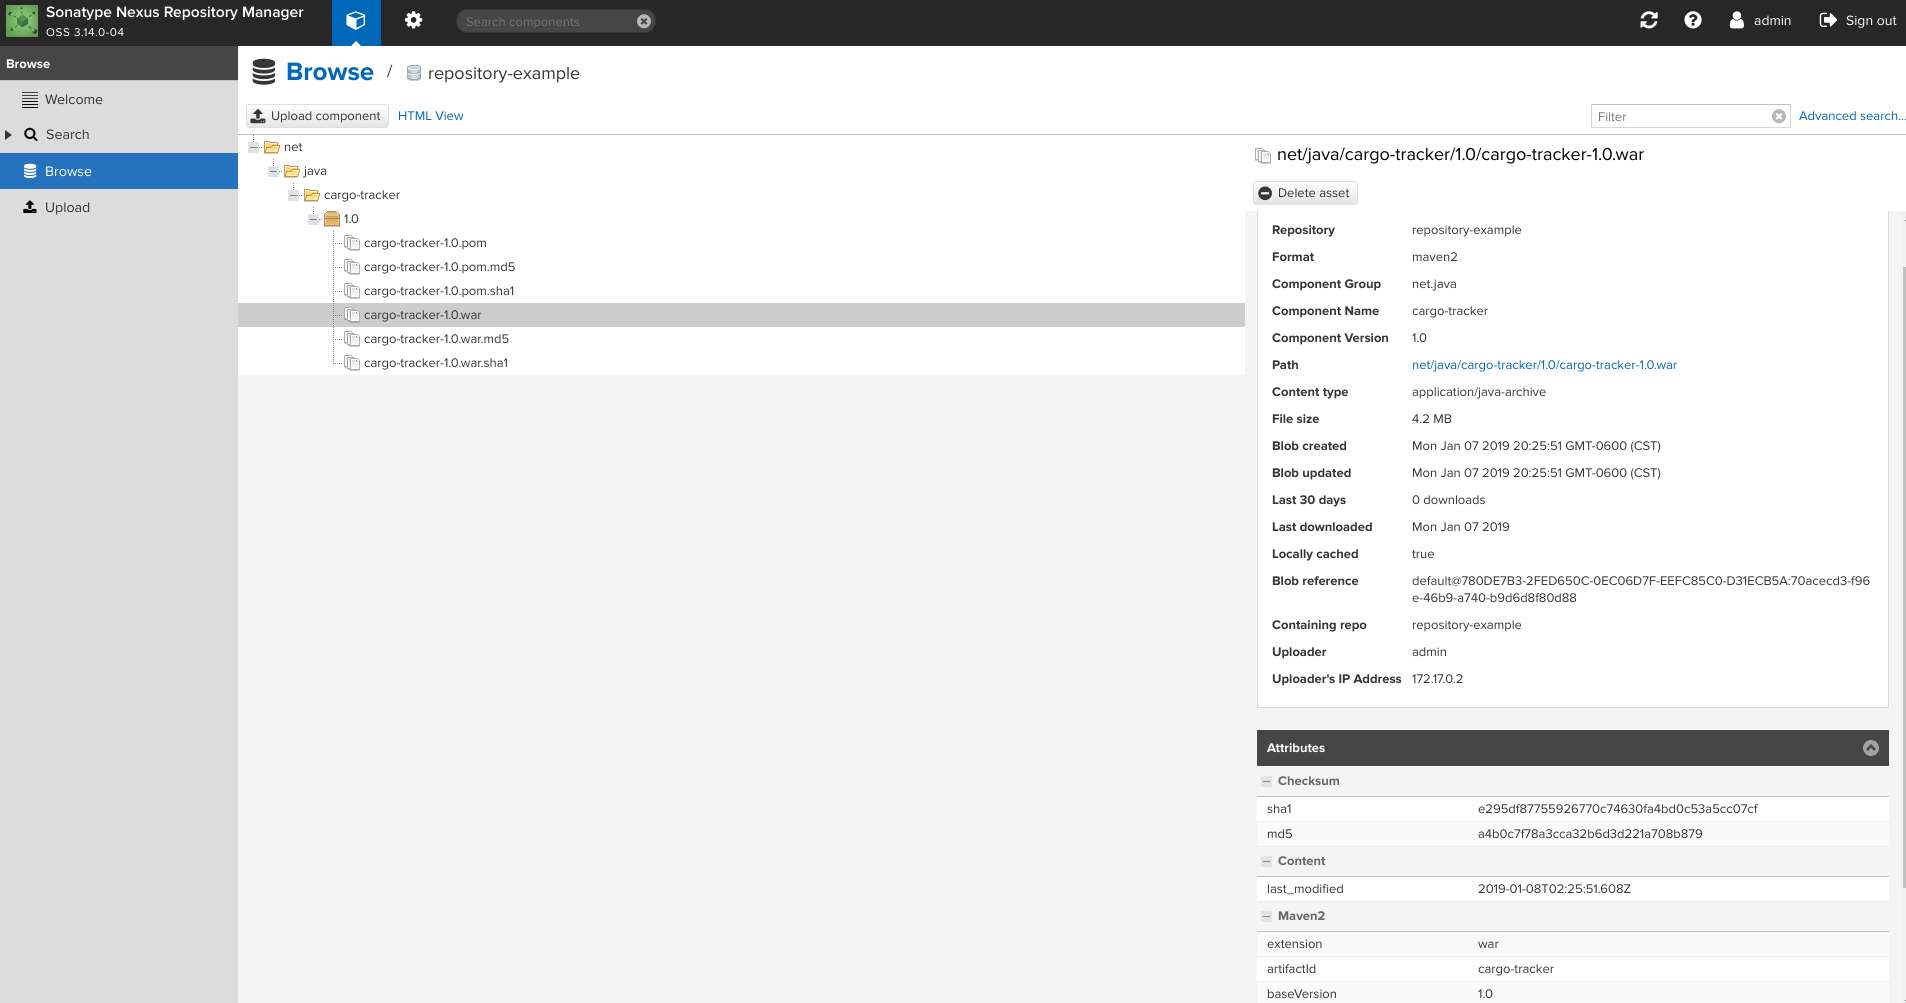
You can clone the code in this GitHub repository with the script nexus/uploadArtifacts.groovy.
The result should look very similar to this in our Nexus instance:
Publishing Artifacts Using Maven Job
First, I am not a fan of this type of job since it has heavy I/O operations in the folder job definition. In my personal opinion, all of these should happen exclusively in the workspace.
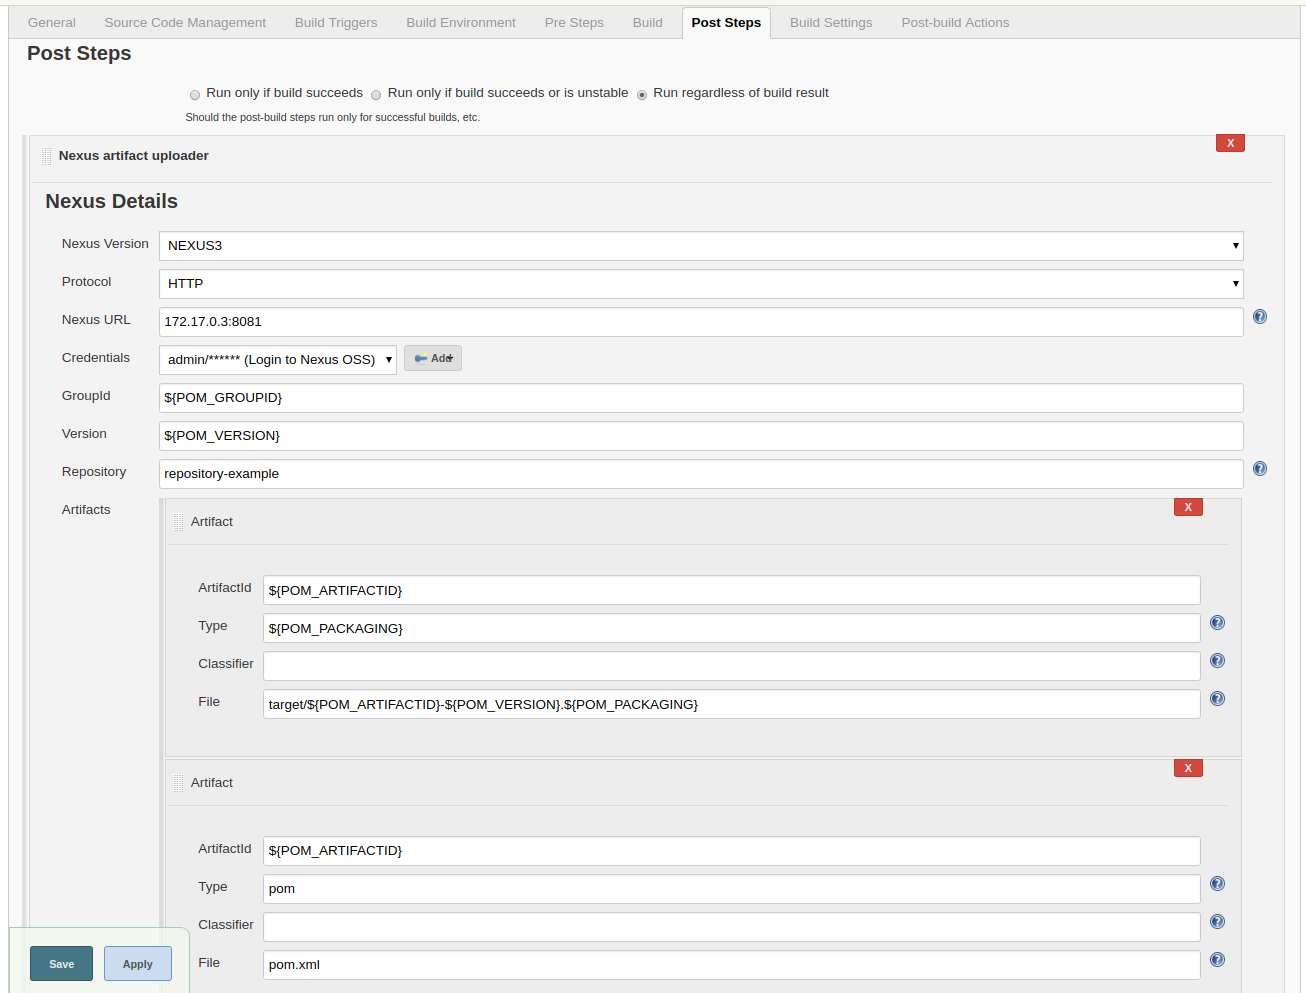
So if we are using this type of job, we can perform exactly the same task we did in the previous example using Pipelines. This job has the particularity helping us define these variables which are quite self-explained with the information extracted from the pom.xml file:
POM_DISPLAYNAMEPOM_VERSIONPOM_GROUPIDPOM_ARTIFACTIDPOM_PACKAGING
Notice we are dynamically building the artifact name using the expression: target/${POM_ARTIFACTID}-${POM_VERSION}.${POM_PACKAGING}, but you know this can vary if you set a custom artifact name in the pom.xml.
- Repository URL: https://github.com/danielalejandrohc/cargotracker.git, branch: master
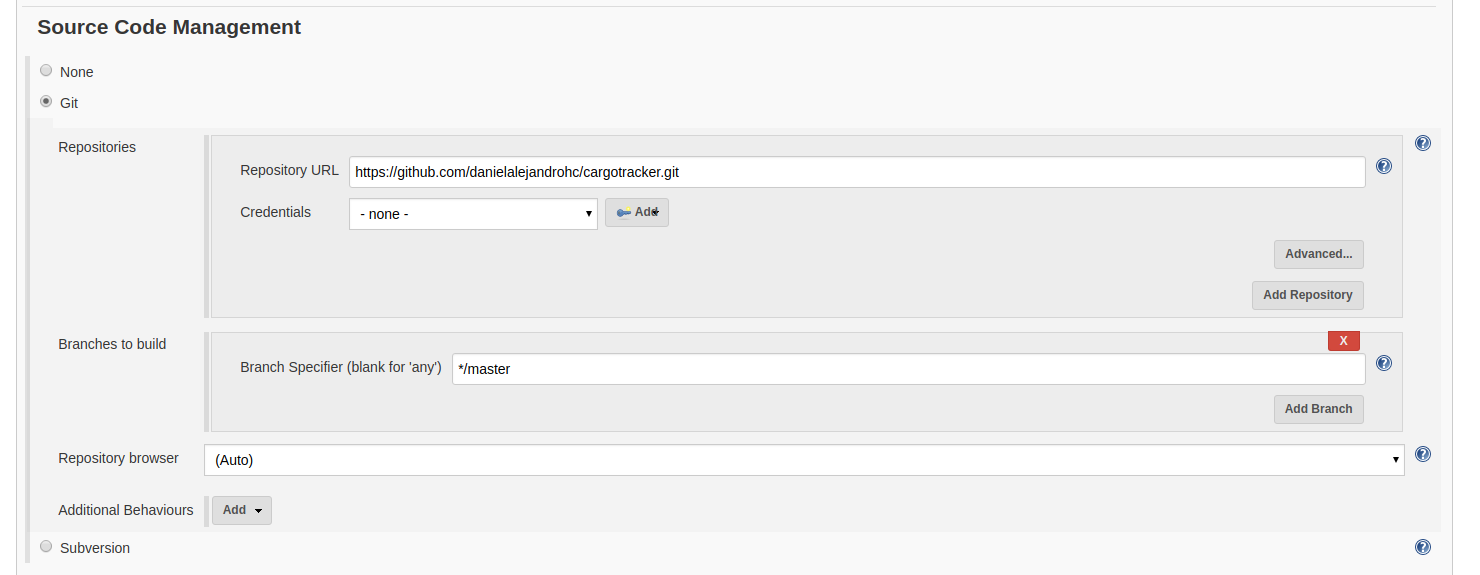
- Root POM: pom.xml, Goals:
package -DskipTests=true

- In the post steps section, we set the final step to publish the artifact to Nexus OSS.
Conclusion
Having a way to distribute our artifacts is crucial to performing CI and CD. Having artifacts centralized in our organization can easily reduce the efforts to reproduce builds in different platforms. This means developers can connect their Maven settings.xml and perform a local build or we can migrate our CI platform without having to deal with moving artifacts from one place to another because they were stored locally. Nowadays, the most popular products for artifacts allow us to set our storage in the cloud so we can decouple one more layer providing us more availability and getting rid of worries about limited storage blocking us to delivery software.
Opinions expressed by DZone contributors are their own.
Comments