Using OKTA as Client Provider in Mulesoft
There are many ways to secure your API in Mulesoft and in this article we are going to address the topic of identity and access control with OpenID connect.
Join the DZone community and get the full member experience.
Join For FreeThere are many ways to secure your API in Mulesoft and in this article we are going to address the topic of identity and access control with OpenID connect. We are going to integrate our AnyPoint platform with an OpenID Connect Provider (OKTA) to provide the OAuth feature to our Anypoint platform.
OpenID Connect is an identity layer on top of the OAuth 2.0 protocol and it has all the OAuth 2.0 capabilities integrated with the protocol itself.
Before we begin let's look into the basics of OAuth2
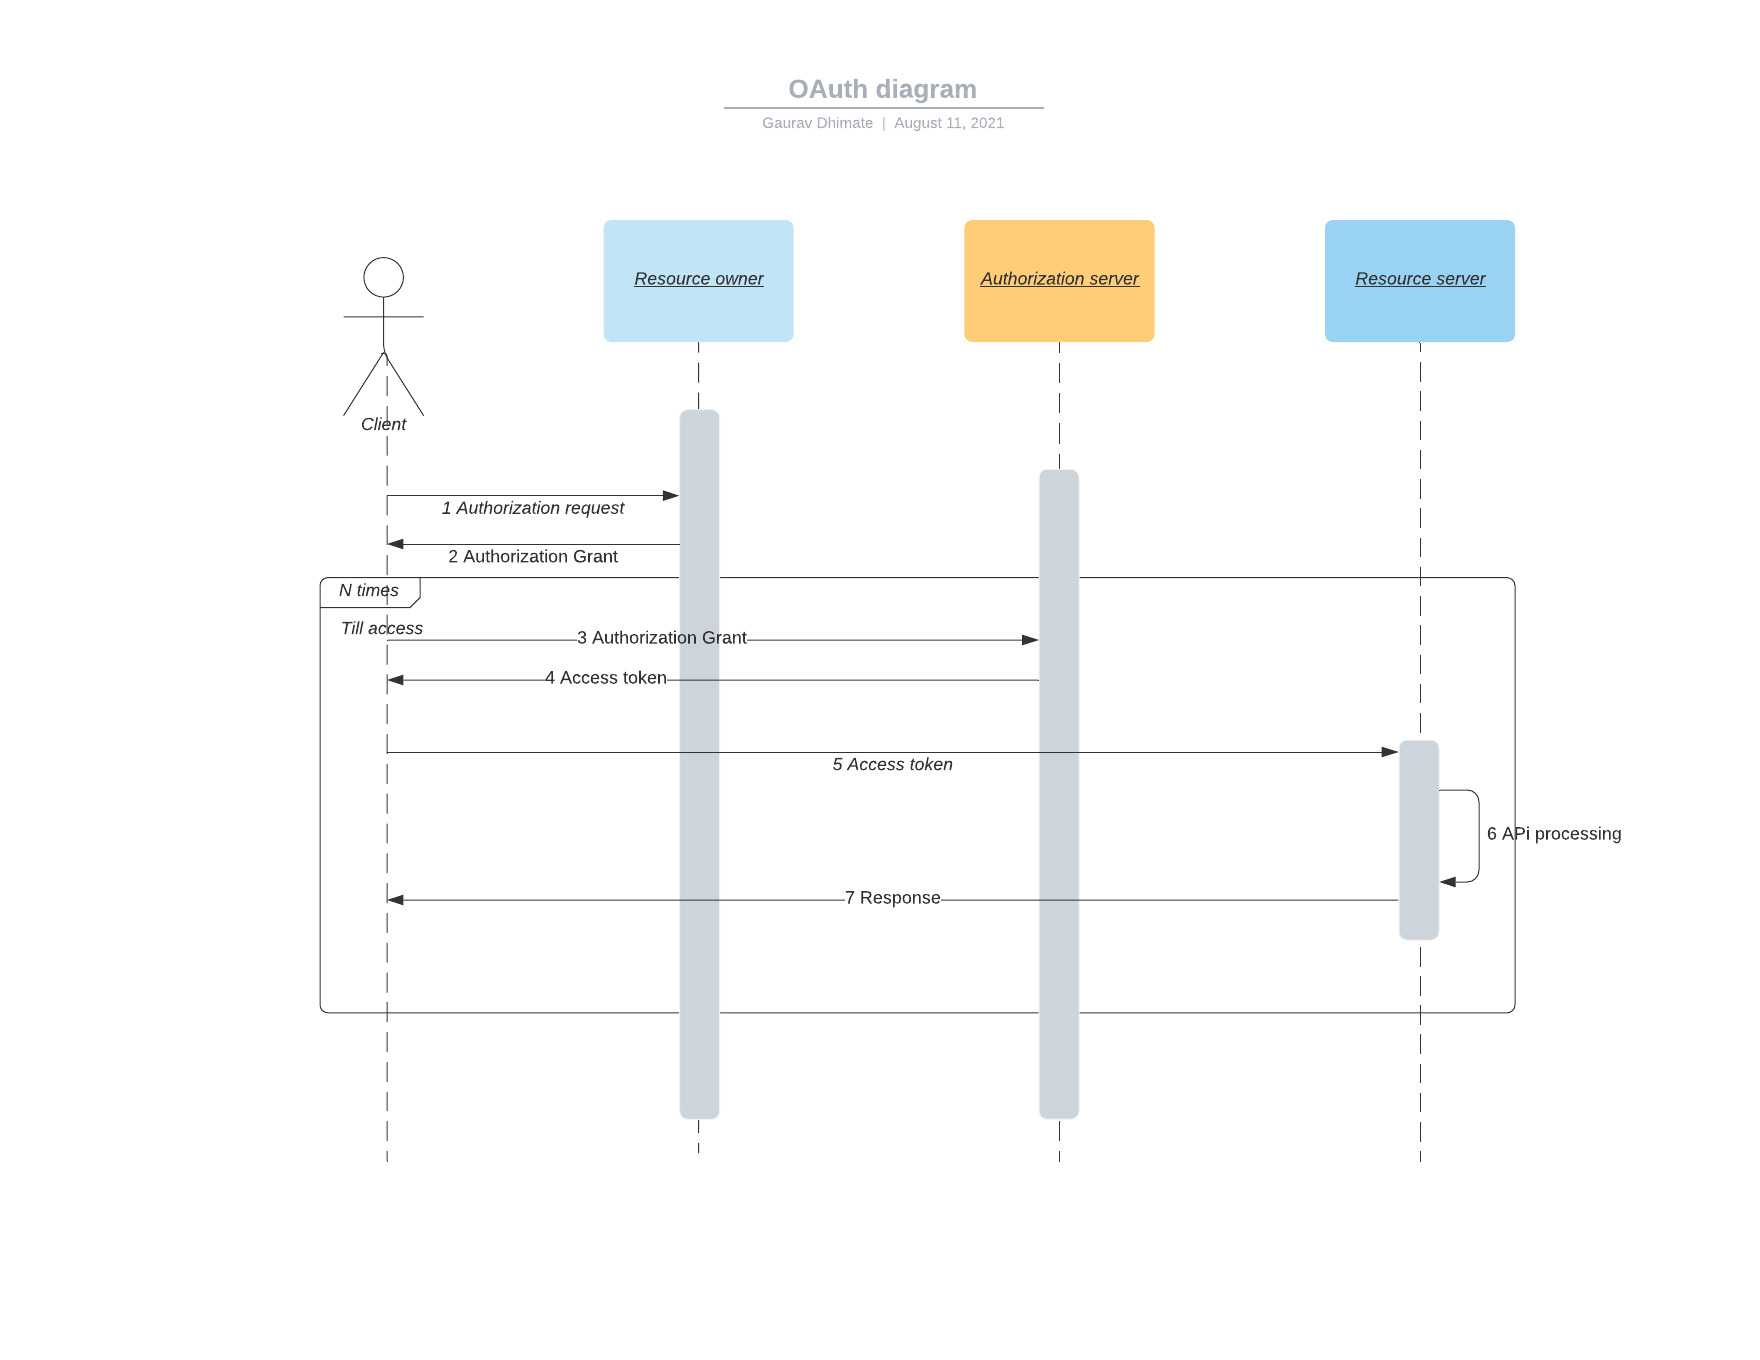
Roles:
- Resource Owner: The owner of the resources that we are trying to access, in our case it will be the Anypoint platform.
- Client: The application/user that wants to access the resource, in our case it will be API users.
- Authorization Server: The authorization service that authenticates the resource owner and/or the client, issues access tokens to the client, and tracks their validity, in our case, it will be the OKTA server.
- Resource Server: The service hosting the protected resources. The resource server must be able to validate the tokens issued by the authorization server, in our case, it will be API deployed on the Runtime manager
Access token:
Access token prove that the resource owner authorizes the client to act on their behalf over specific resources during a limited amount of time.
OAuth 2.0 Authorization Grant Types :
In OAuth 2.0, the term grant type refers to the way an application gets an access token
- Authorization Code: The Authorization Code grant type is used by confidential and public clients to exchange an authorization code for an access token.
- Implicit: The authorization server gives the access token to the user-agent so it can forward the token to the client
- Resource Owner Password Credentials: The Resource Owner Credentials Grant Type uses the username and the password credentials of a Resource Owner (user) to authorize and access protected data from a Resource Server
- Client Credentials: The Client Credentials Grant Type uses the client_id and the client_secret credentials of a Client to authorize and access protected data from a Resource Server
Now let's see the step-by-step configuration of the same.
STEPS:
Create an account in Okta: Create a developer account at https://developer.okta.com/signup/ or if you have enterprise account you can use that.
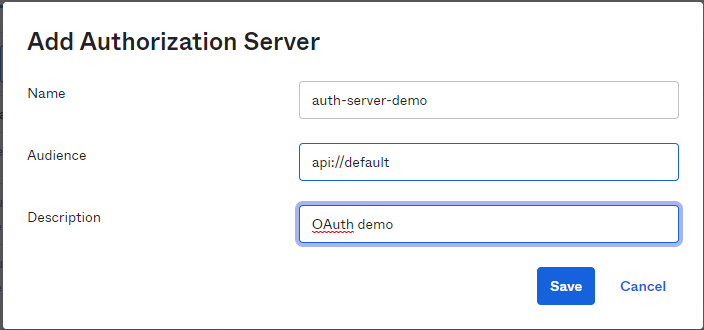
Create Authorization server: Once we have created the OKTA account we need to create an Authorization server which is going to validate our client.
Go to Security --> API --> Authorization Servers

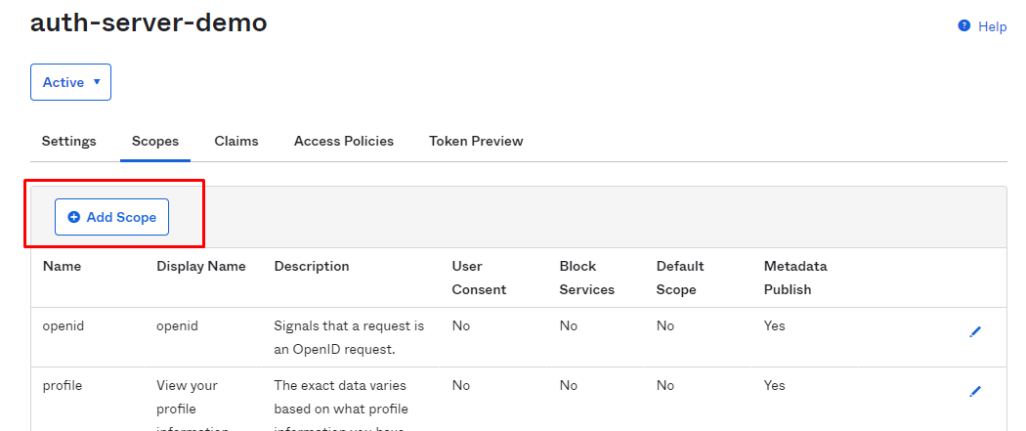
Add scope: For the auth-server-demo server let's create a custom scope.
auth-server-demo --> scope


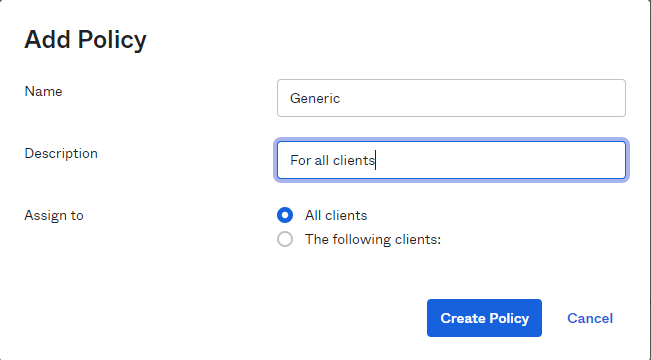
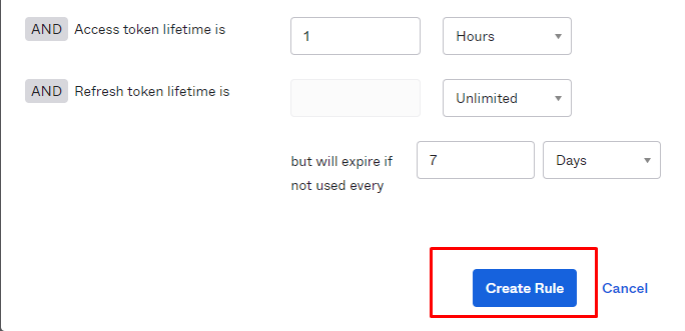
Let's add policy
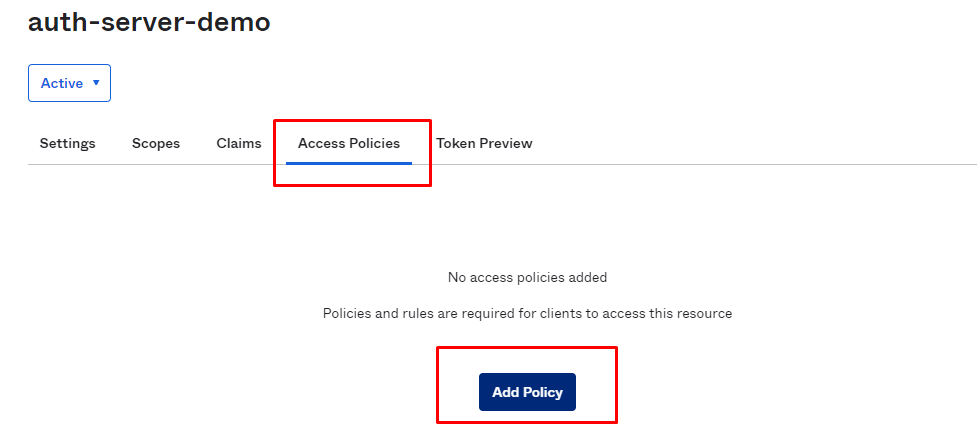
We will create a generic policy for all clients to this server.

Get metadata URL: Meta data URL will have all the details we need to configure OKTA with the Anypoint platform. All the required URL's will be in this file.
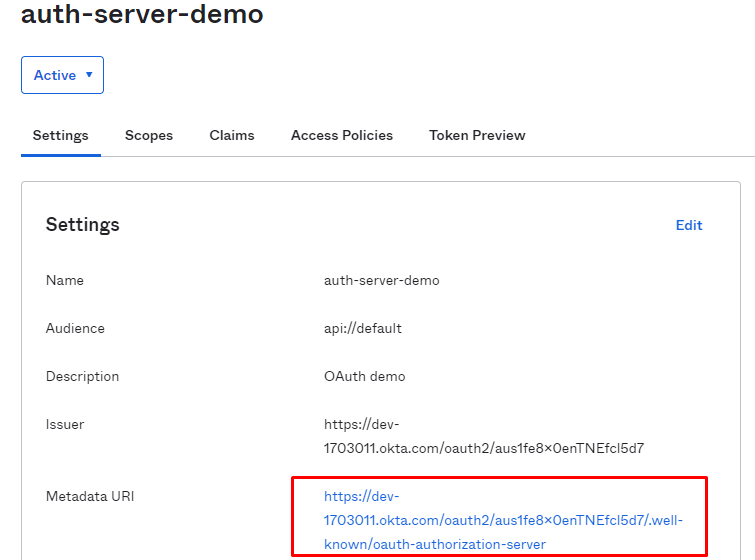
Sample content of the file is as below:
{
   "issuer":"https://dev-1703011.okta.com/oauth2/aus1fe8x0enTNEfcl5d7",
   "authorization_endpoint":"https://dev-1703011.okta.com/oauth2/aus1fe8x0enTNEfcl5d7/v1/authorize",
   "token_endpoint":"https://dev-1703011.okta.com/oauth2/aus1fe8x0enTNEfcl5d7/v1/token",
   "registration_endpoint":"https://dev-1703011.okta.com/oauth2/v1/clients",
   "jwks_uri":"https://dev-1703011.okta.com/oauth2/aus1fe8x0enTNEfcl5d7/v1/keys",
   "introspection_endpoint":"https://dev-1703011.okta.com/oauth2/aus1fe8x0enTNEfcl5d7/v1/introspect",
   "scopes_supported":[
      "read",
      "openid",
      "profile",
      "email",
      "address",
      "phone",
      "offline_access"
   ]
}}
Note: This content is not complete, you will have other fields as well.
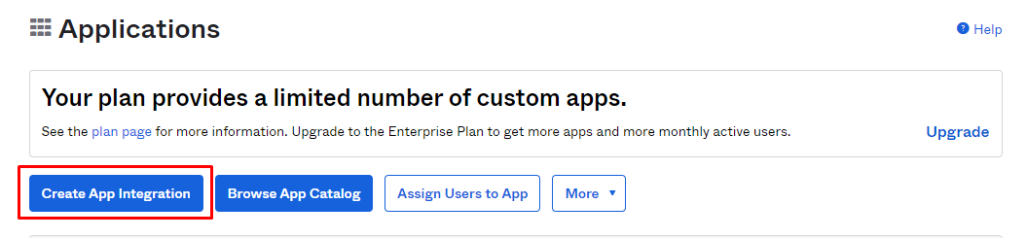
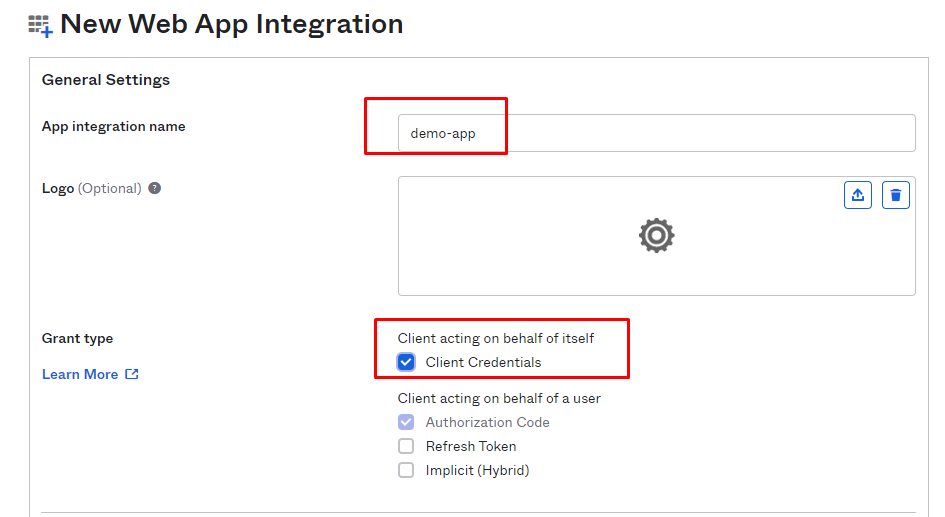
Create a new app in OKTA: Applications -- > create app Integration --> demo-app.
This app will act as introspect app and will be used to introspect the access token.
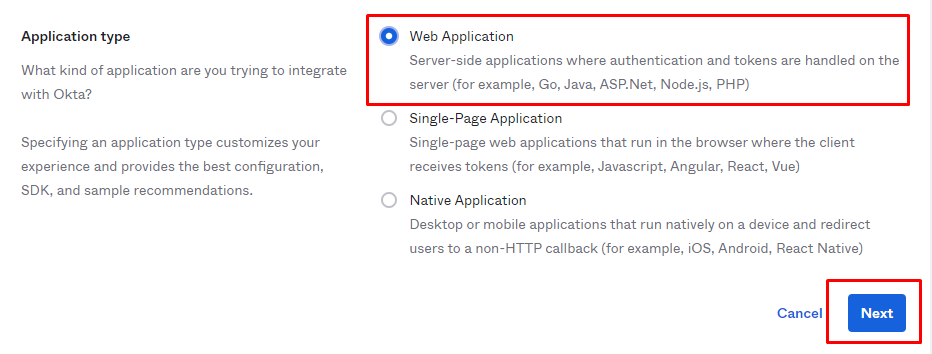
Select sign-on method as “OIDC - OpenID connect” and application type as “web application”


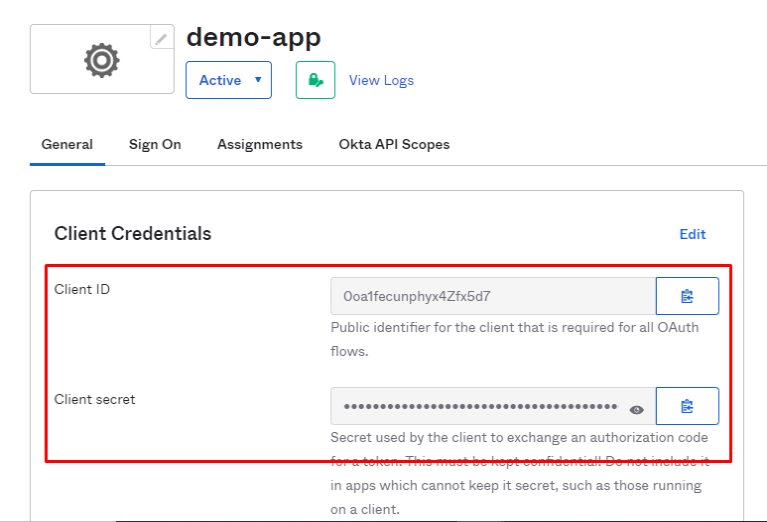
“ClientID/Client secret” that we get below will be used while configuring the provider in Anypoint Platform
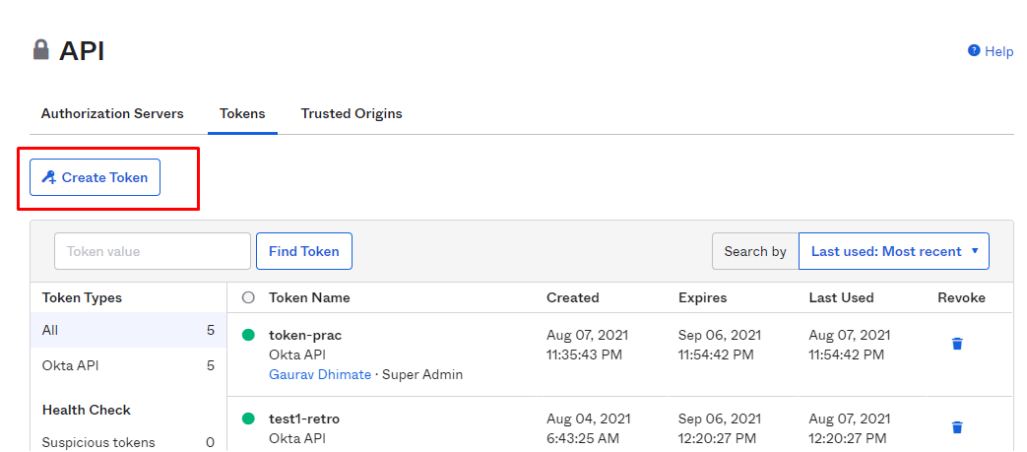
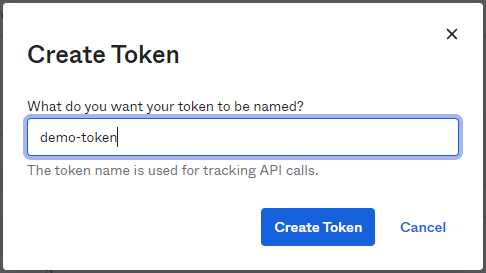
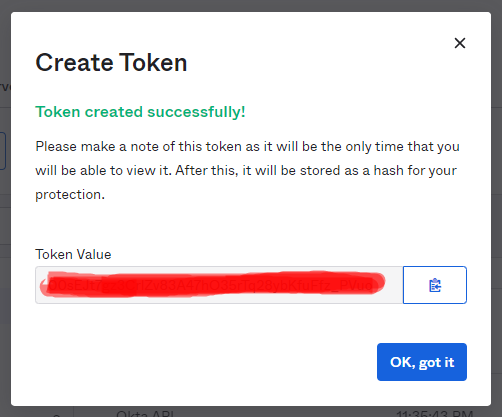
Create introspective token: This token that we are going to generate will be used by Anypoint platform to connect OKTA
API --> token --> demo-token
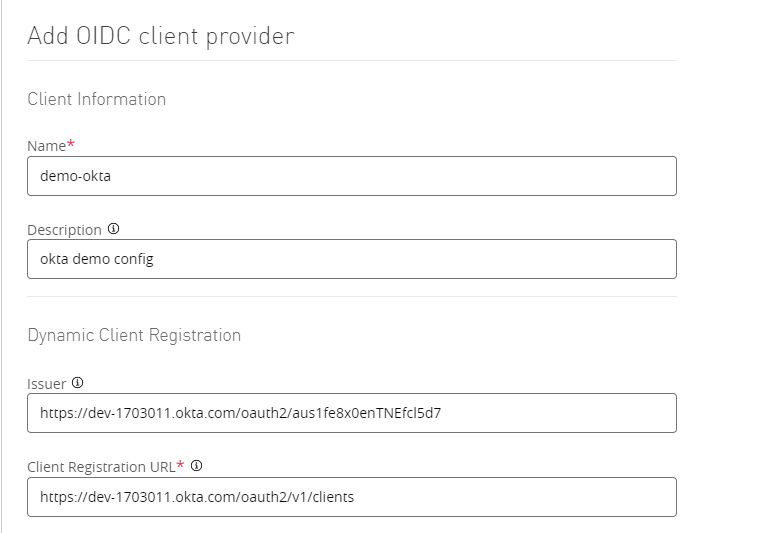
Config client provider in access management: Use config obtain from auth server URL.
Anypoint platform --> Access management --> Client provider
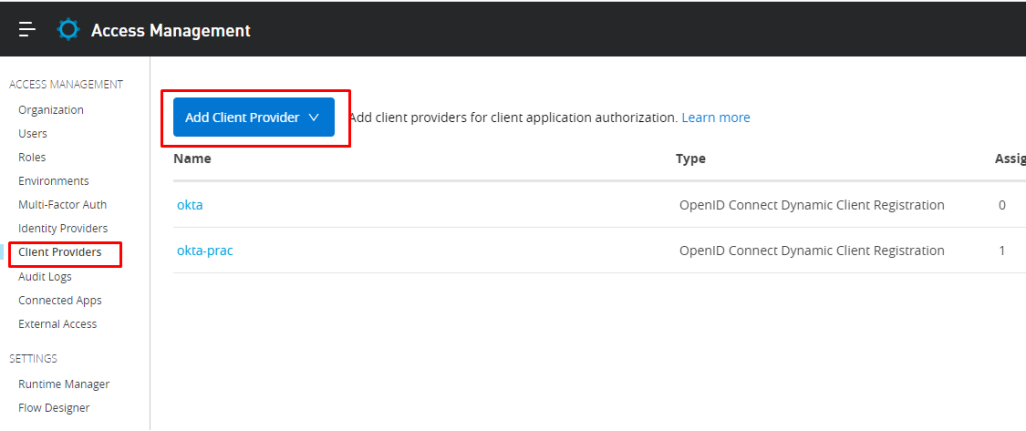
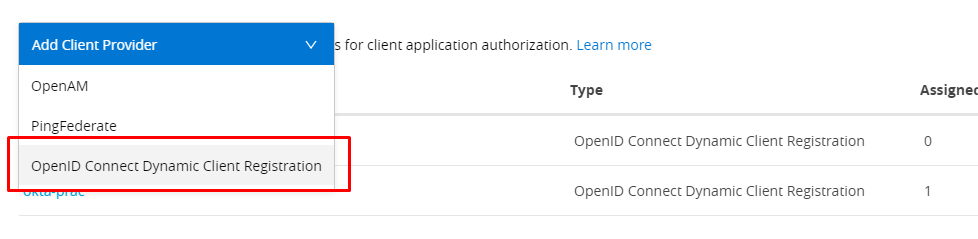
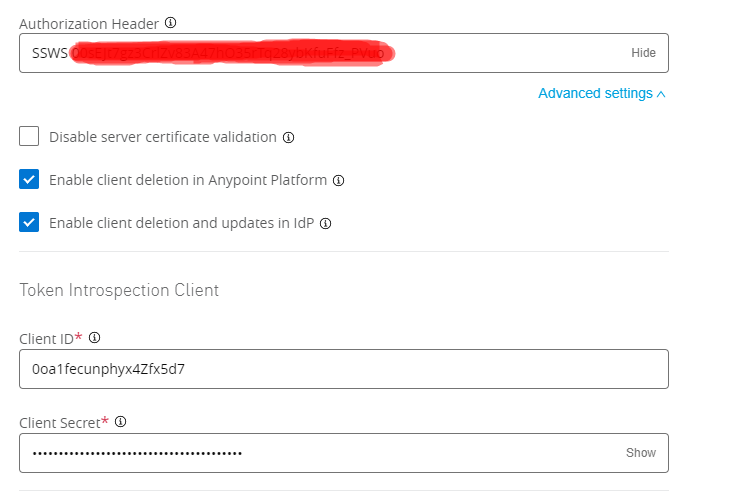
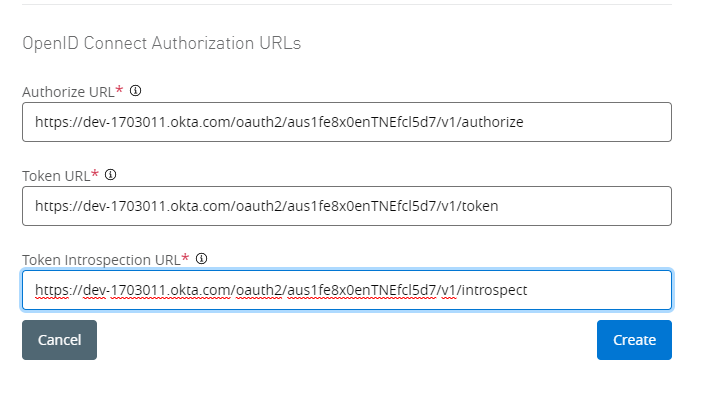
Fill in the details on the form.
Authorization token will be "SSWS <introspective token that we got in the previous step>"
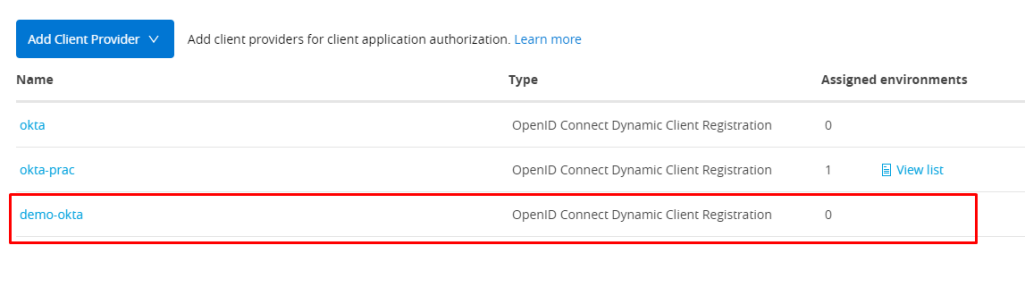
Note: If you see the assigned environment is 0 for our new client provider, that means we haven't associated any environment yet to this provider.
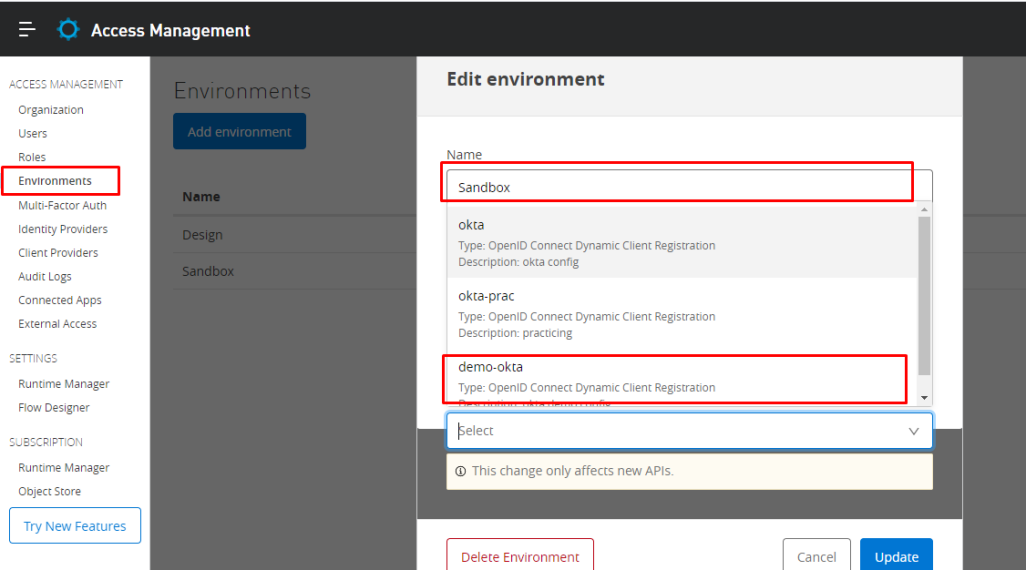
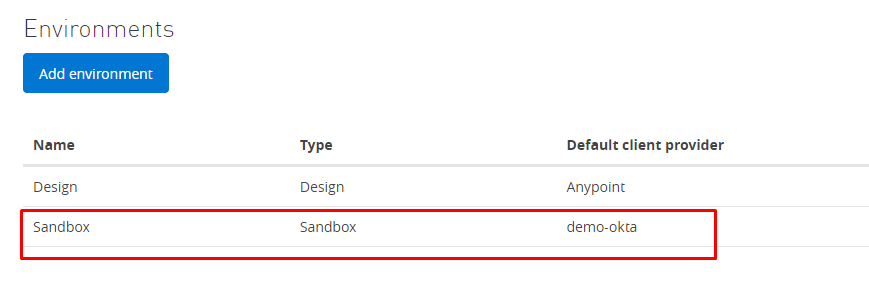
Assign provider to the environment where you intend to use it.
Access management --> Environment --> Sandbox --> client-provider
Update RAML to have a security header: We need to update RAML to use the OpenId policy in our API.
securitySchemes:
  oauth_2_0:
        description: |
            Mule OAuth 2.0.
        type: OAuth 2.0
        describedBy:
            headers:
                Authorization:
                    description: |
                      Used to send a valid OAuth 2 access token. Do not use
                      with the "access_token" query string parameter.
                    type: string
            queryParameters:
                access_token:
                    description: |
                      Used to send a valid OAuth 2 access token. Do not use together with
                      the "Authorization" header
                    type: string
            responses:
                401:
                    description: |
                        Bad or expired token.
                403:
                    description: |
                        Bad OAuth request.
        settings:
          authorizationUri: https://dev-1703011.okta.com/oauth2/default/v1/authorize
          accessTokenUri: https://dev-1703011.okta.com/oauth2/default/v1/token
          authorizationGrants: [authorization_code, password, client_credentials, implicit]
Add this security schema as:
/flights:
  get:
    securedBy: [oauth_2_0]
Import RAML project into API manager, select provider while creating an instance: Select client-provider while importing.
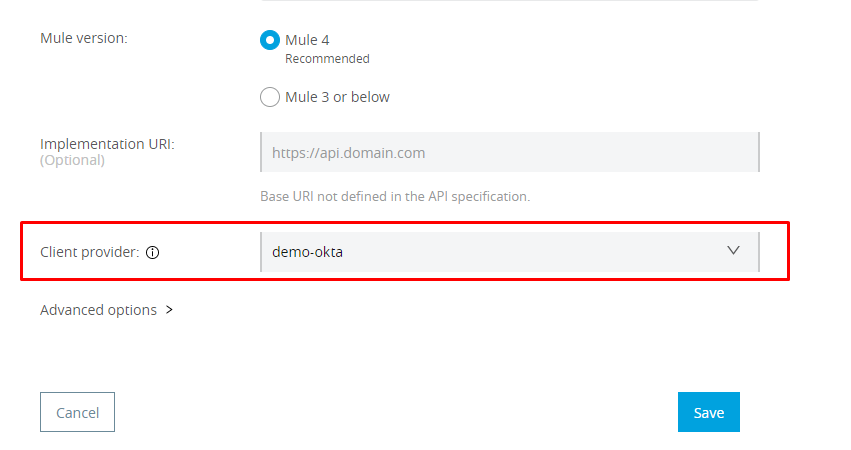

Deploy application the auto-discovery id (17138632): The next step is to deploy an API in Runtime manager with the Auto discovery id that we got from above step.
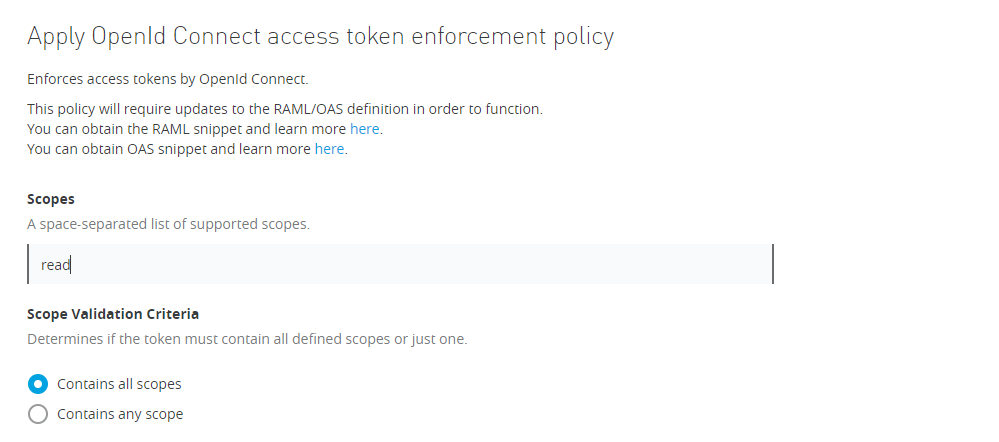
Apply OpenId policy: Api manager -- > api --> policy
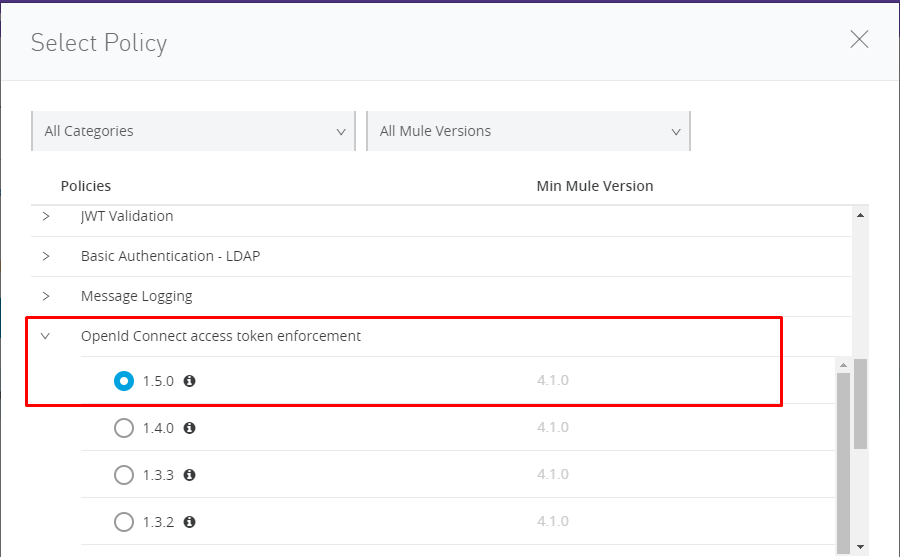
Note: If OpenId is not configured then this policy won't show up.
Add accepted scopes:
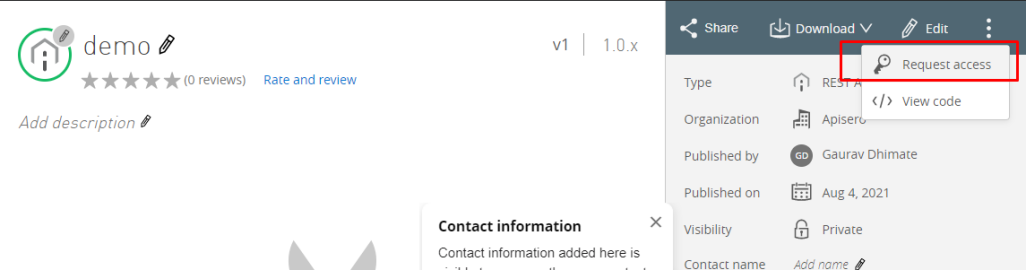
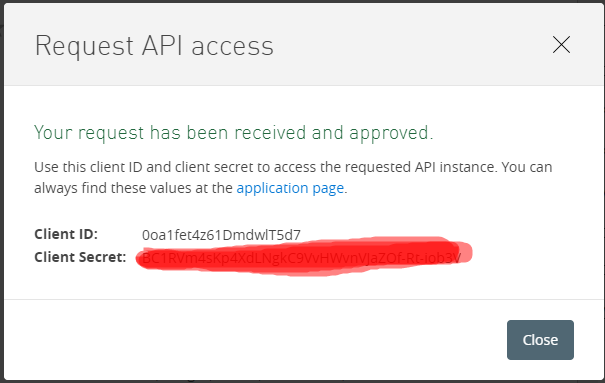
Request access from Exchange with option Authorization code grant type.
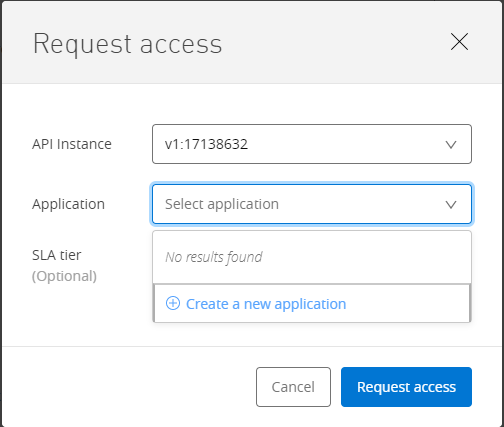
Create a new application which will also be created in OKTA under the application.
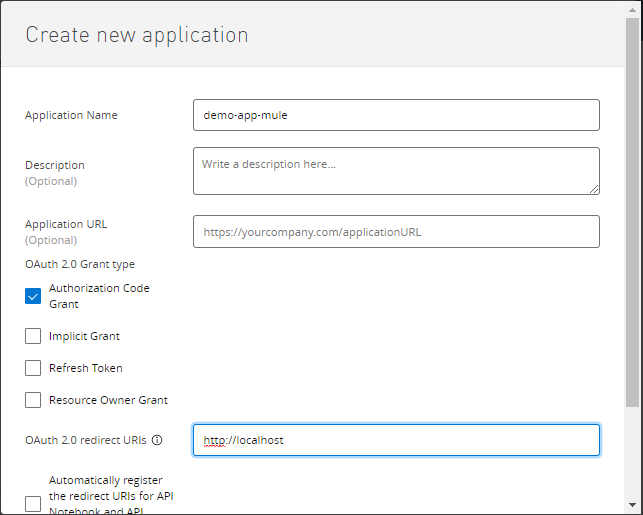
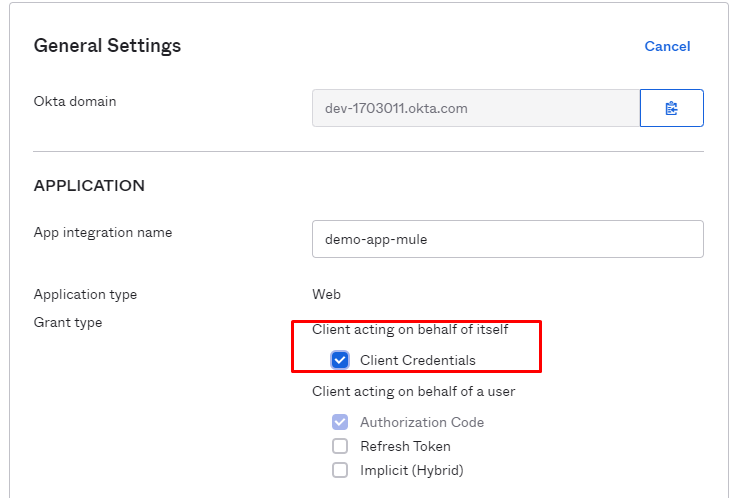
Enable client credentials to grant type in OKTA for above demo-app-mule
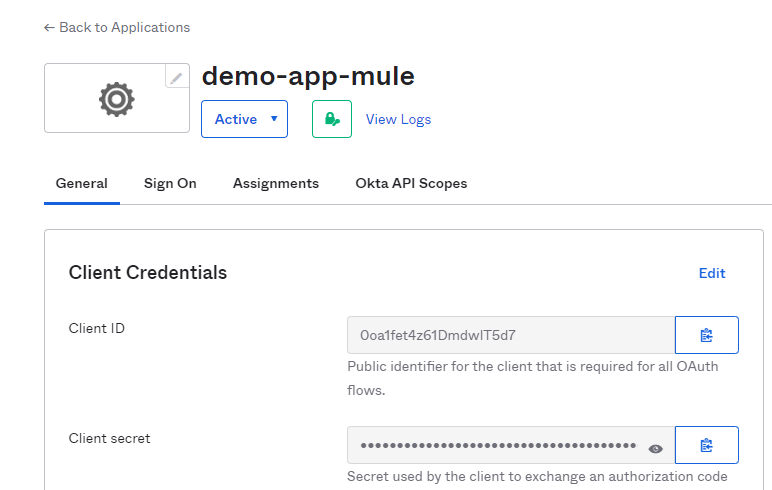
Since mulesoft doesn't allow you to create a client app with "client credentials" we need to enable it from OKTA.
- Get access token from OKTA
Add header -- > content-type:application/x-www-form-urlencoded
Add basic auth --> clientid/clientsecret - retro token creds
Add query params --> grant_type:client_credentialsscope:read
Sample curl command for getting OKTA token will be below:
curl --location --request POST 'https://<token_url>?grant_type=client_credentials&scope=read' \
--header 'content-type: application/x-www-form-urlencoded' \
--header 'Authorization: Basic MG9hMWZldDR6NjFEbWR3bFQ1ZDc6QkMxUlZtNHNLcDRYZExOZ2tDOVZ2SFd2blZKYVpPZi1SdC1pb2IzVg==' \
--header 'Cookie: JSESSIONID=CAC5CF30DE7C6DCB186FEC7461A18788'
Note: Just replace <token_url> with your token endpoint from metadata URL JSON. In response, you will get the below response:
{
    "token_type": "Bearer",
    "expires_in": 3600,
    "access_token": "eyJraWQiOiJyNU8tcmg1RVR4aHNLR3JlNGZRWWMyT1lmU2lSZGZlSDZuZHFmU2VMajBZIiwiYWxnIjoiUlMyNTYifQ.eyJ2ZXIiOjEsImp0aSI6IkFULlVUSG05TUgwSlRJNTNVcDl5RGdaWl9iN0VwVHlPbVhrUmFMTzA1UHNrWEEiLCJpc3MiOiJodHRwczovL2Rldi0xNzAzMDExLm9rdGEuY29tL29hdXRoMi9hdXMxZmU4eDBlblRORWZjbDVkNyIsImF1ZCI6ImFwaTovL2RlZmF1bHQiLCJpYXQiOjE2Mjg0NDUwMDQsImV4cCI6MTYyODQ0ODYwNCwiY2lkIjoiMG9hMWZldDR6NjFEbWR3bFQ1ZDciLCJzY3AiOlsicmVhZCJdLCJzdWIiOiIwb2ExZmV0NHo2MURtZHdsVDVkNyJ9.AG5tXTFnbn5p-uh40pkIDYHUo7QFO2z-IZ92MVJFWMFHER_oF-Tc2-YgoZBUCA9AUUgoRGimq937qc9JJ8Z0SzxG9jqEAMhk1iFdX3KrgM0wbkhScFJDZjGdZuSCIjRVuVF8ZuRxcZh7HKuEubrenat6ybchw7HzGHkktuBzdmg4iQXg66kskGz6Qk1LX_xAXvMUmTipESpWaCl8uqUXDkbN0hWSLsjlD67V0CvZko5wuIYIXLNuPg7RlEdPydKtEuZZsF0NRXxvs3xGb2NmIuGNTjhogwJmEhh7AEW-NF7Tri5qdHiyP70AYgaKxtmAW5ojyafOcF6DurWE0cyQ0Q",
    "scope": "read"
}
Call API with the access token: Use access_token from the above step to access the API, if everything is good then you will get proper response from API.

Conclusion
We have successfully configured OKTA as a client-provider for our Anypoint platform.
Opinions expressed by DZone contributors are their own.
Comments