Setting Up Your Java Pipeline With Azure DevOps and Docker
This tutorial demonstates how to set up an Azure pipeline for automated building and deployment of a Java application, using Git for version control.
Join the DZone community and get the full member experience.
Join For FreeUnderstanding how to organize a pipeline from development to operation has, in my experience, proven to be quite the endeavor. This tutorial aims to tackle precisely this challenge by guiding you through the required tools necessary to deploy your code as Docker containers by going through the steps involved in creating a simple "Hello, World!" application (although preexisting projects are also easily applicable for this approach).
Whether you're a seasoned developer seeking to optimize your workflow or a newcomer eager to learn best practices, this tutorial will equip you with the knowledge and tools to streamline your development process effectively. Moreover, becoming proficient in this pipeline setup will greatly enhance your workflow, allowing you to deliver high-quality software faster, with fewer errors, and ultimately, better meet the demands of today's agile development environments.
If you have come far enough to consider a pipeline for your project, I expect you to be familiar with some of the simpler tools involved in this process (e.g. Git, Java, Maven), and will not cover these in-depth.
You may also enjoy: Building CI/CD Pipelines for Java Using Azure DevOps (Formerly VSTS)
To go about making a pipeline for our "Hello, World!" application, the following subjects will briefly be covered:
To make things clear: Our goal is to be able to run docker run <dockerid>/<image>:<tag> while before, only having run git push on master. This is an attempt to create a foundation for future CI/CD implementations ultimately leading to a DevOps environment.
Azure DevOps
One of the prerequisites for this walk-through is to use the Azure DevOps platform. I can highly encourage the full package, but the modules Repos and Pipelines are the only ones required. So, if you have not already, you should sign yourself up and create a project. After doing so, we can proceed to the Repos module.
Azure Repos
This module provides some simple tools for maintaining a repository for your code. While a repository could easily be managed by something like GitHub, this module supports solid synergy between repositories and pipelines.
After you click on the module, you will be met with the usual Git preface for setting up a repository. I highly recommend using the SSH methods for long-term usage (if this is unknown to you, see Connect to your Git repos with SSH). Now, after setting it up, you will be able to clone the repository onto your computer.
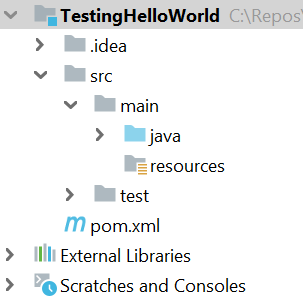
Continuing, we will create a Maven project within the repository folder using IntelliJ IDEA (other IDEs can be used, but I will only cover IntelliJ) that ultimately prints the famous sentence, "Hello, World!" (for setting up a project with Maven, see Creating a new Maven project - IntelliJ). This should leave you with a project tree like so:
Finish off by creating a main class in src/main/java:
public class Main {
public static void main(String[] args) {
System.out.println("Hello World!");
}
}
But before pushing these changes to master, a few things need to be addressed.
Maven
Maven provides developers with a powerful software management tool configurable from one location, the pom.xml file. Looking at the generated pom file in our project, we will see the following:
xxxxxxxxxx
<project xmlns="http://maven.apache.org/POM/4.0.0"
xmlns:xsi="http://www.w3.org/2001/XMLSchema-instance"
xsi:schemaLocation="http://maven.apache.org/POM/4.0.0 http://maven.apache.org/xsd/maven-4.0.0.xsd">
<modelVersion>4.0.0</modelVersion>
<groupId>surgo.testing</groupId>
<artifactId>testing-helloworld</artifactId>
<version>1.0</version>
</project>
In our case, the only really interesting part of the pom file is the version tag. The reason is that upon pushing our source code to master, Maven will require a new version each time — enforcing good practice.
As an extension, we need to make Maven create an executable .jar file with a manifest of where the main class is to be located. Luckily, we can just use their own Maven plugin:
xxxxxxxxxx
<project xmlns="http://maven.apache.org/POM/4.0.0"
xmlns:xsi="http://www.w3.org/2001/XMLSchema-instance"
xsi:schemaLocation="http://maven.apache.org/POM/4.0.0 http://maven.apache.org/xsd/maven-4.0.0.xsd">
<modelVersion>4.0.0</modelVersion>
<groupId>surgo.testing</groupId>
<artifactId>testing-helloworld</artifactId>
<version>1.0</version>
<properties>
<main.class>Main</main.class>
</properties>
<build>
<plugins>
<plugin>
<groupId>org.apache.maven.plugins</groupId>
<artifactId>maven-jar-plugin</artifactId>
<version>3.1.2</version>
<configuration>
<archive>
<manifest>
<addClasspath>true</addClasspath>
<classpathPrefix>lib/</classpathPrefix>
<mainClass>${main.class}</mainClass>
</manifest>
</archive>
</configuration>
</plugin>
</plugins>
</build>
</project>
The only thing you might want to change is the name of the main class (line 12). Remember the package name, if not directly located in src/main/java (I prefer using properties, but you can insert the name directly in line 26 if you like).
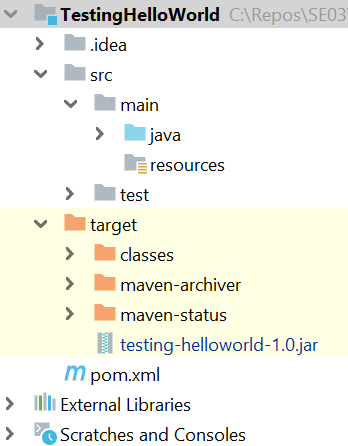
Lastly, before committing our additions to master, we will need to build the target folder which includes our .jar file. This can be done either directly through IntelliJ or in the terminal (if you have Maven installed). Simply press the lifecycle "package" in the UI, or run mvn package in the terminal. Upon finalization, a .jar file will have appeared in the target folder:
This concludes the initial setup necessary for our pipeline and we can now finally push our changes to master.
Git
Most of you are probably quite familiar with Git, but I will go ahead and cover what needs to be done anyway.
The Git tool provides us with a distributed version control system easily accessible from anywhere. Now provided we correctly configured our repository in Azure Repos, cloned it to our local computer, and initialized the IntelliJ project within that folder, it should be straightforward.
As all of our added files have yet to be staged, run git add. This will stage every changed or added file. Then run git commit -m "initial commit" to commit the staged files. Lastly, run git push to push the committed files to master.
You might now be wondering, "Has all the magic happened?" And the answer would be no. In fact, not much has happened. We have created a repository and filled it with a Maven project that prints "Hello, World!" when invoked, which in all honesty, is not much of an achievement. But, more importantly, we have established a foundation for our pipeline.
Azure Pipelines
Pipelines, the star of the show, provides us with build and deployment automation. It enables us to customize what should happen whenever a build is triggered (in our case by pushing to master).
Let me take you through the process of setting up a simple pipeline.
Step 1: First, go to the Azure DevOps Pipeline module. This will present you with a single button "Create Pipeline," press it.
Step 2: We will now be prompted for the location of our code, and since we used Azure Repos, press "Azure Repos Git."
Step 3: It will now look through your repositories. Press the one you pushed the Maven project onto.
Step 4: Since it is a Maven project, select "Maven."
You should now be presented with the following azure.pipelines.yml file:
xxxxxxxxxx
# Maven
# Build your Java project and run tests with Apache Maven.
# Add steps that analyze code, save build artifacts, deploy, and more:
# https://docs.microsoft.com/azure/devops/pipelines/languages/java
trigger:
- master
pool:
vmImage: 'ubuntu-latest'
steps:
- task: Maven@3
inputs:
mavenPomFile: 'pom.xml'
mavenOptions: '-Xmx3072m'
javaHomeOption: 'JDKVersion'
jdkVersionOption: '1.8'
jdkArchitectureOption: 'x64'
publishJUnitResults: true
testResultsFiles: '**/surefire-reports/TEST-*.xml'
goals: 'package'
Do not think too much about the semantics of the file. The important thing to know now is that the trigger is set to master and the steps include a task for Maven. For more information about the Maven inputs, see Maven task.
Step 5: If everything looks in order, press "save and run" in the top-right corner to add the azure.pipelines.yml file to the repository. The pipeline will then be activated and run its first job.
Docker
Docker, the final piece of the puzzle, provides us with an OS-level of virtualization in the shape of containers with lots of versatility and opportunity. We need this tool to deploy our builds on machines and luckily, it is greatly integrated into the Azure DevOps platform. To fully utilize its many capabilities, you will need to register on the DockerHub.
- Step 1: After registration, create a repository with the name of your application. Then choose whether or not to make it public (you can only have one private repository with the free plan).
- Step 2: Next, we need to authorize DockerHub into our Azure DevOps project. To do this go back to Azure DevOps and click on 'Project Settings' in the bottom-left corner.
- Step 3: Choose "Pipelines/Service Connections*".
- Step 4: Now click on the top-right button "New service connection" and search for Docker registry. Mark it, and hit next.
- Step 5: Choose "Docker Hub" as the registry type.
- Step 6: Fill in the remaining fields (the service connection name is up to you). You should now be able to see your entry below "Service Connections."
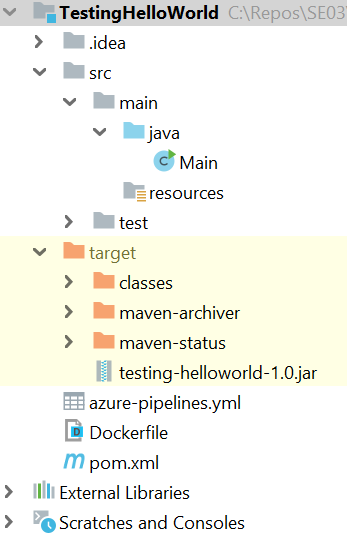
- The connection will make itself relevant later, but for now, we need to go back to the project and add a few things. Since we added the azure.pipelines.yml file to the repository, a
git pullneeds to be called to pull the newest changes. Furthermore, we need to define our Docker image using a Dockerfile. - Step 7: Create a new file in the root of the project and name it "Dockerfile." Your project tree should now look something like this:
The Dockerfile should be considered a template for containers much like classes are for objects. What needs to be defined in this template is as follows:
- We need to set a basis for the virtual environment (
FROM openjdk:8). - We need to copy our .jar file onto the virtual environment (
COPY /target/testing-helloworld-?.?*.jar .). - We need to run the .jar file upon initialization (
CMD java -jar testing-helloworld-?-?*.jar).
You should now have a file looking similar to this:
FROM openjdk:8
COPY /target/testing-helloworld-?.?*.jar .
CMD java -jar testing-helloworld-?.?*.jar
The regex simply accounts for different versions being deployed, but the actual name has to match the .jar file from the target folder.
Update the azure.pipelines.yml File
To sum up our current progress, we have now made a Maven project, linked it to a pipeline, and created a template for the virtual environment. The only thing missing is to connect everything via the azure.pipelines.yml file.
Step 1: Add Variables
We will need to add some variables for the DockerHub connection, as well as the ever-changing version number to the azure.pipelines.yml file (insert your Service Connection and Docker repository):
xxxxxxxxxx
...
variables:
containerRegistryServiceConnection: saban17-testing
imageRepository: saban17/testing-helloworld
tag: 1.0.0
...
These variables are not strictly necessary, but it never hurts to follow the DRY principle.
Step 2: Add Tasks to Pipeline Steps
Next, we need to add more tasks to our pipeline steps. What needs to happen is to log in to Docker, build the Dockerfile previously defined, and push the image to our DockerHub repository.
One at a time, we add the wanted behavior starting with the Docker login:
xxxxxxxxxx
- task: Docker@2
displayName: dockerLogin
inputs:
command: login
containerRegistry: $(containerRegistryServiceConnection)
Then the Docker build:
xxxxxxxxxx
- task: Docker@2
displayName: dockerBuild
inputs:
repository: $(imageRepository)
command: build
Dockerfile: Dockerfile
tags: |
$(tag)
And lastly, the Docker push:
xxxxxxxxxx
- task: Docker@2
displayName: dockerPush
inputs:
command: push
containerRegistry: $(containerRegistryServiceConnection)
repository: $(imageRepository)
tags: |
$(tag)
You should now have an azure.pipelines.yml file looking similar to this (with the addition of mavenAuthenticateFeed:true in Maven@3 inputs):
xxxxxxxxxx
trigger:
- master
pool:
vmImage: 'ubuntu-latest'
variables:
containerRegistryServiceConnection: saban17-testing
imageRepository: saban17/testing-helloworld
tag: 1.0.0
steps:
- task: Maven@3
inputs:
mavenPomFile: 'pom.xml'
mavenOptions: '-Xmx3072m'
javaHomeOption: 'JDKVersion'
jdkVersionOption: '1.8'
jdkArchitectureOption: 'x64'
publishJUnitResults: true
mavenAuthenticateFeed: true
testResultsFiles: '**/surefire-reports/TEST-*.xml'
goals: 'package'
- task: Docker@2
displayName: dockerLogin
inputs:
command: login
containerRegistry: $(containerRegistryServiceConnection)
- task: Docker@2
displayName: dockerBuild
inputs:
repository: $(imageRepository)
command: build
Dockerfile: Dockerfile
tags: |
$(tag)
- task: Docker@2
displayName: dockerPush
inputs:
command: push
containerRegistry: $(containerRegistryServiceConnection)
repository: $(imageRepository)
tags: |
$(tag)
Understandingly, this might be a little overwhelming; but fear not, it looks more complicated than it really is. For more information about these inputs see Docker task.
Push to the Pipeline
Finally, now we get to see the magic happen. However, before doing so, I need to tell you the routine procedure that is to push to the pipeline:
Step 1: Go into the pom.xml and the azure.pipelines.yml files, and increment the version number.
Step 2: Run the Maven lifecycle clean to remove earlier .jar files in the target folder.
Step 3: Run the Maven lifecycle package to build and package your code (creating the new .jar file).
Step 3: Provided you are on the master branch, run the Git commands:
-
git add . -
git commit -m "commit message" -
git push
Step 4: Check whether or not the job passes in the pipeline.
If everything went as it should, you have now uploaded an image with your .jar file to the associated Docker Hub repository.
Step 5: Running this image now only requires the host to have Docker installed. Let us try it!
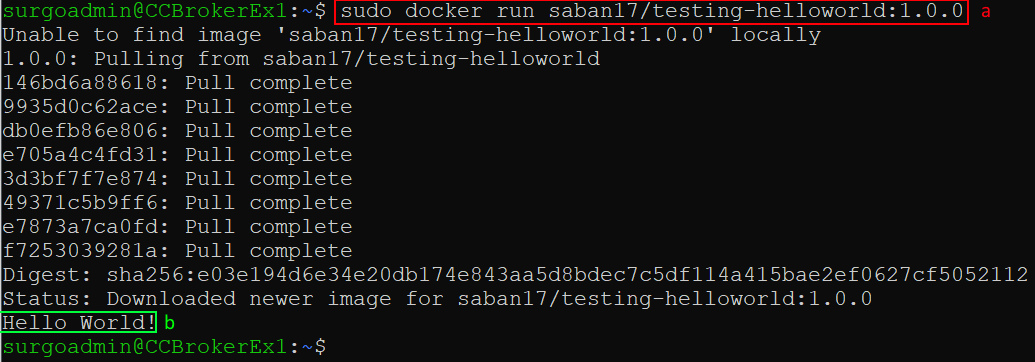
Running Docker Hub repository
The input (a) initiates a container from the requested repository. The image was then retrieved, instantiated, and processed with the final result (b) displaying "Hello World!"
This concludes the guide for setting up your Java Pipeline with Azure DevOps and Docker.
Conclusion
By now, it should hopefully be clear why this approach has its benefits. It enables the developer to form a run-time environment (Dockerfile) and upload it to operation with simple to no effort (git push). While it has not been covered, this approach also creates artifacts in Azure DevOps, which is very useful when using something like Maven, as it makes dependencies surprisingly easy to manage.
Since this approach only recently made it into our team, it is still under development and a lot of additions are still to be made. I highly encourage you to further expand upon your pipeline by making it fit your exact needs.
I hope this guide has proven to be useful as well as practical, and should you have any further questions, feel free to comment.
Opinions expressed by DZone contributors are their own.
Comments